Skip to Content

blog post

Electric Scooter Battery Upgrade – Pt. 3 – Building the Pack

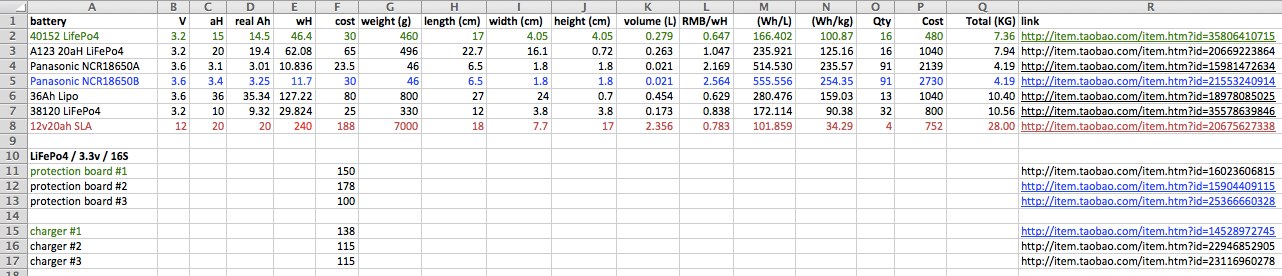
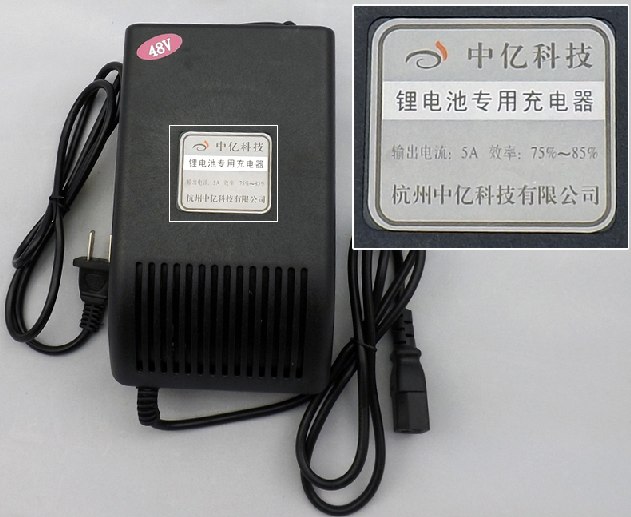
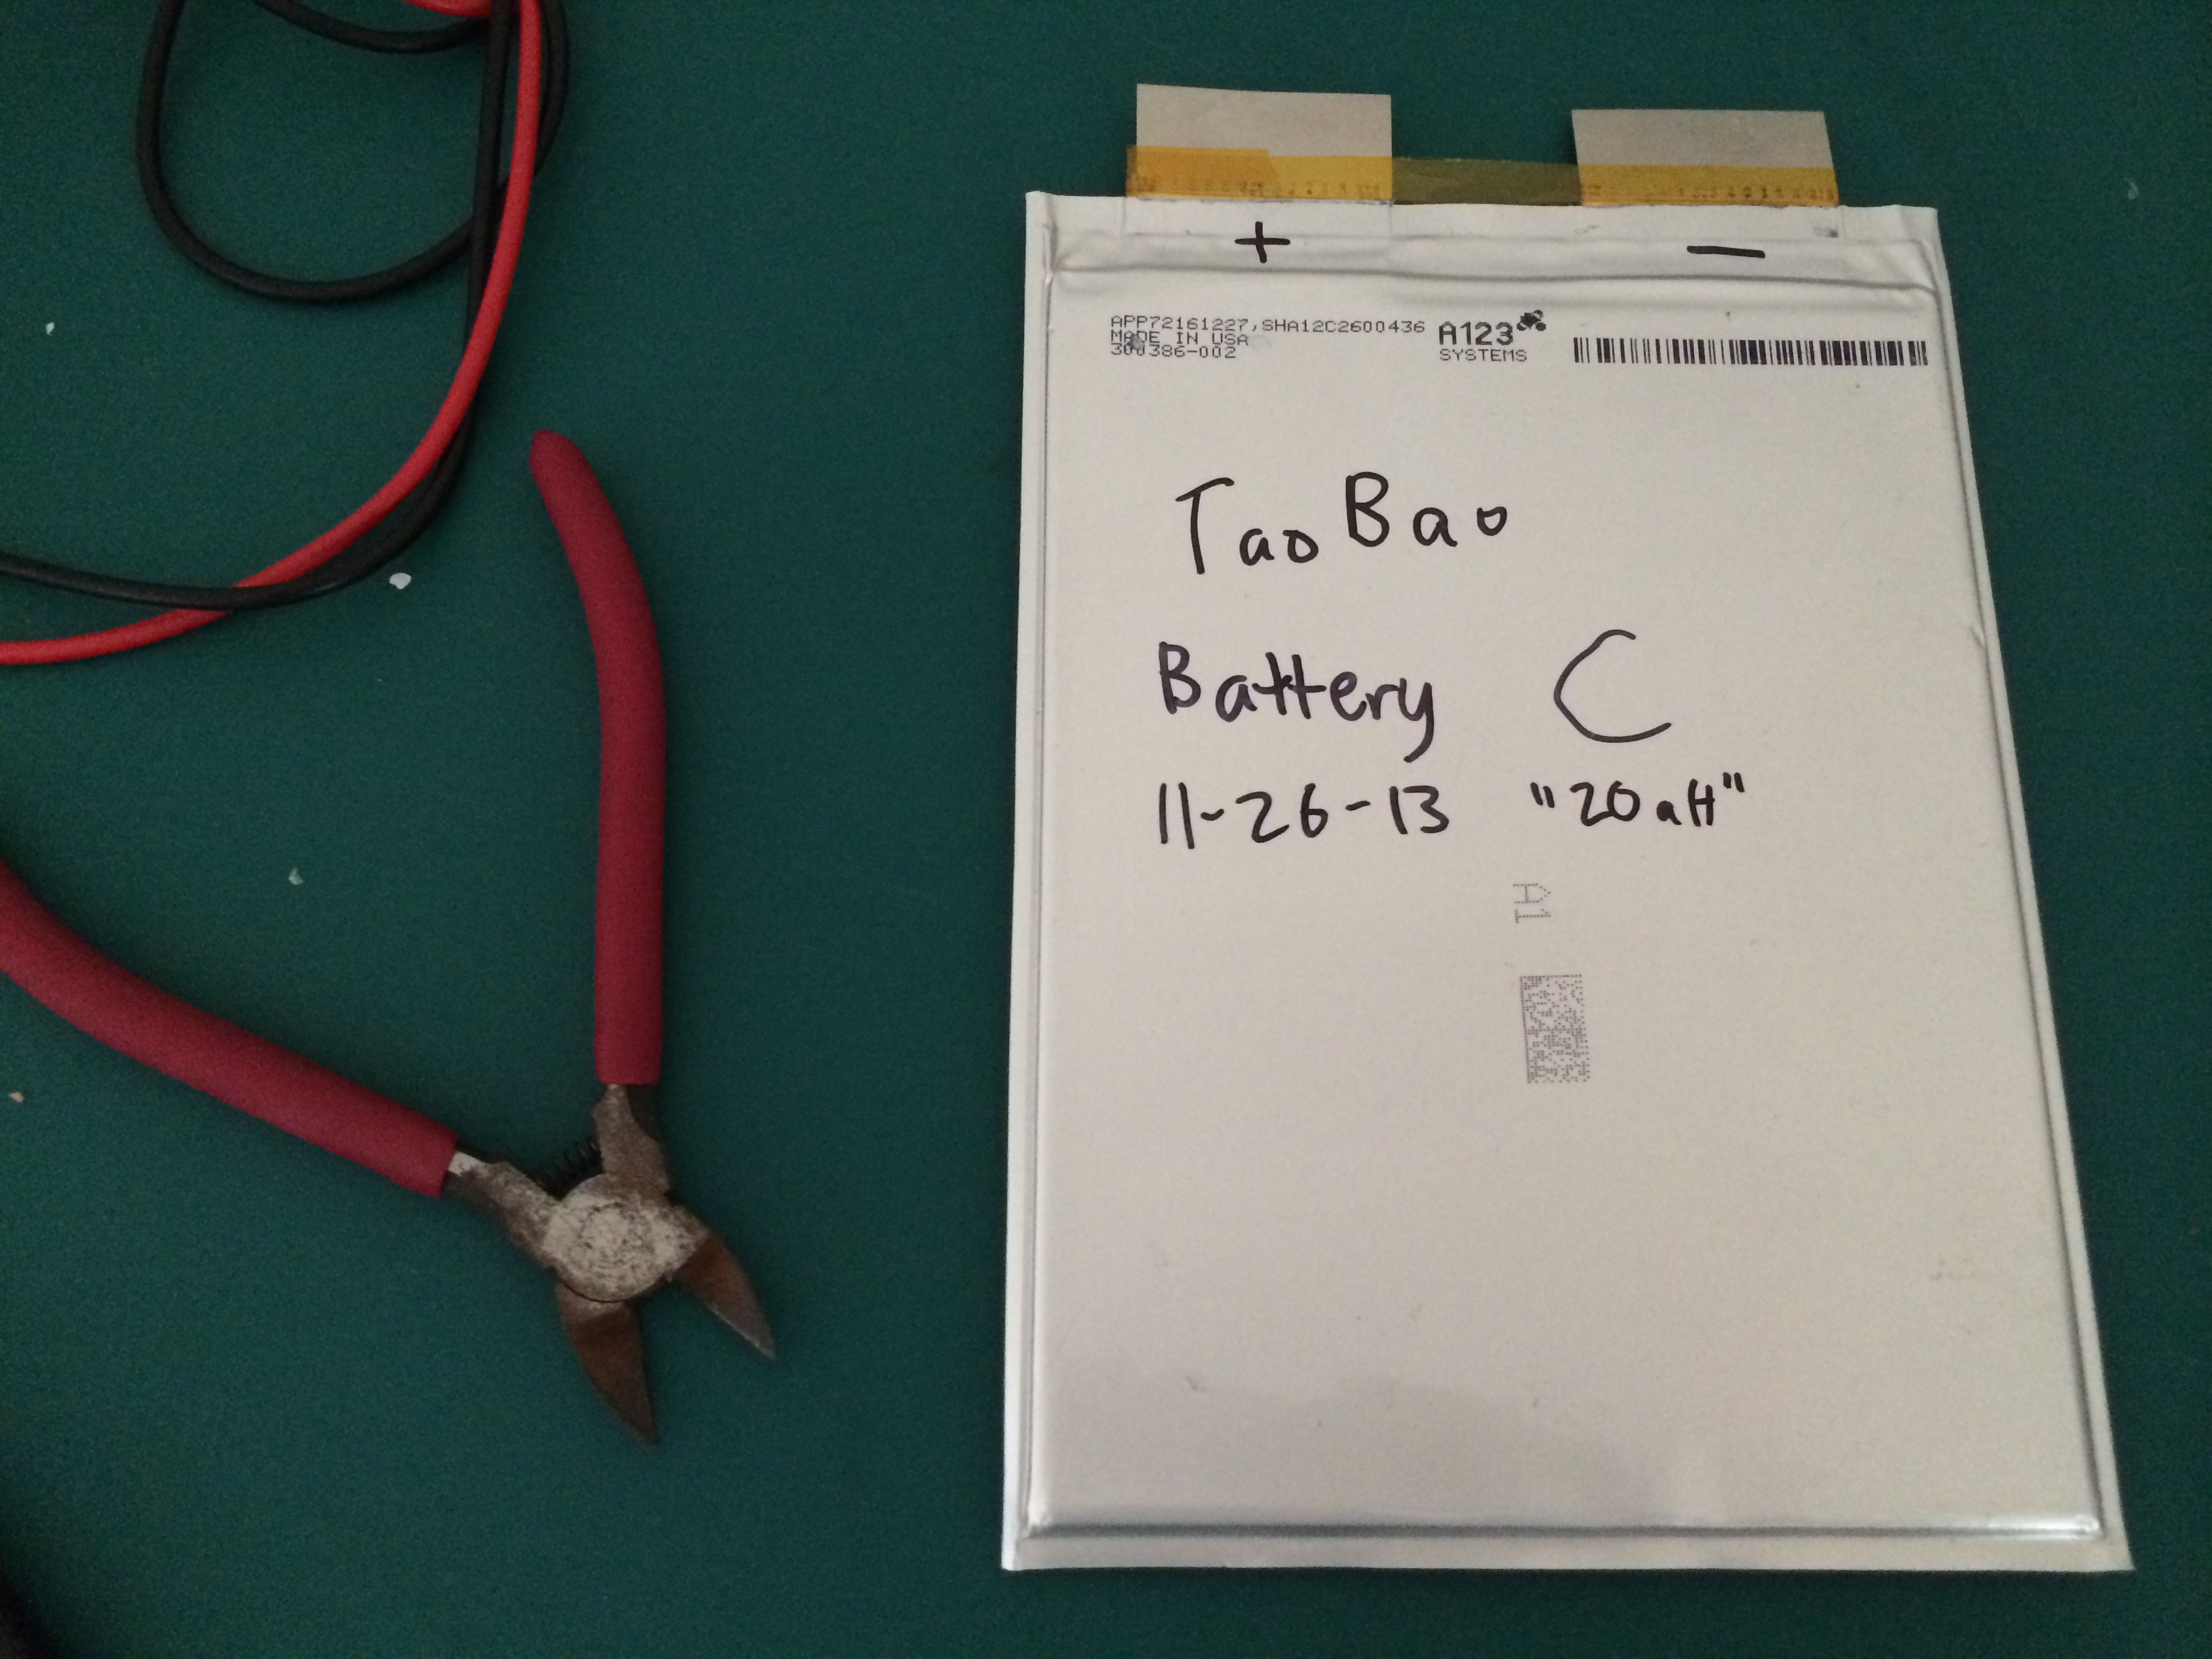
In the last post, I decided on the 15Ah LiFePo4 cylinders in the 40152 size. Since my bike is a 48v system, I needed an equivalent voltage for this. Looking around on Taobao and the net, it seems like 16 LiFePo4 batteries in series is the standard for 48v. I already had one of these batteries from testing, but I ordered 16 new ones anyway in case I got a dud. At first I was a bit disappointed because the batteries I got were not brand new – there was rust / cruft on some of the terminals.

IMG_0195

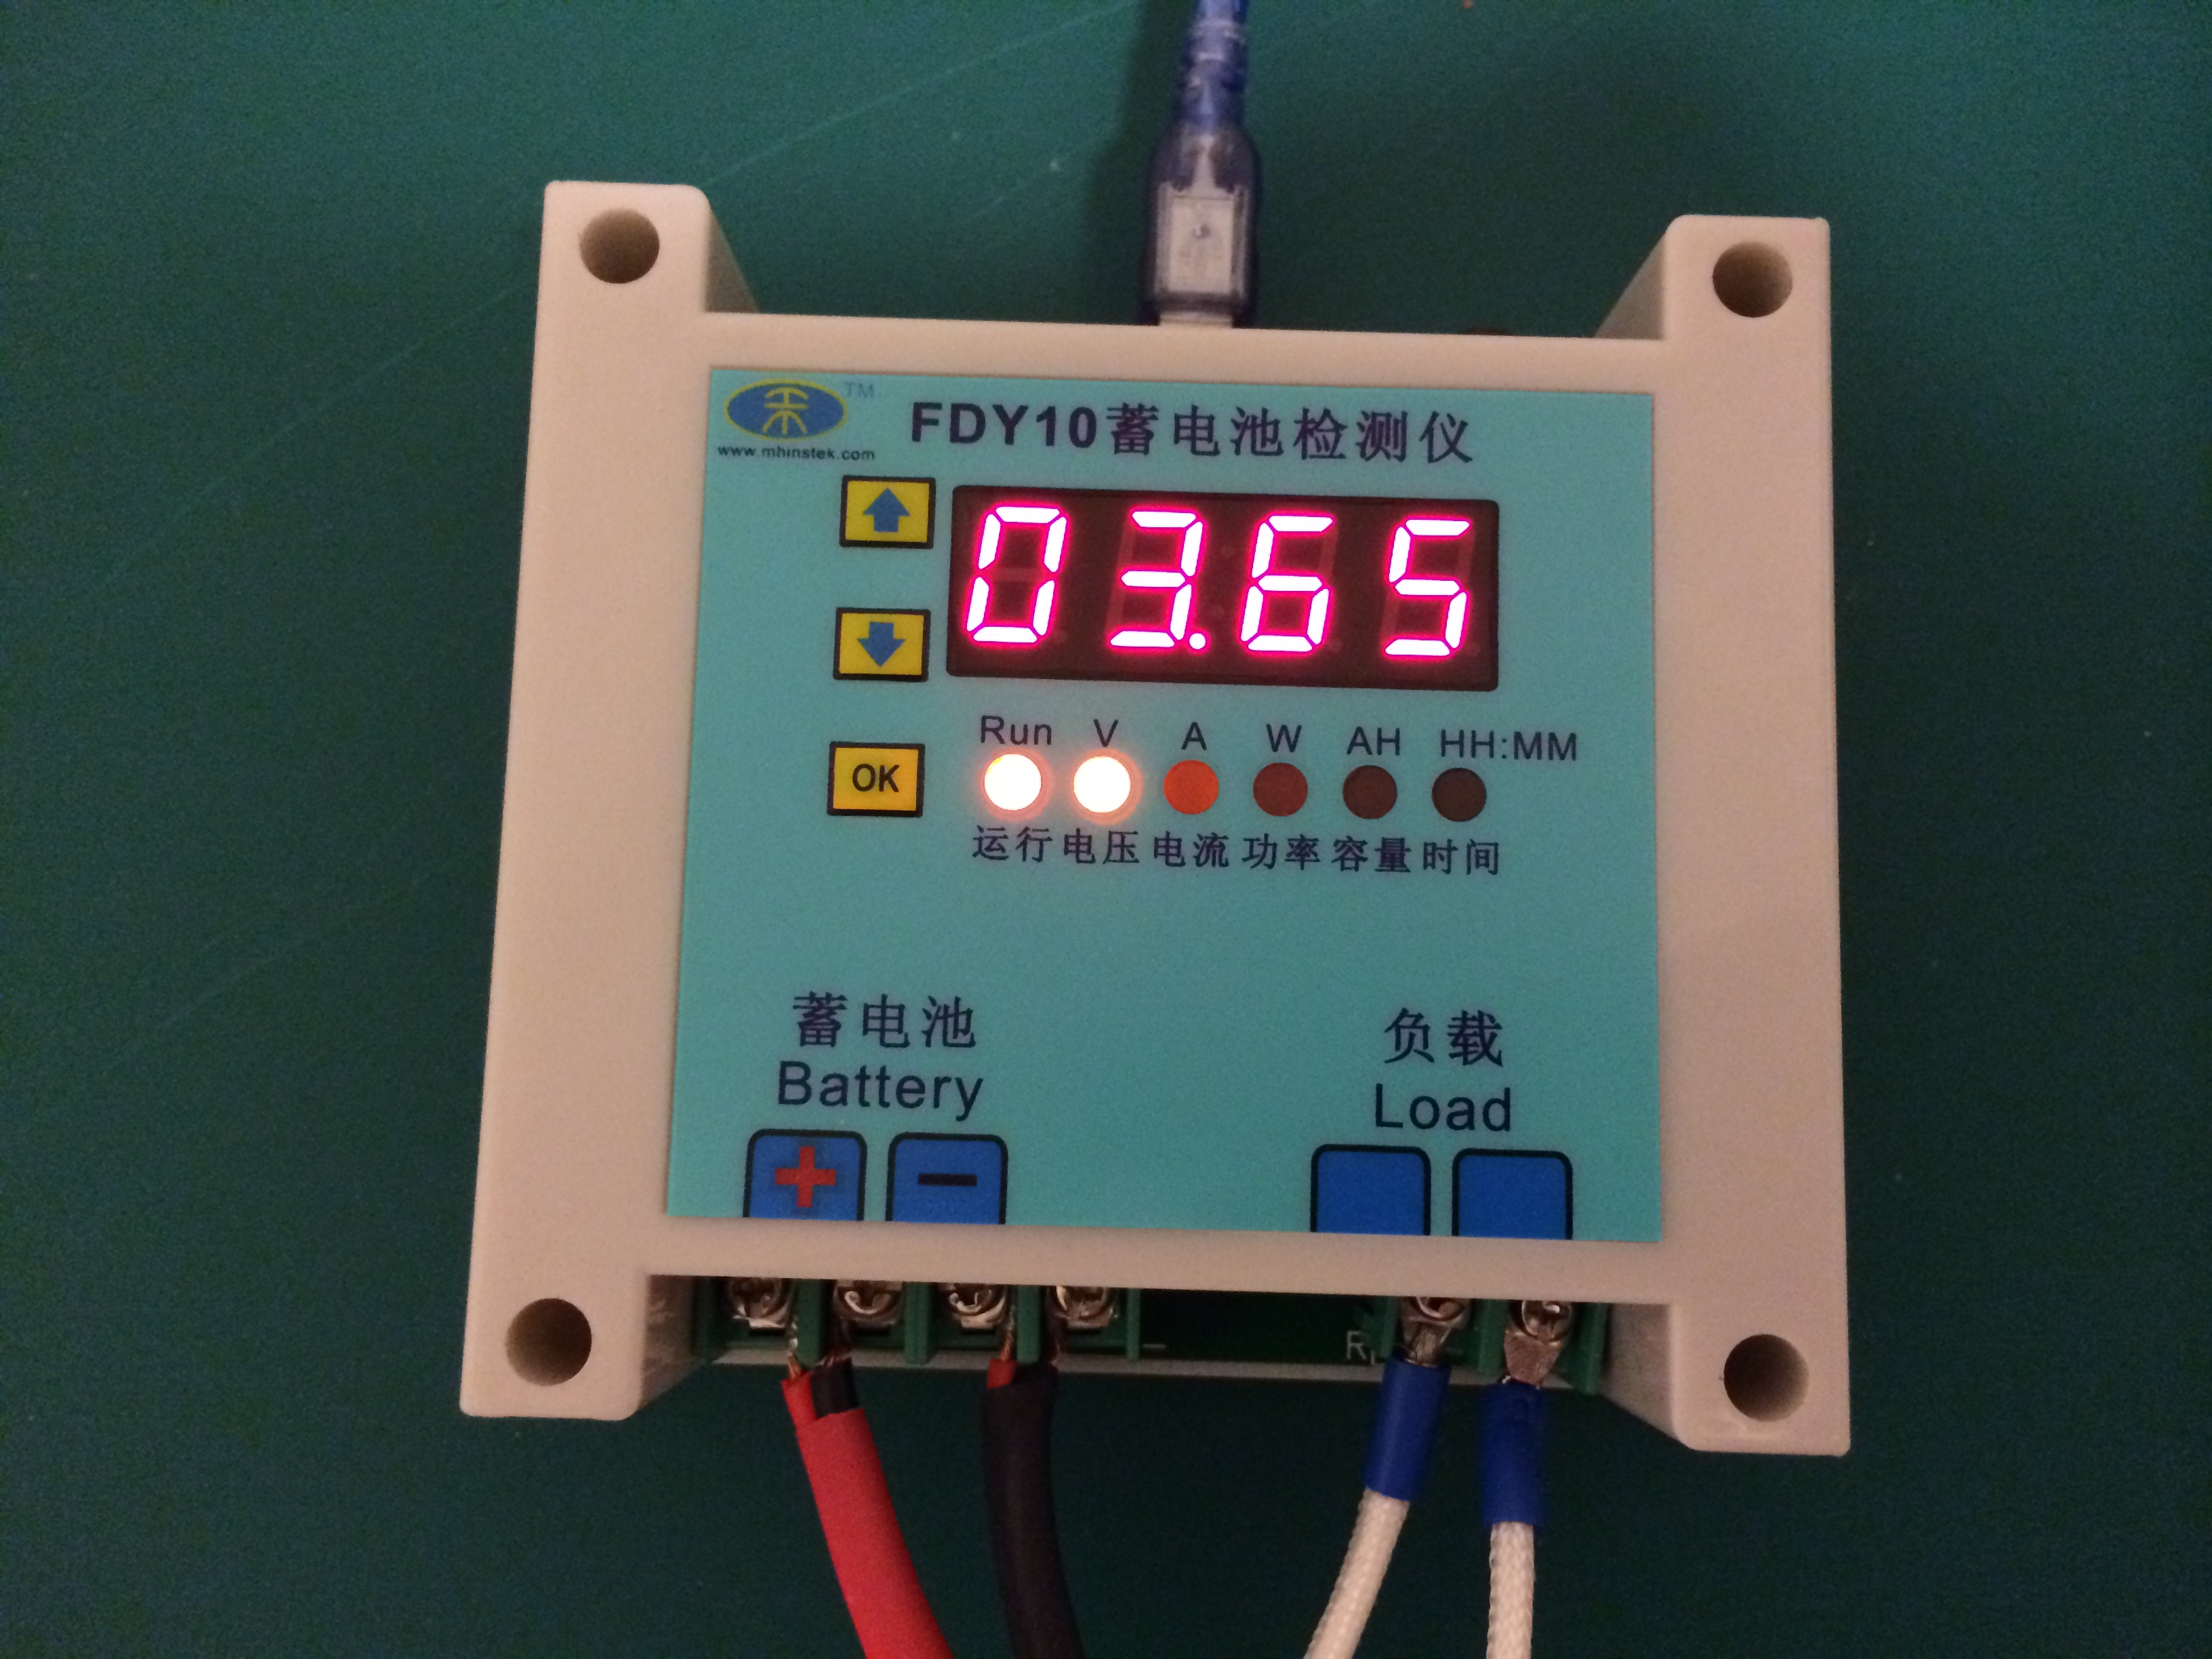
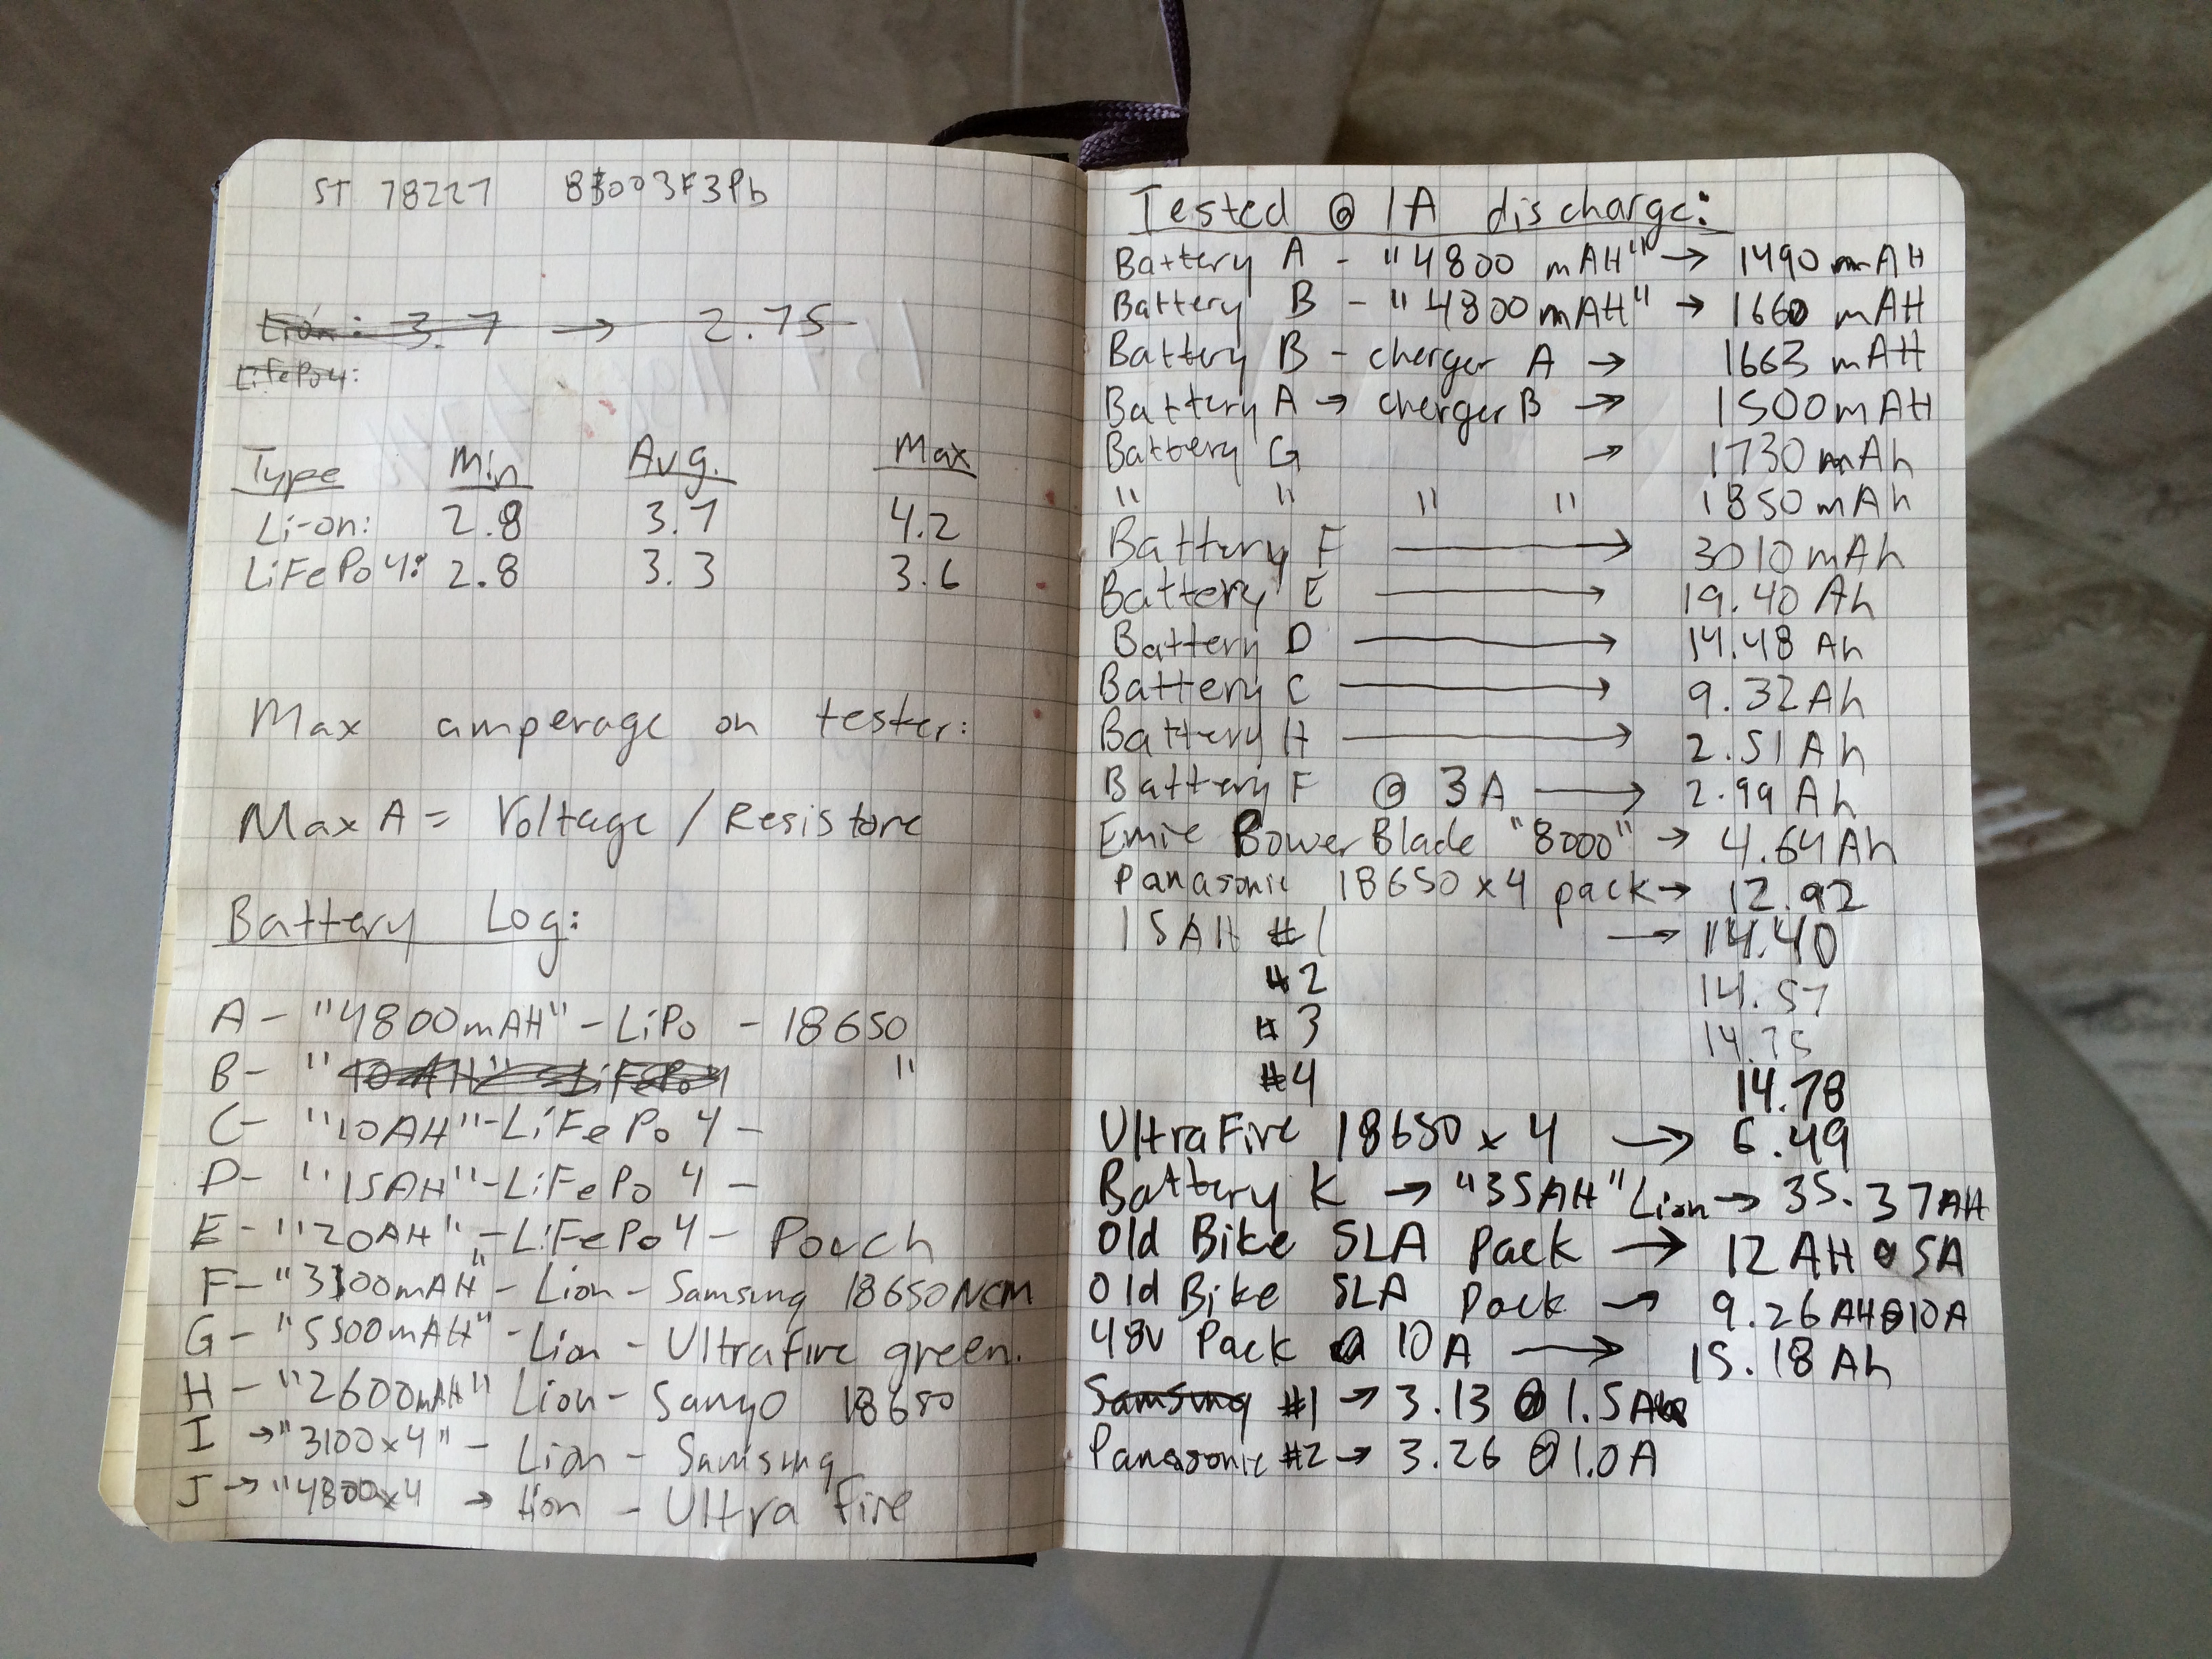
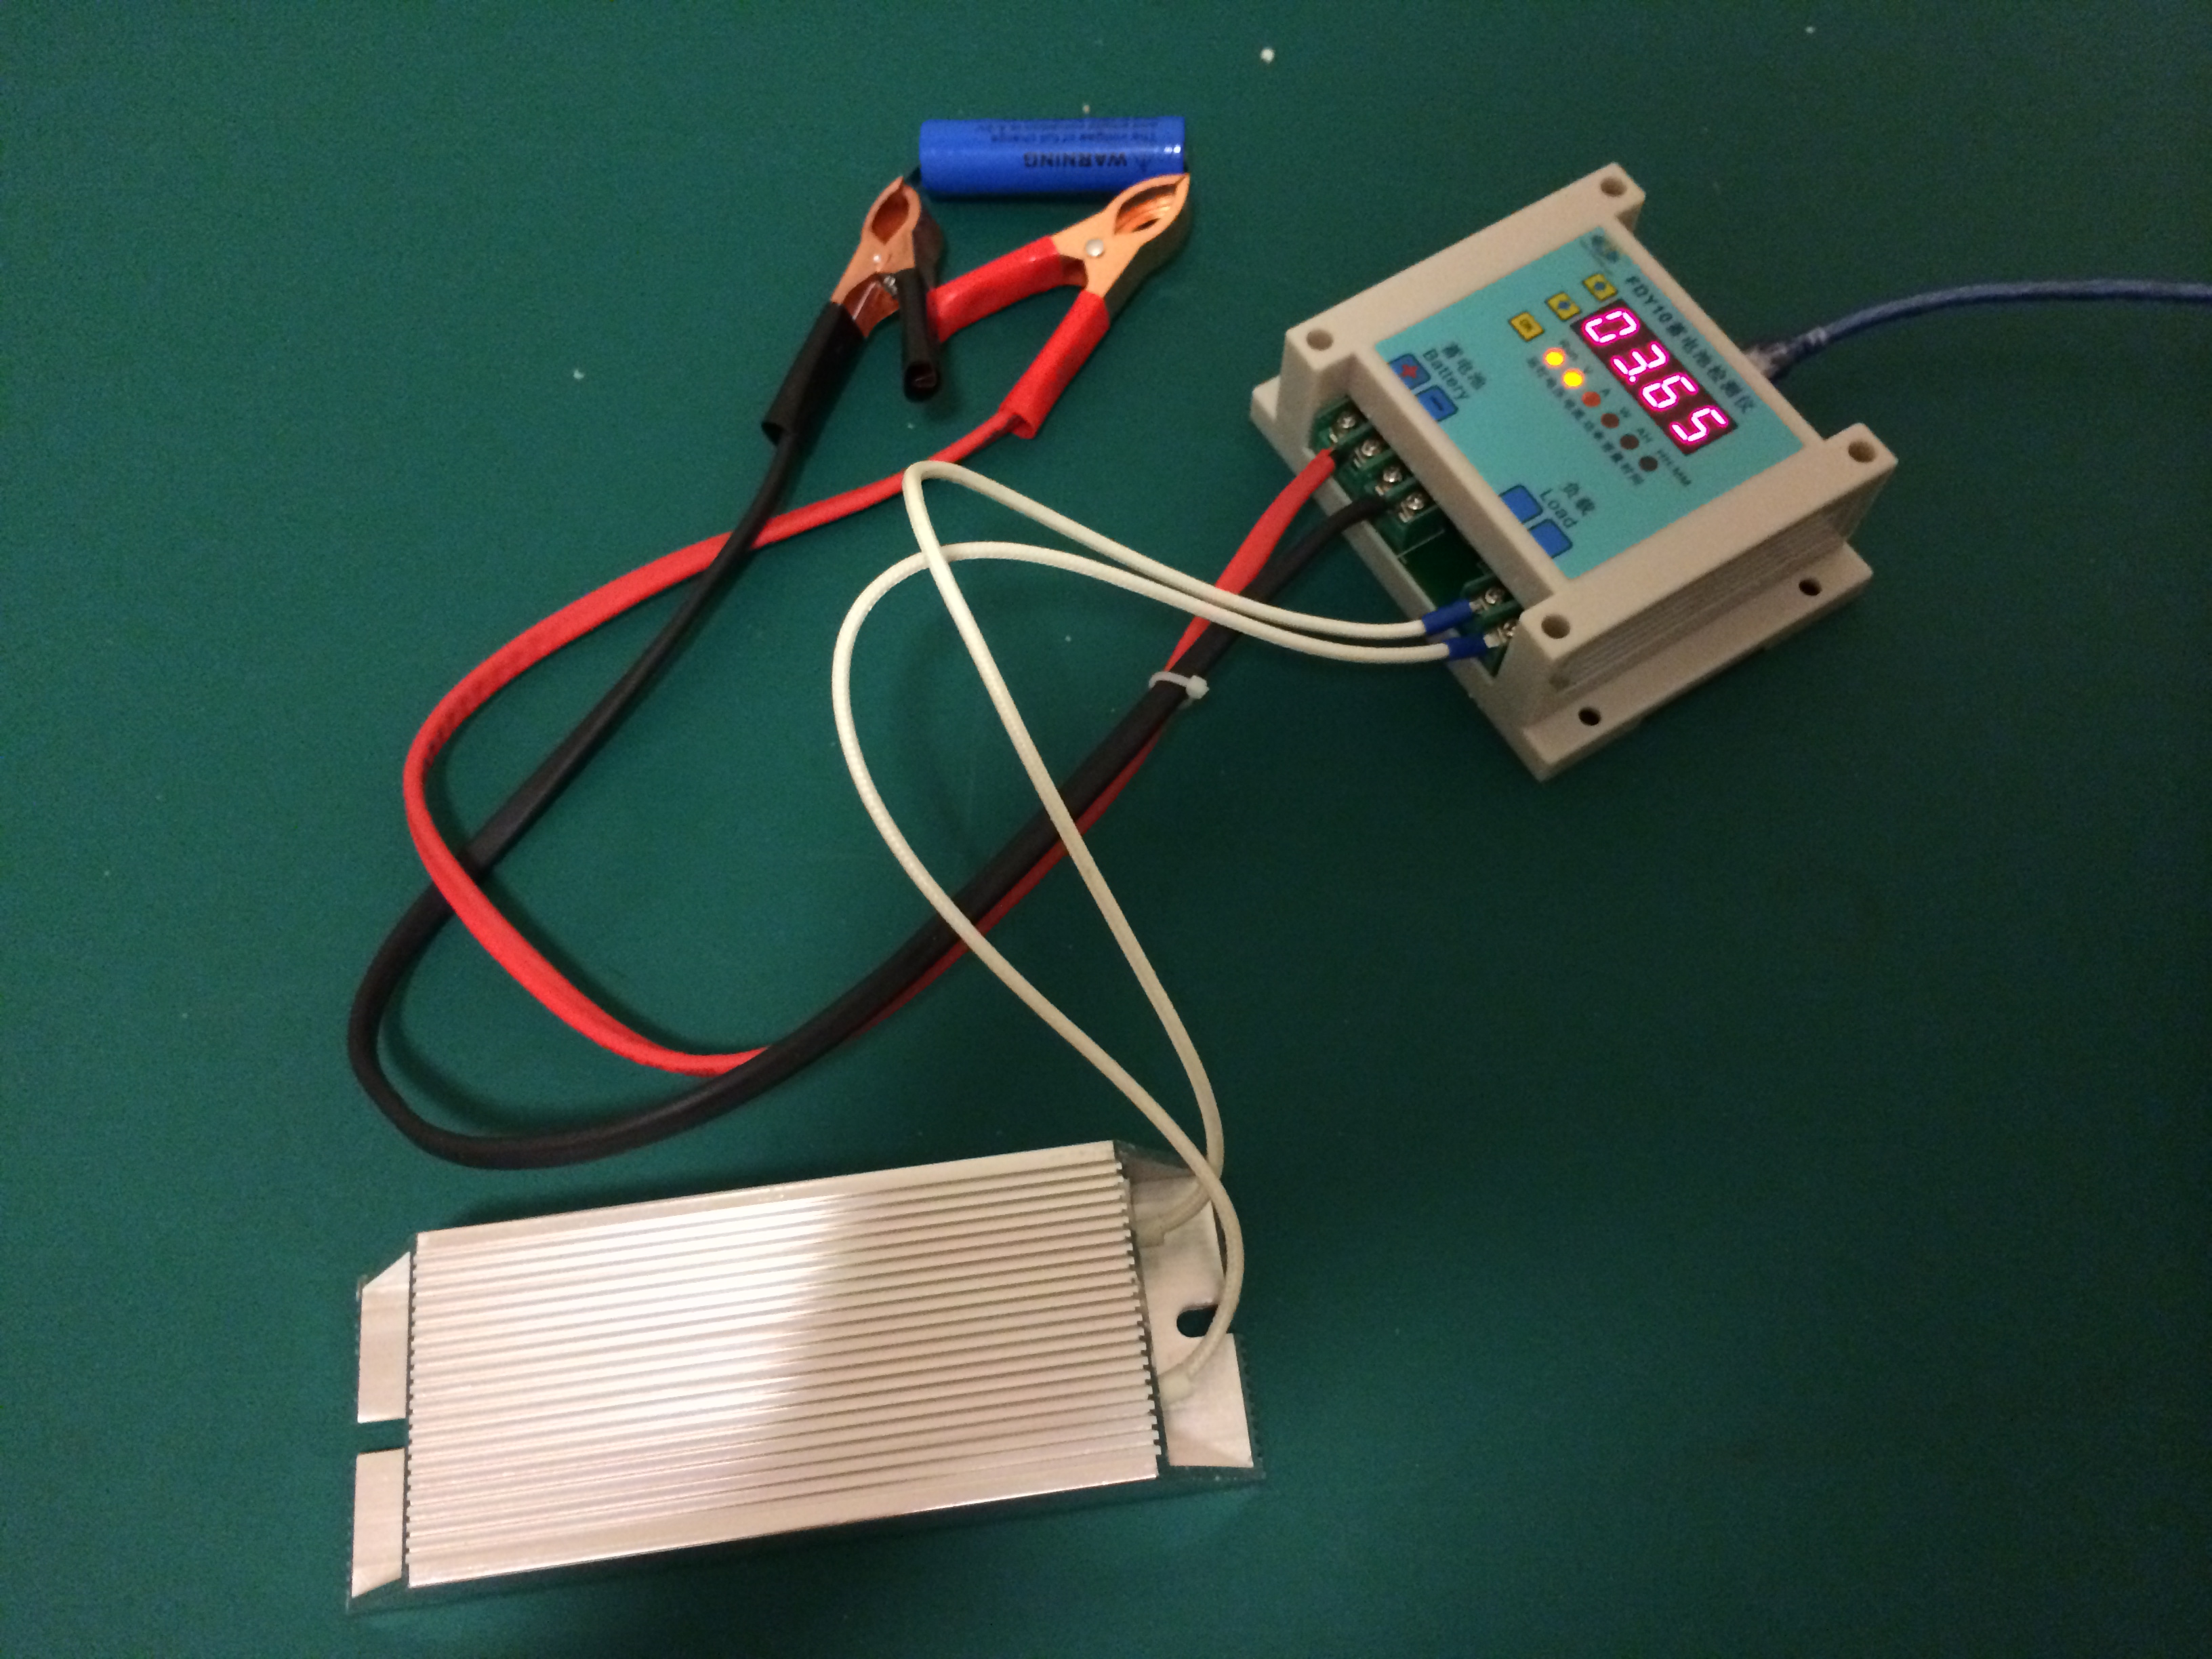
Since I had my handy-dandy battery capacity tester, I took 4 of the worst batteries and tested them. They all measured out to an average of 14.5 Ah, which assuaged my concerns – these batteries were either lightly used or just sitting in storage for a couple years. For the price I got them, I can’t really complain and I decided to go forward with the build.

IMG_0196

The first thing I did before assembly was to take some black electrical tape and use it to mark the negative terminals. You can tell the difference between negative and positive with a multimeter or by looking carefully, but I wanted to know which was with with a simple glance. This turned out to be a really good idea.

IMG_0204

These particular batteries are really cool in that they have a built-in screw terminal on each battery. This makes constructing the pack really easy – all I had to do was make some connector pieces and then screw it all together like some sort of more dangerous version of Ikea furniture. I ordered some aluminum strip (2mm * 15mm) and cut them into 55mm long pieces. I drilled 2 6mm holes 40mm apart from each other and then a 3.5mm hole in the middle. The middle hole was tapped to M4 for the balancing cable.

IMG_0206

You can build the pack in a variety of configurations (2×8, 3×6, 4×4, etc) but I decided to go with 4×4 to make it easy to fix in the existing battery space. This also meant that the final terminals ended up on the same side of the pack. I found it was easiest to build one row at a time, then attach that to the previous rows to build it up layer by layer.

IMG_0205

As I bolted each pack together, I made sure to use some thread locker on each of the bolts. This pack is going to be used in an electric bike, and I’m not exactly gentle with how I ride it. I did not want anything to vibrate loose during a drive and this will help ensure that the pack holds together.

IMG_0207

After the pack was fully assembled, I measured the total voltage – at 53v it checks out, and so I taped the pack together so I could start adding the balancing cables.

IMG_0212

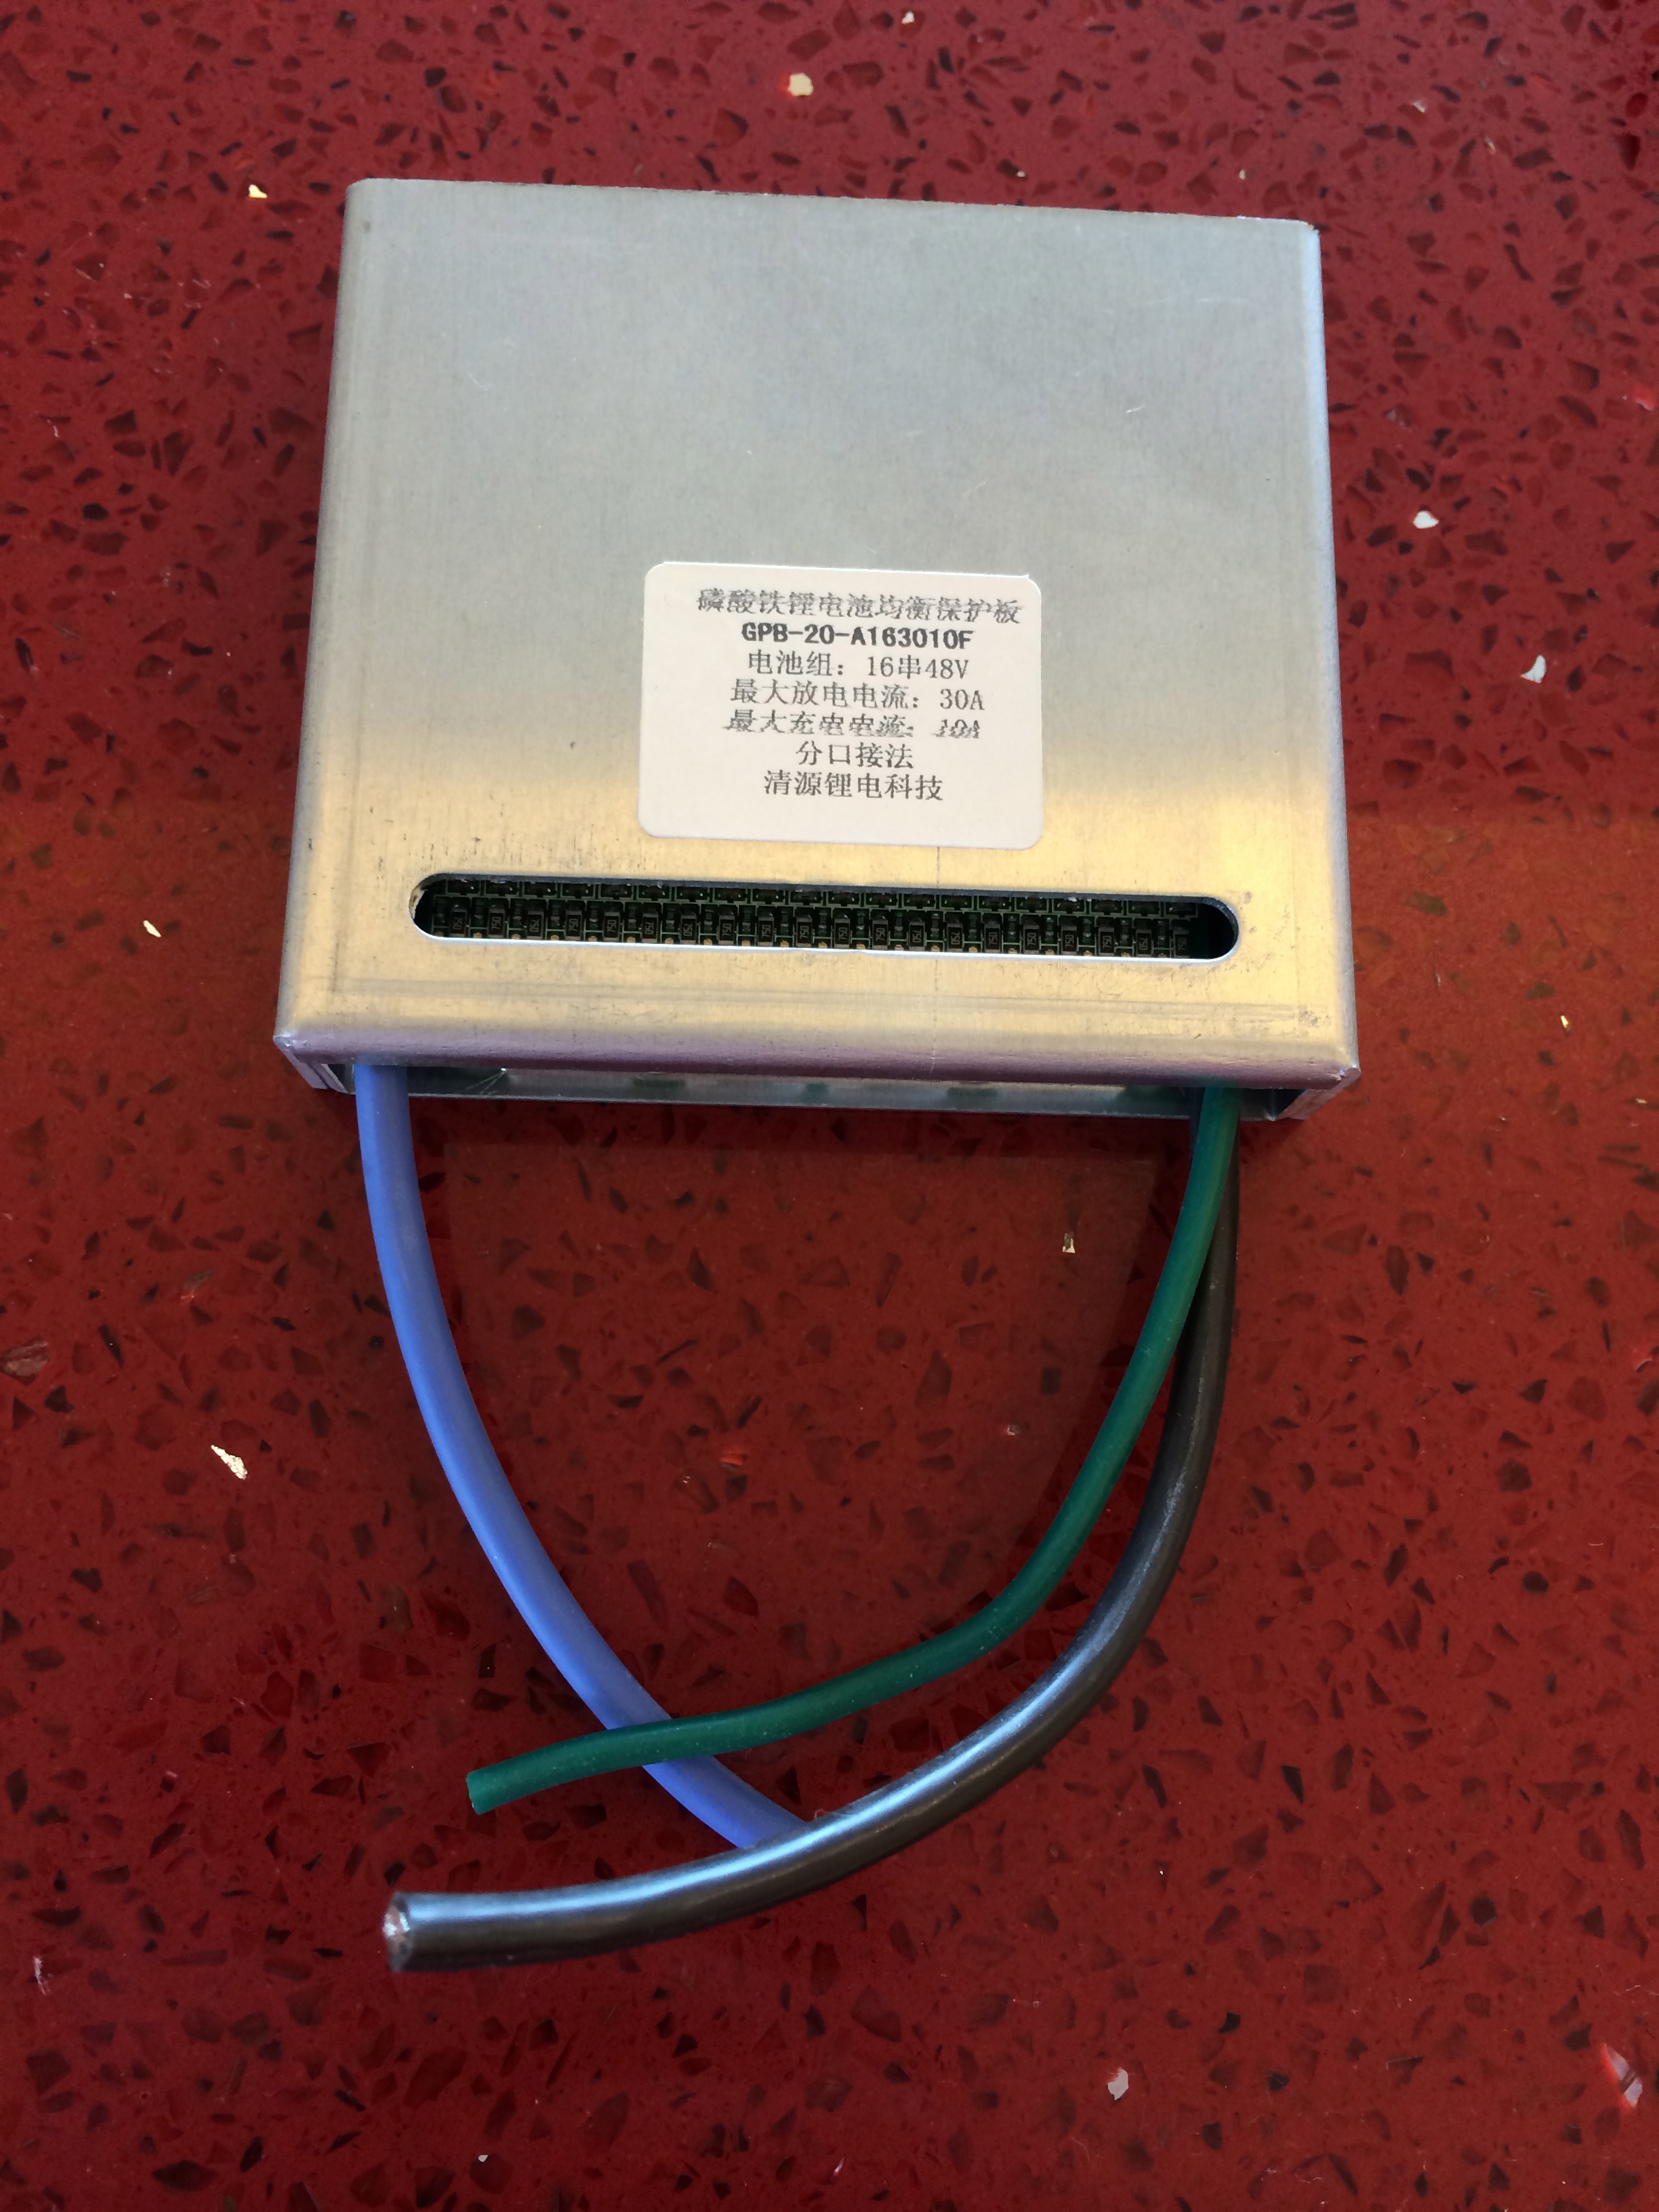
The protection board came with pigtails for the balancing cables, and I picked up some wires with screw-down connectors to attach them to the battery. My first step was to solder these together and use shrink tubing to protect the joint.

IMG_0215

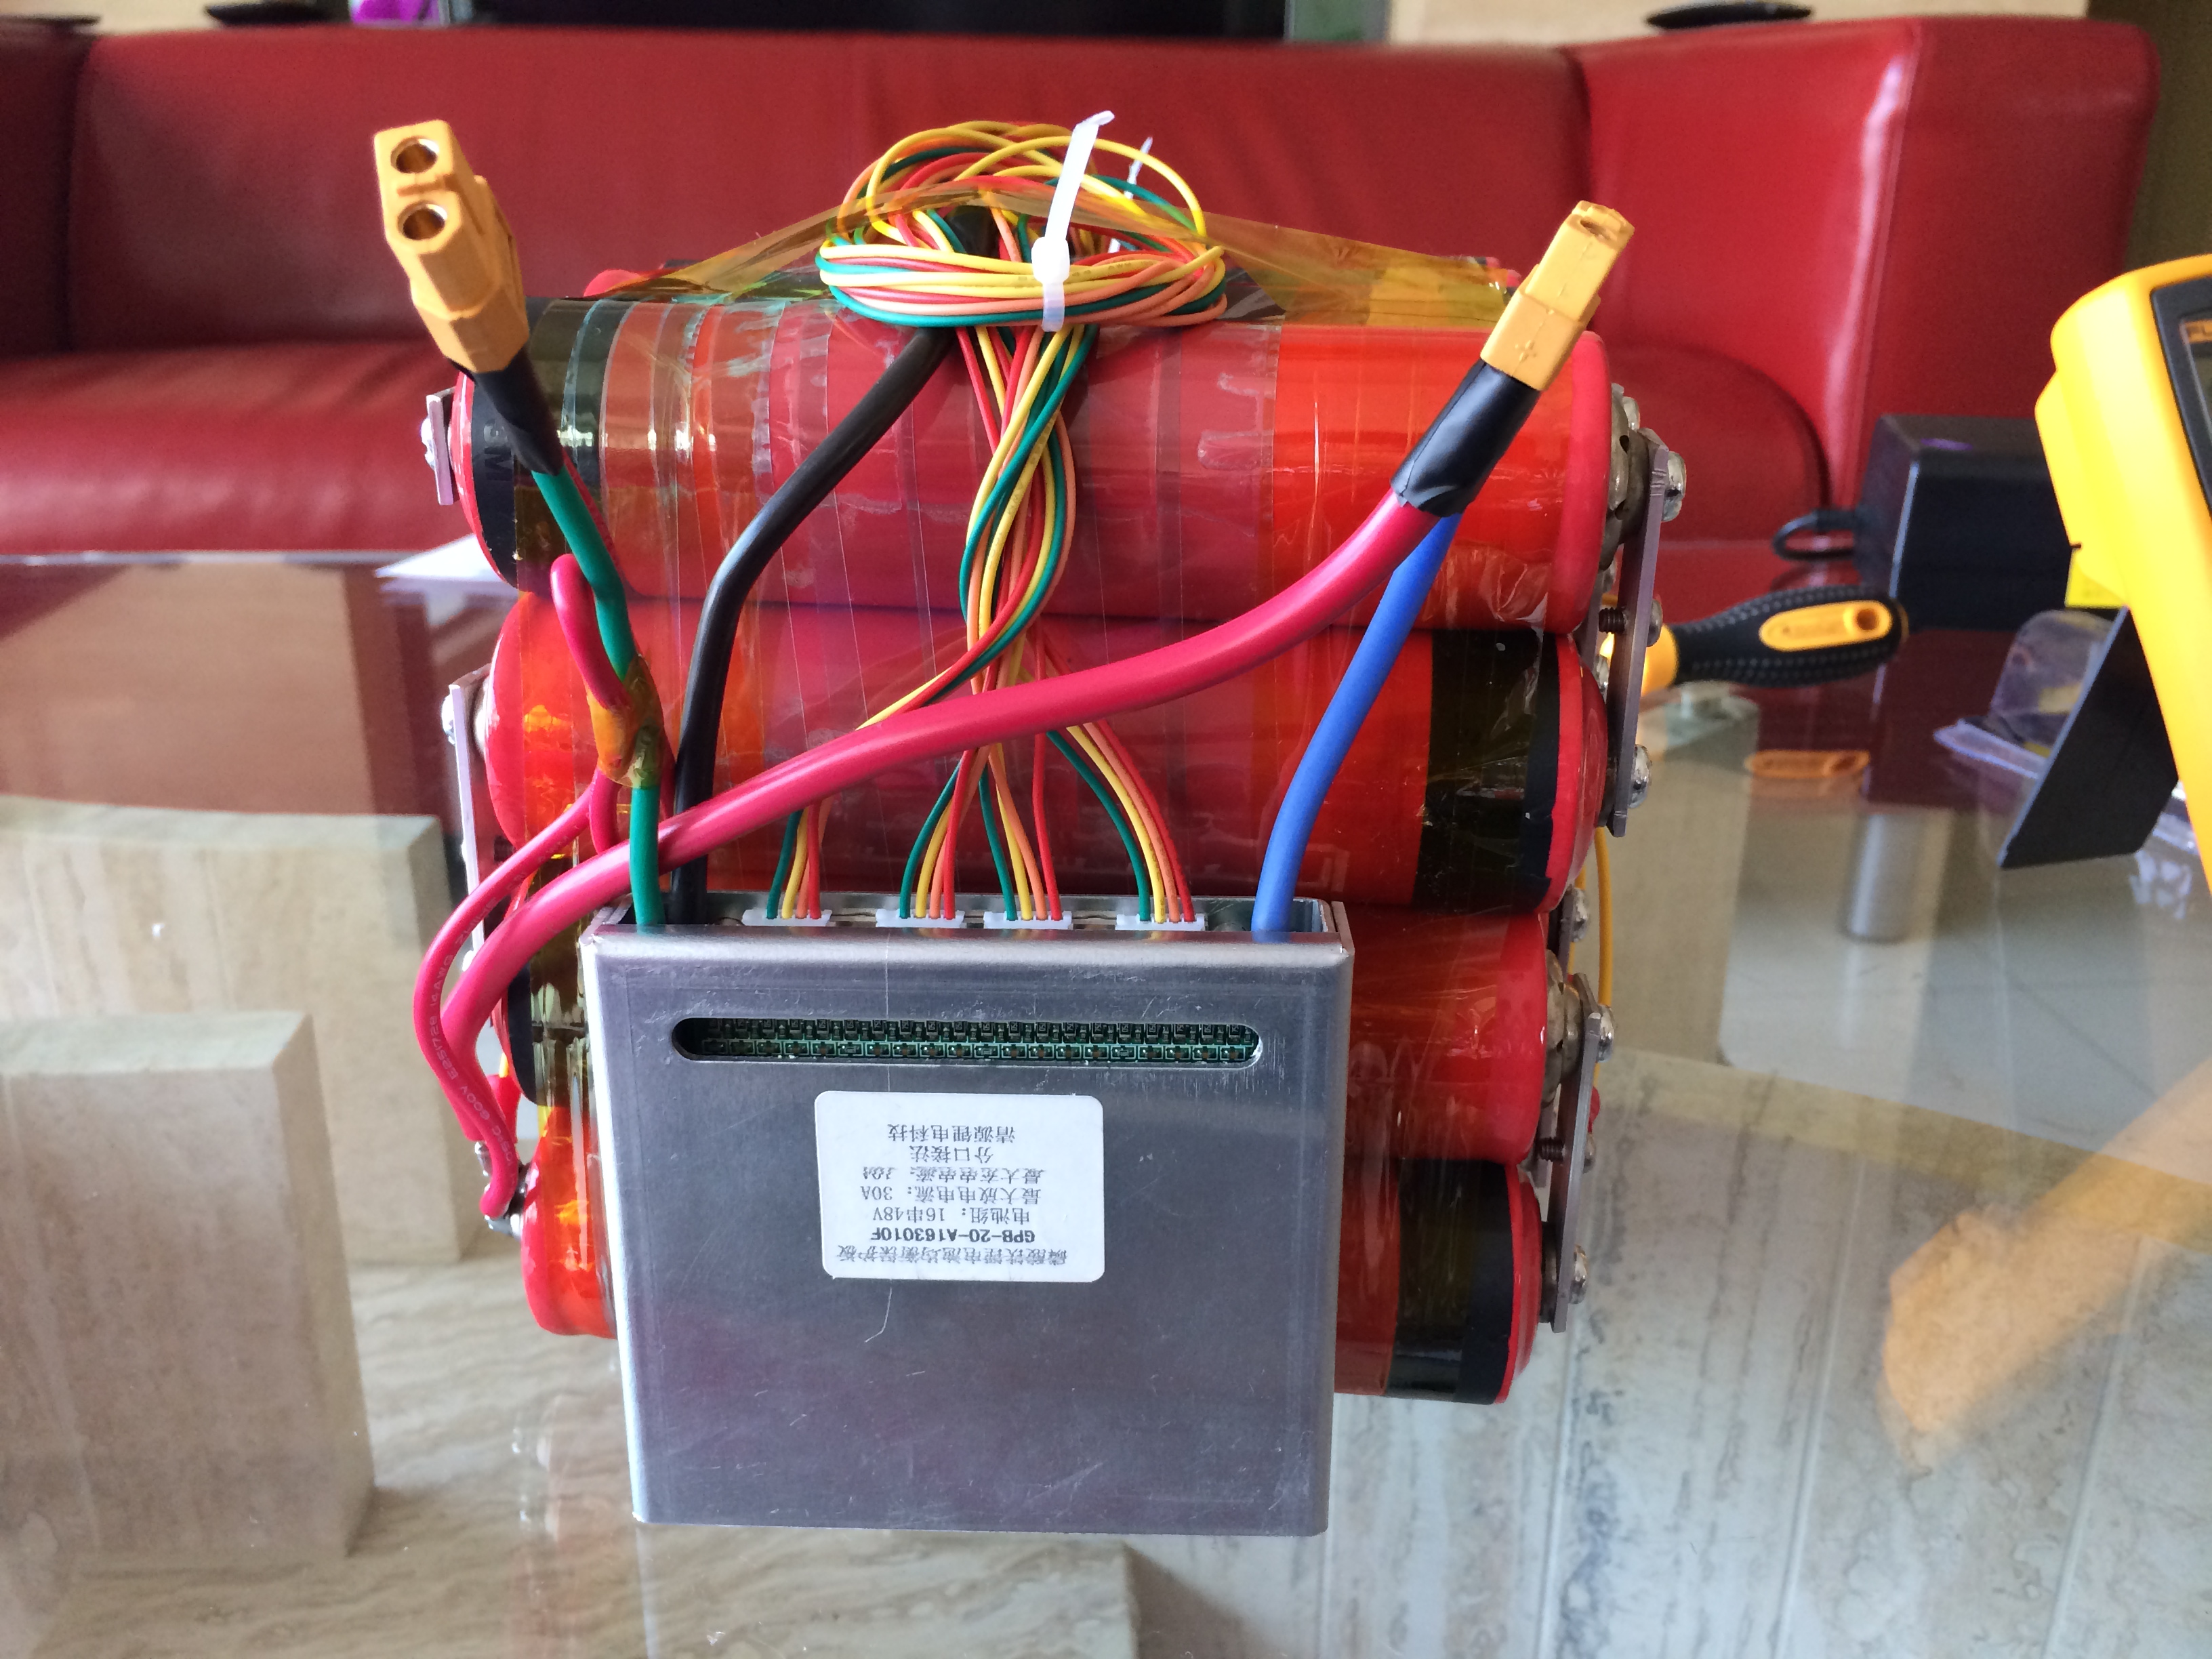
After that was done, I attached each of the balance cables to the appropriate spot on the battery. My method was to first measure and check each voltage, and then mark on the aluminum bus bar with a Sharpie which line it was. Then wiring up the connectors was as simple as looking for the right number and screwing it down. Again, I used Loctite on the screws to prevent anything from coming loose. The result was rather bomb-like but hopefully it acts less like a bomb and more like a battery. Once all the balance wires were in place, I checked each cable with a multimeter. Going in order, I confirmed that they were each roughly 3.3v apart.

IMG_0221

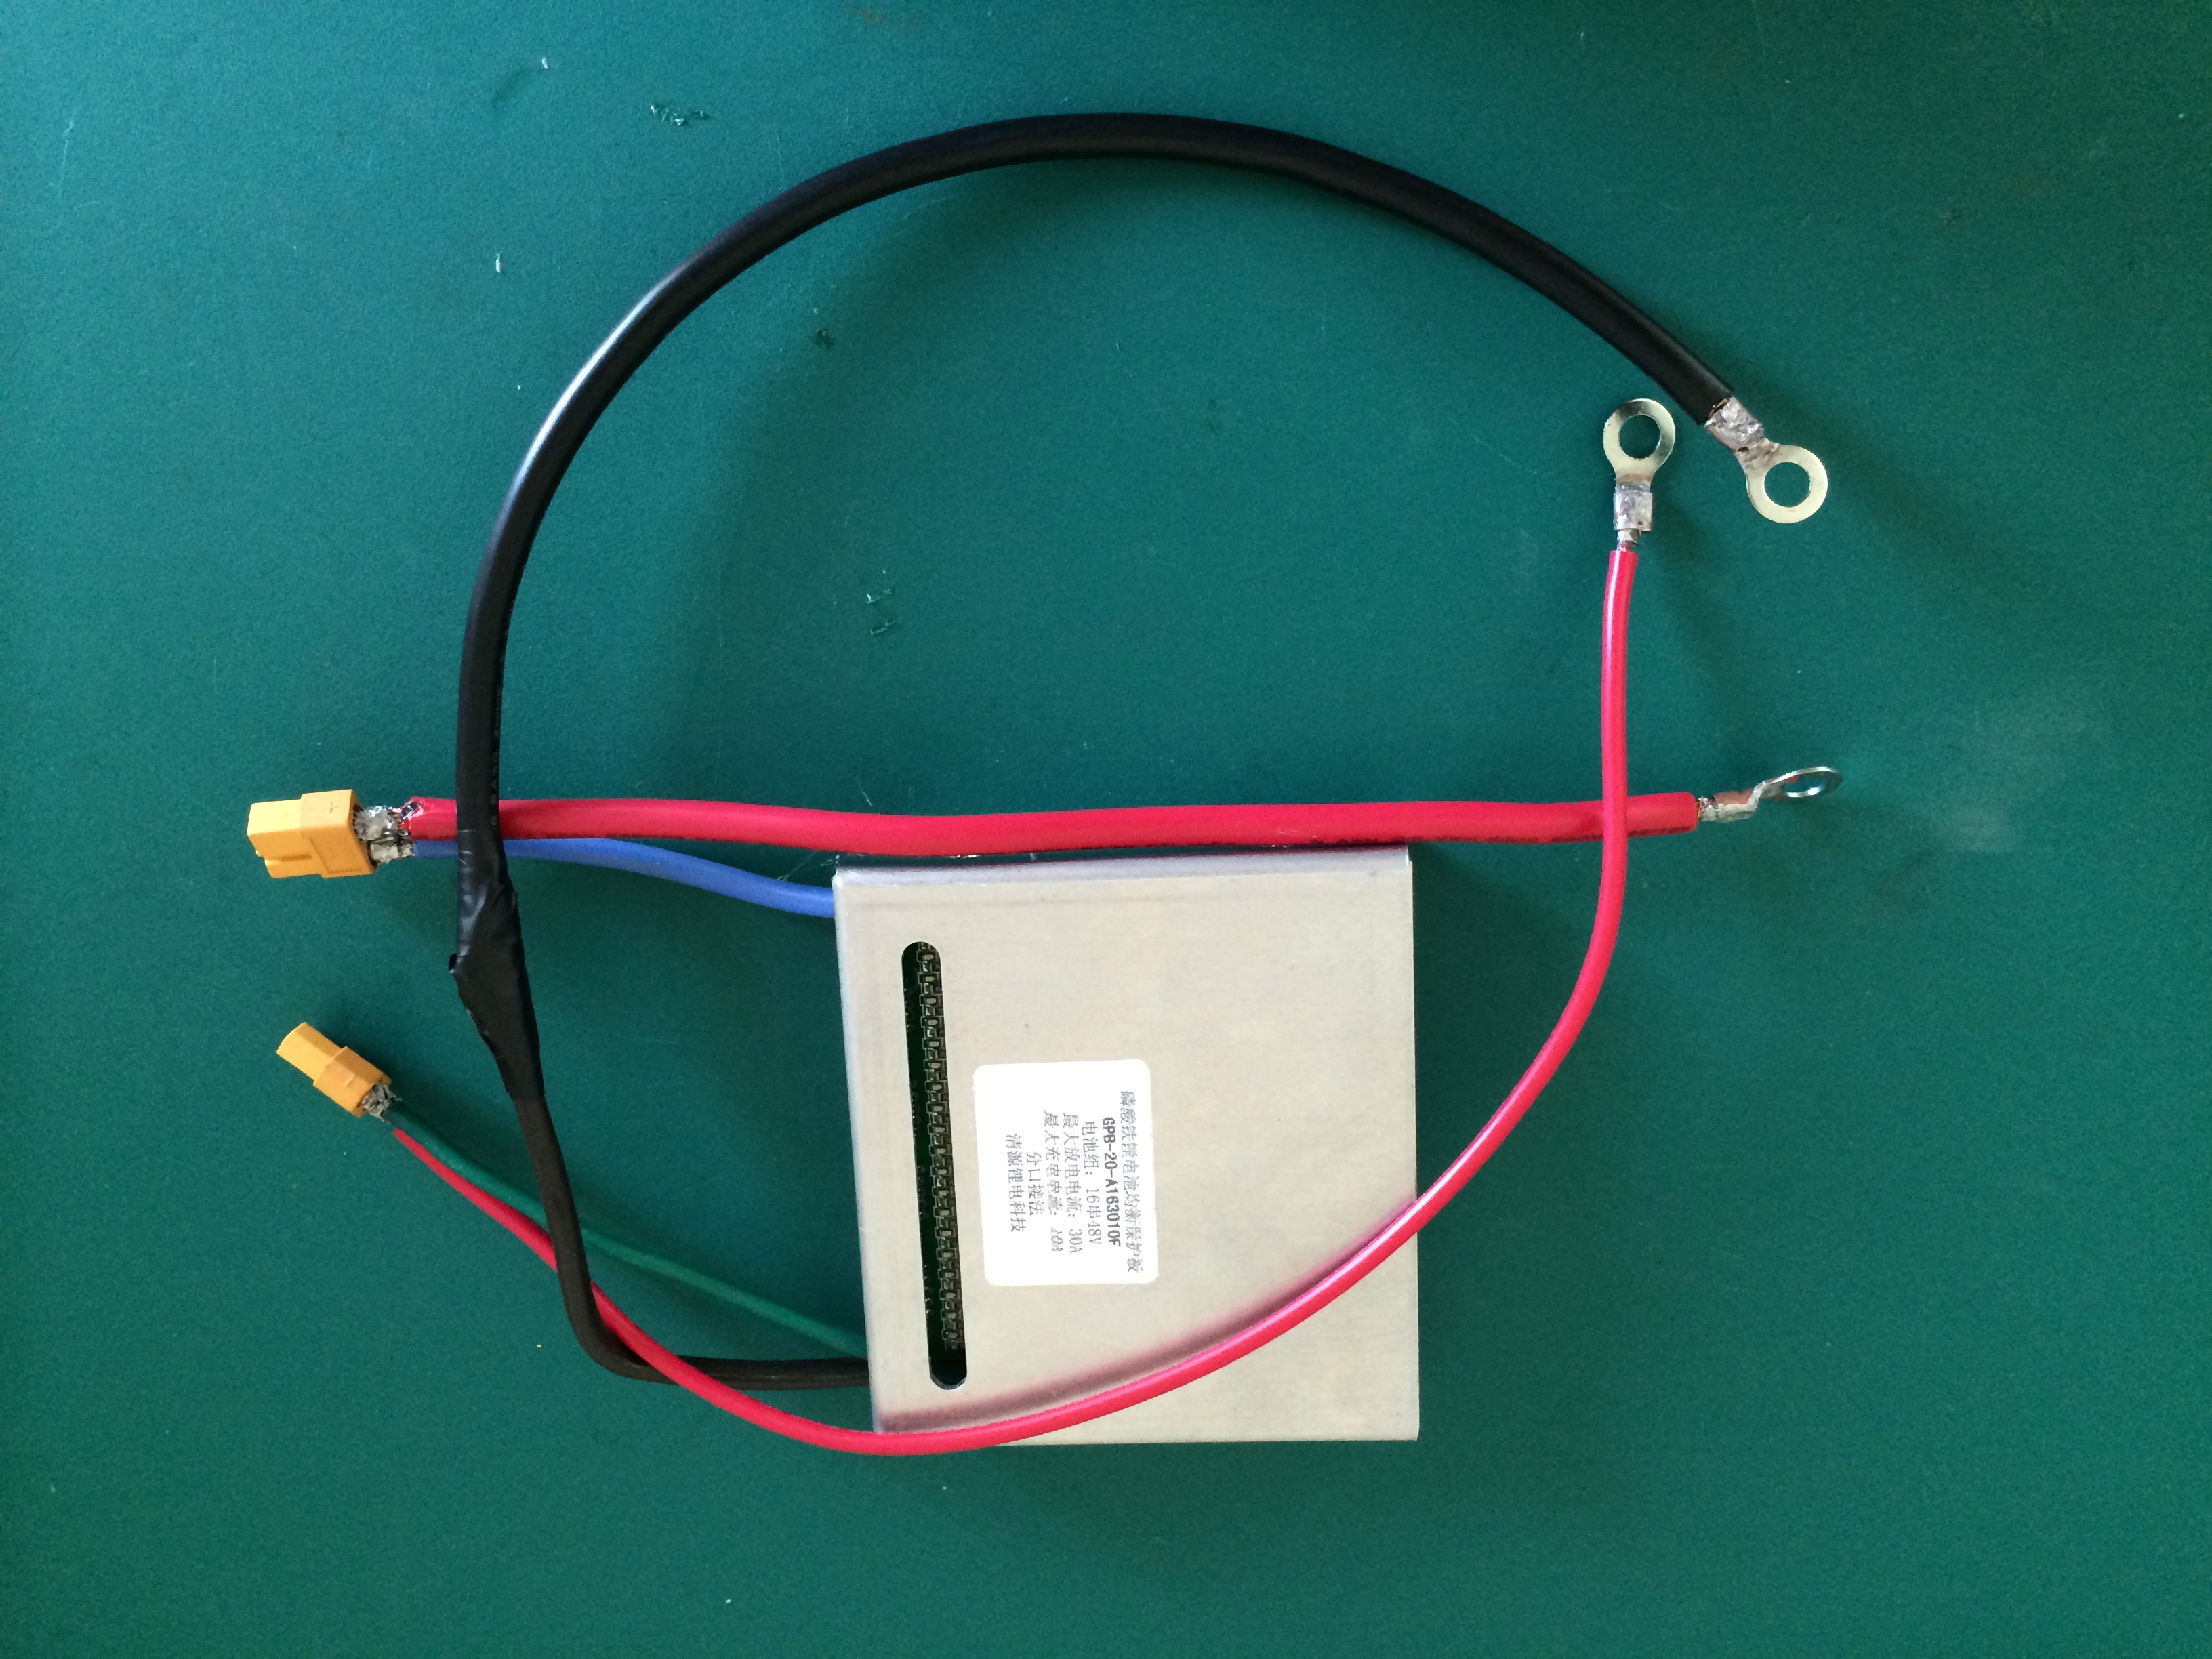
Next was preparing the protection board. The positive and negative terminals of the battery each had M6 screws, so I attached some M6 ring terminals to those leads. For the connection to charger and ebike power, I used some awesome XT60 connectors which can handle at least 60 amps – way more than I need, but they were cheap and polarized. The biggest challenge was the 8 gauge wire was a major pain in the ass to solder and I really had to crank up the temp on my iron to get it right.

IMG_0223

Next I plugged in each of the balance cables to the protection board according to the instructions and then taped the board in place with a couple passes of tape. The next step was to charge up the battery and make sure it was all balanced.

IMG_0243

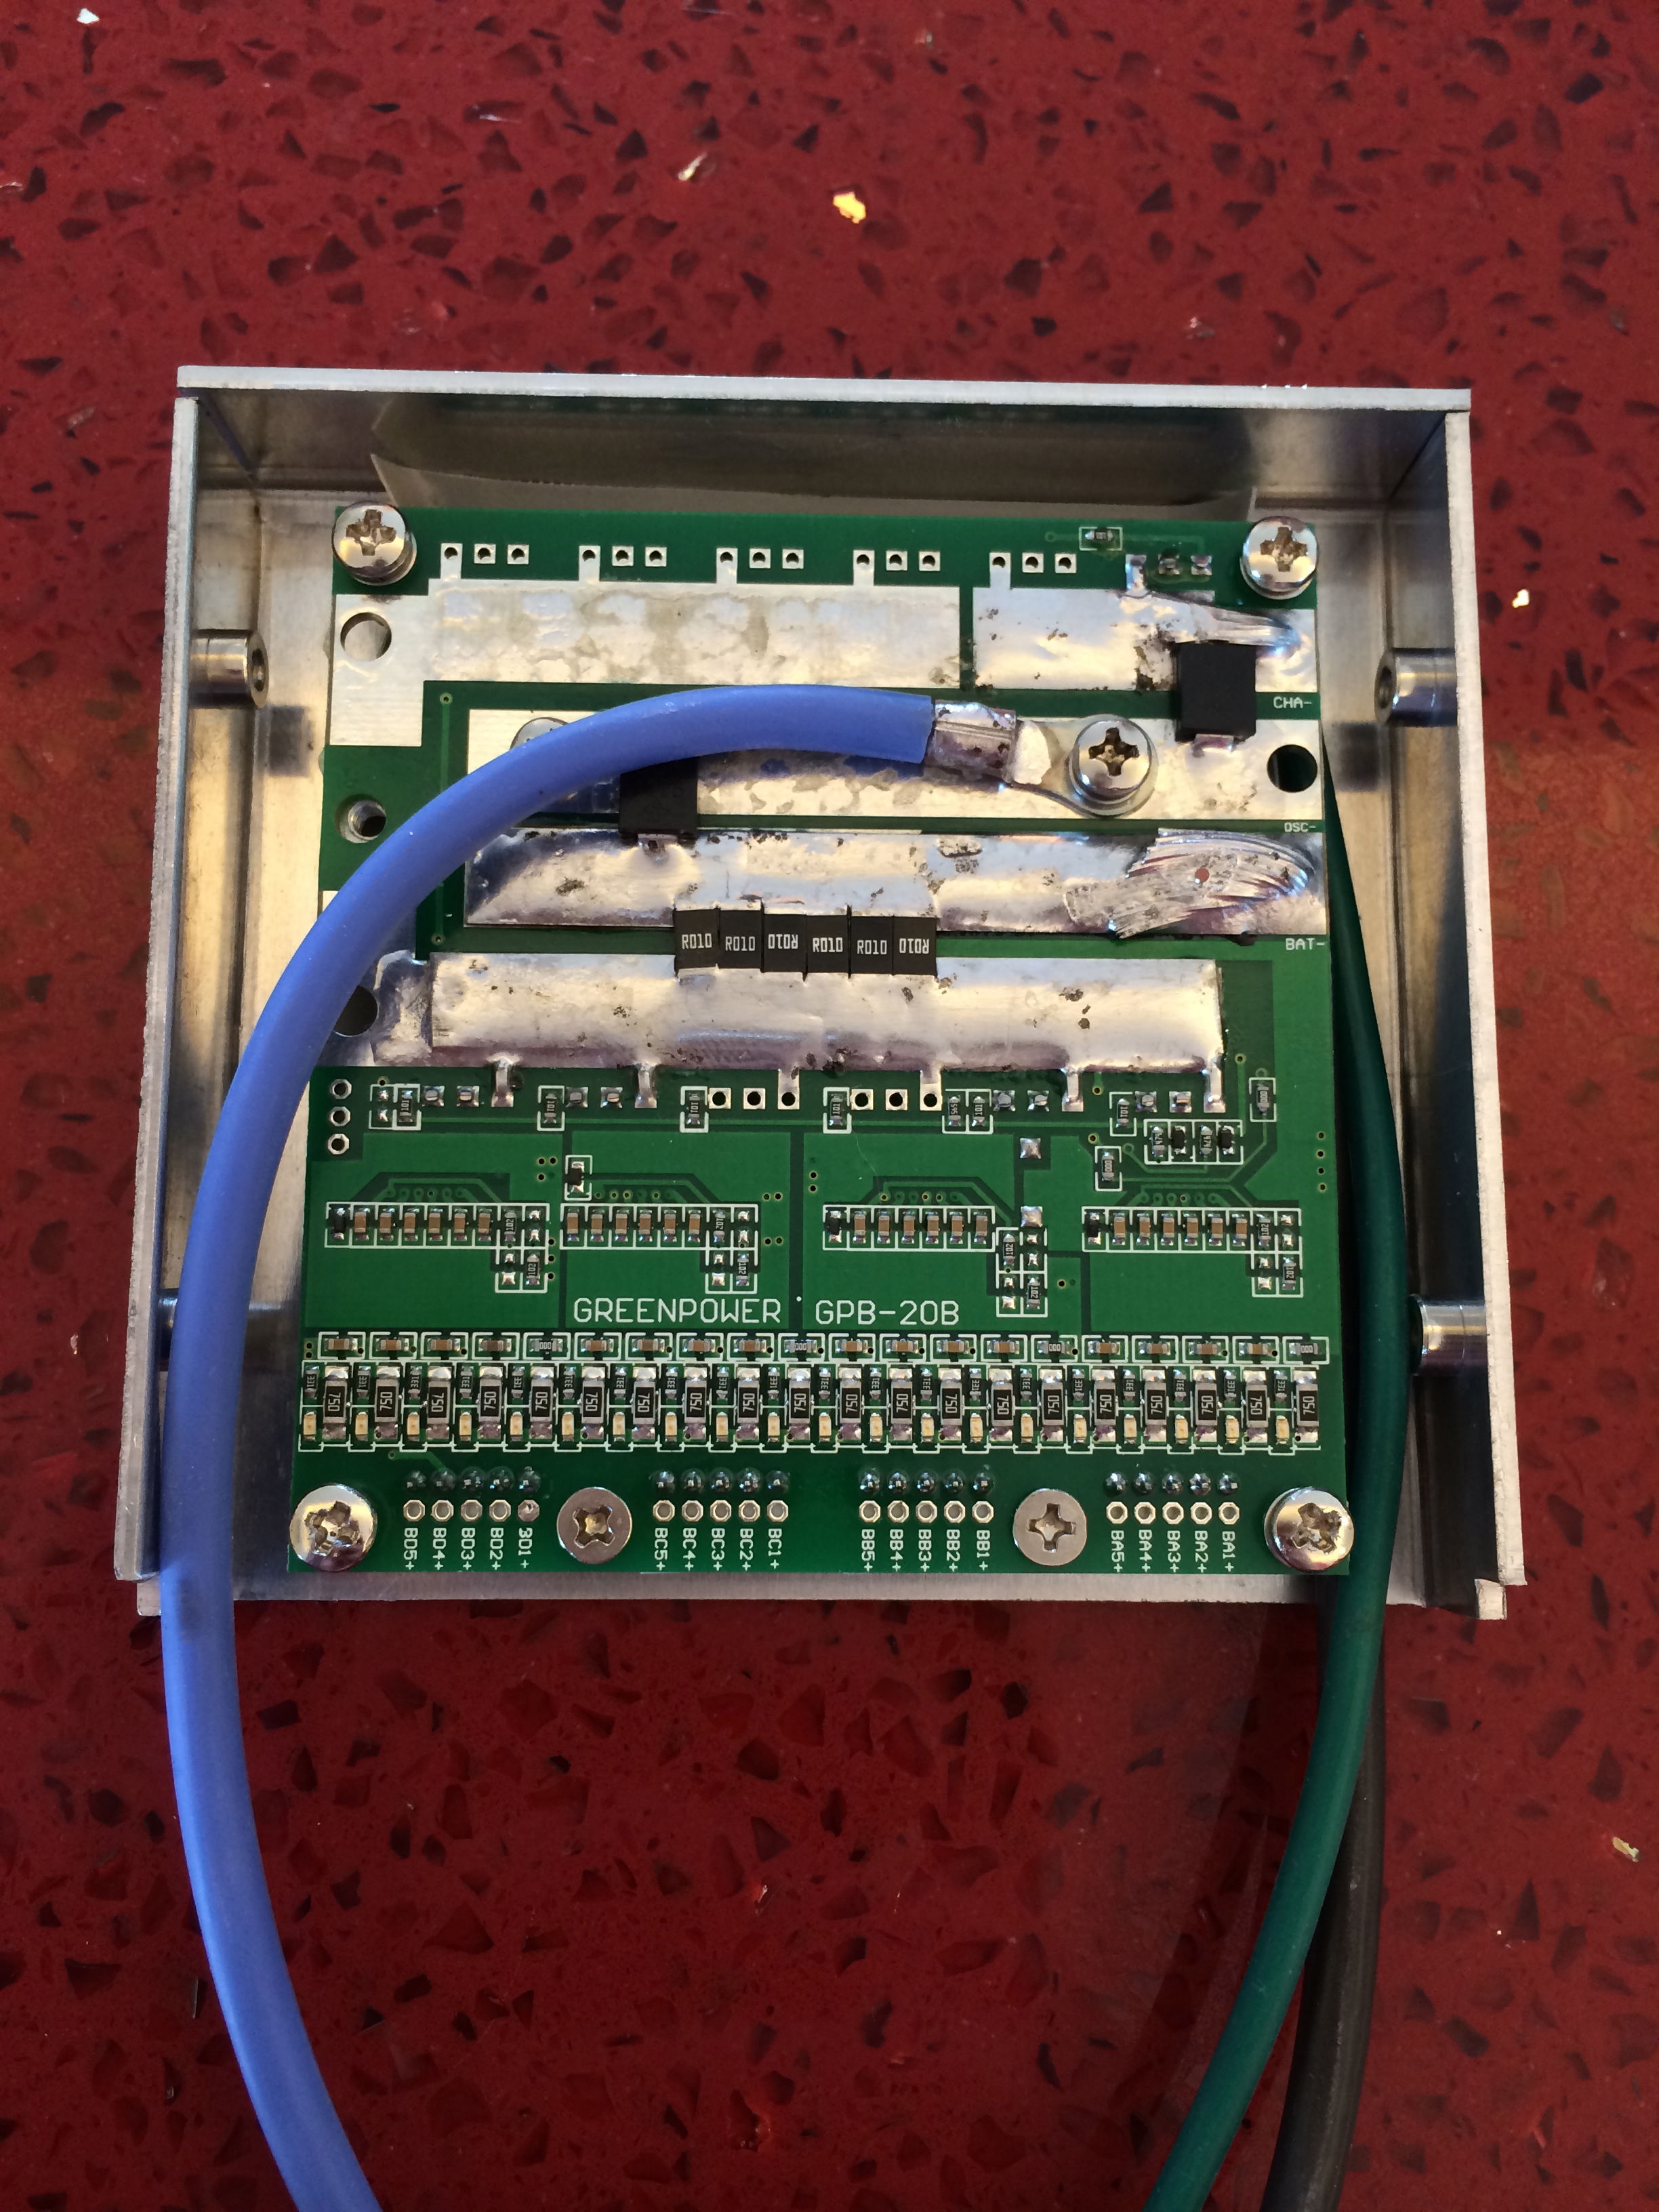
Unfortunately it was not balanced. If I was doing this again, I would probably do something like put all the cells in parallel first and then charge them fully. Instead, I had to individually balance the cells. I originally had thought the protection board would do this, and it probably would if you let it sit for eternity, but some of the cells were almost fully discharged. You see, the way the balancing works on this board is by slowly discharging the excess voltage through an LED until it drops below the predefined voltage. This is great if your cells are only off by a few hundred milliamps and you’re willing to wait a couple hours. Not so good if you have 10amp difference to make up.

IMG_0251

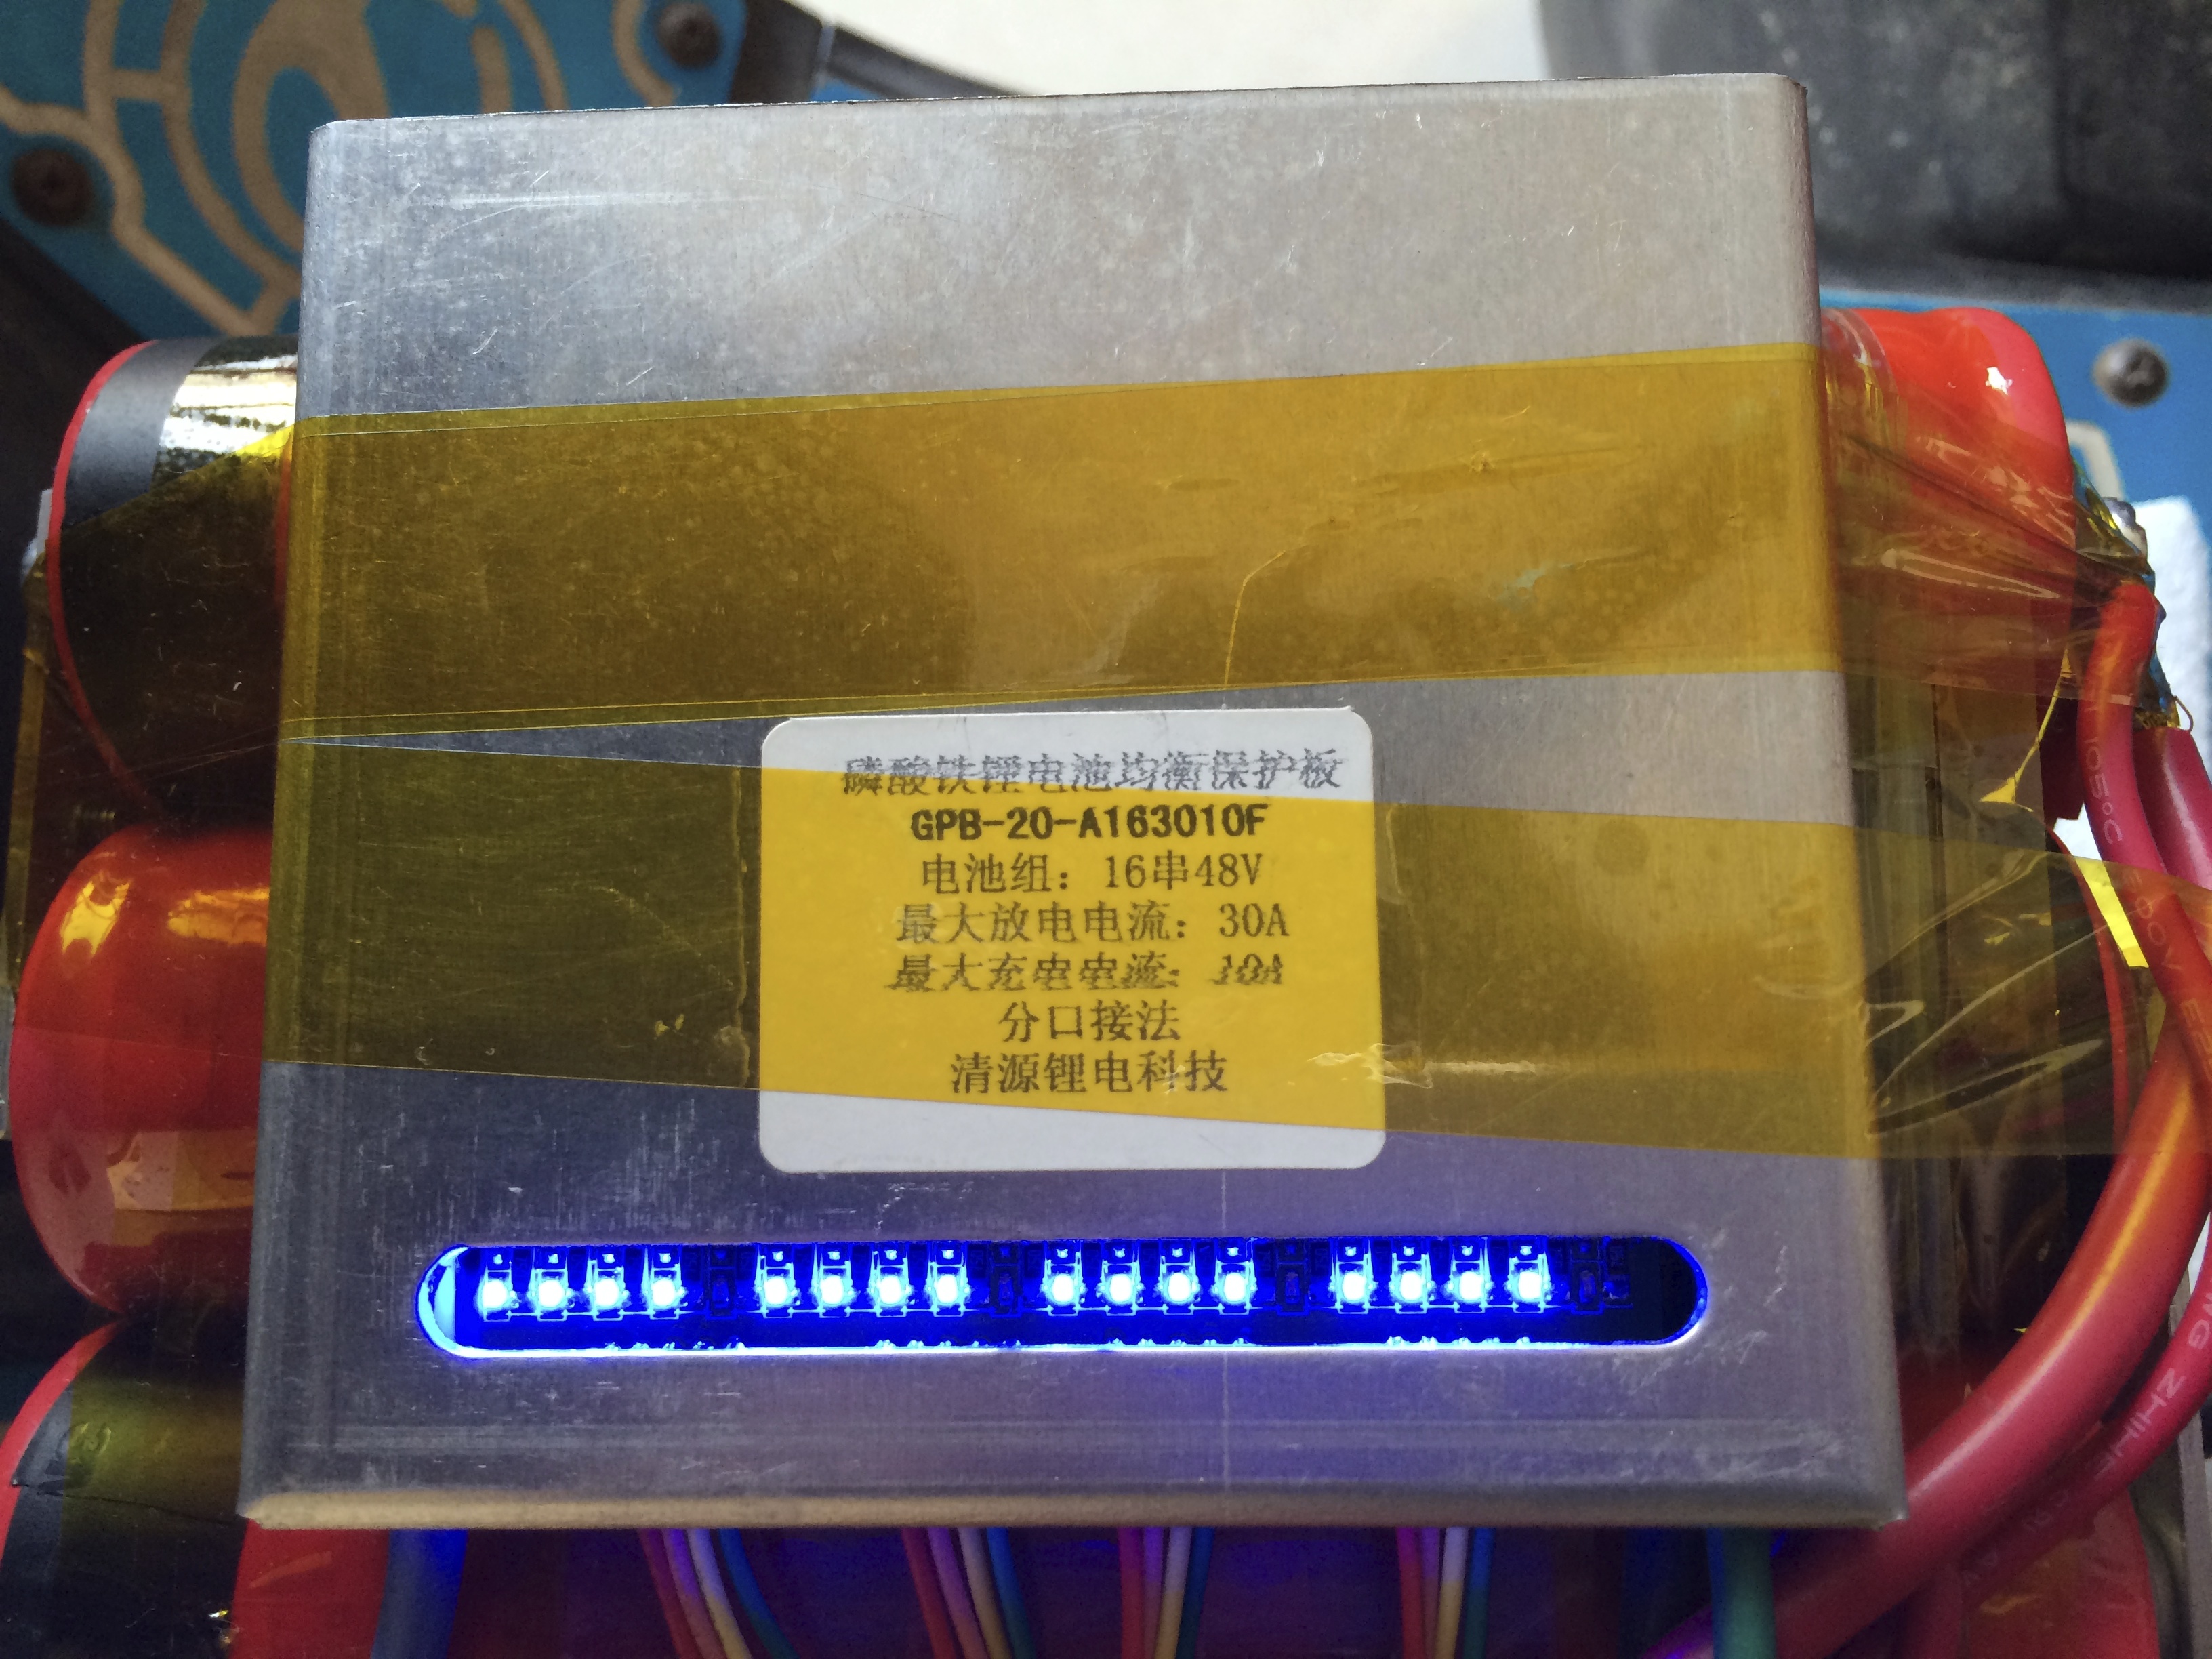
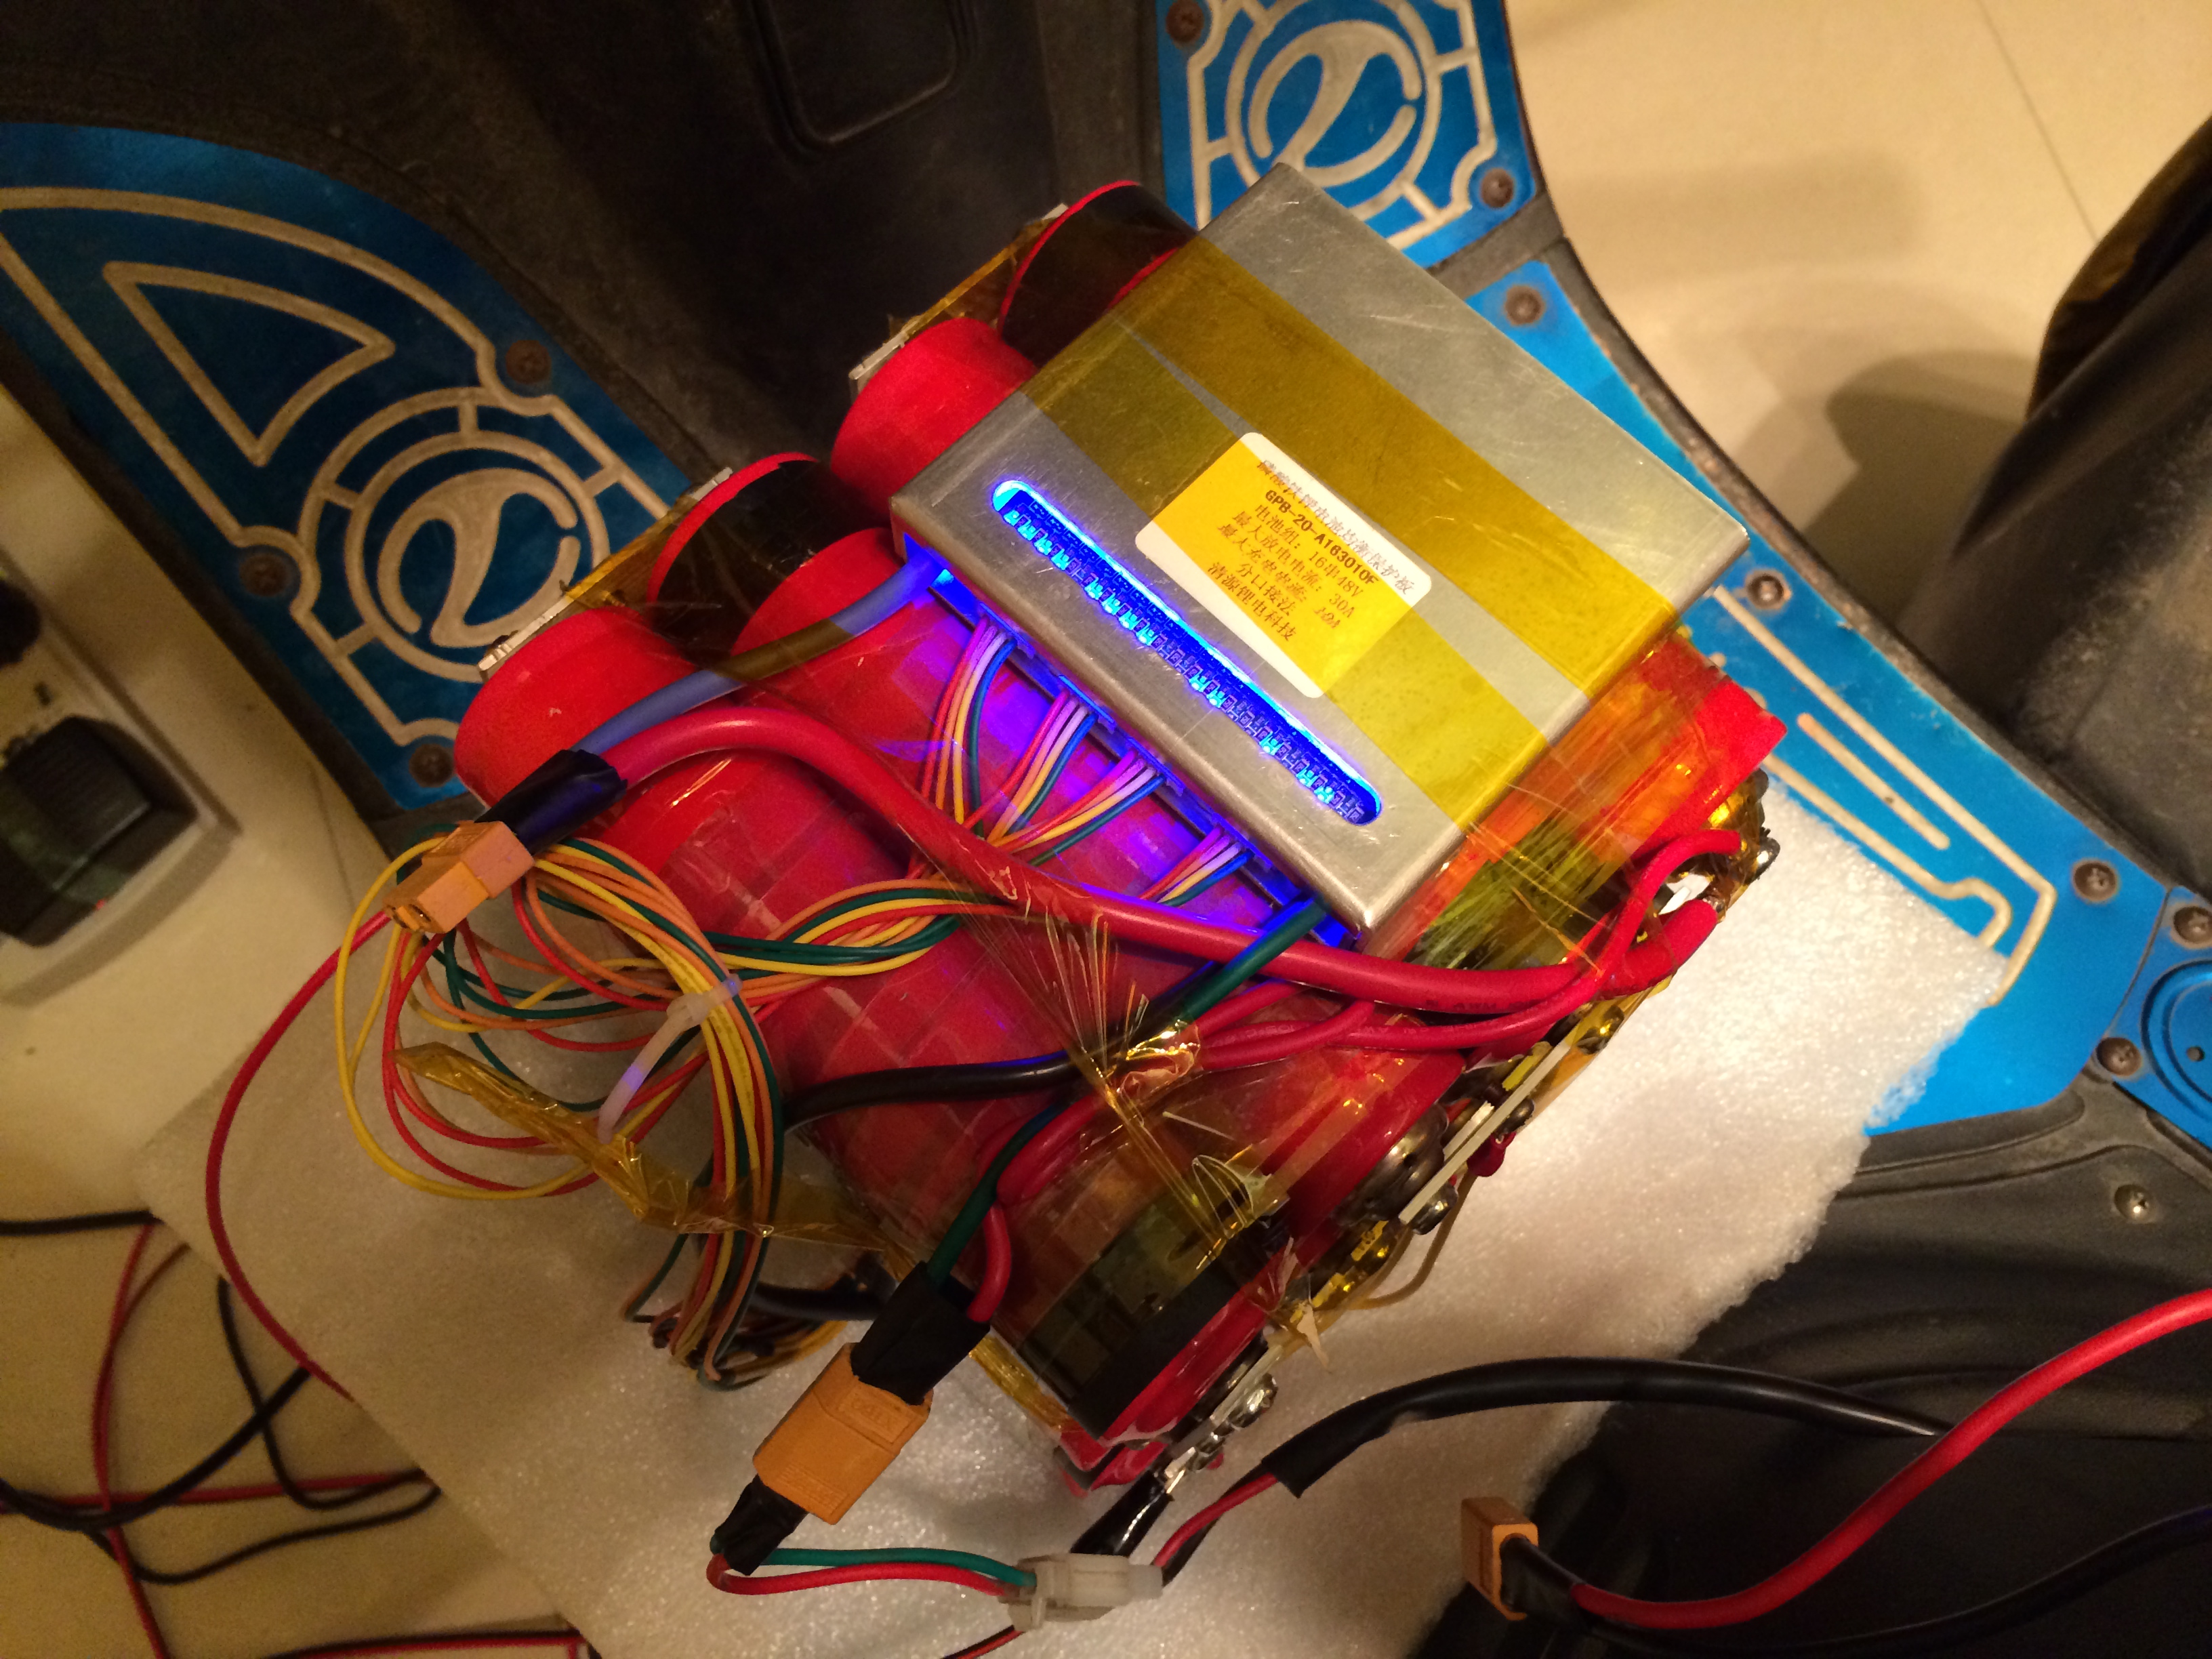
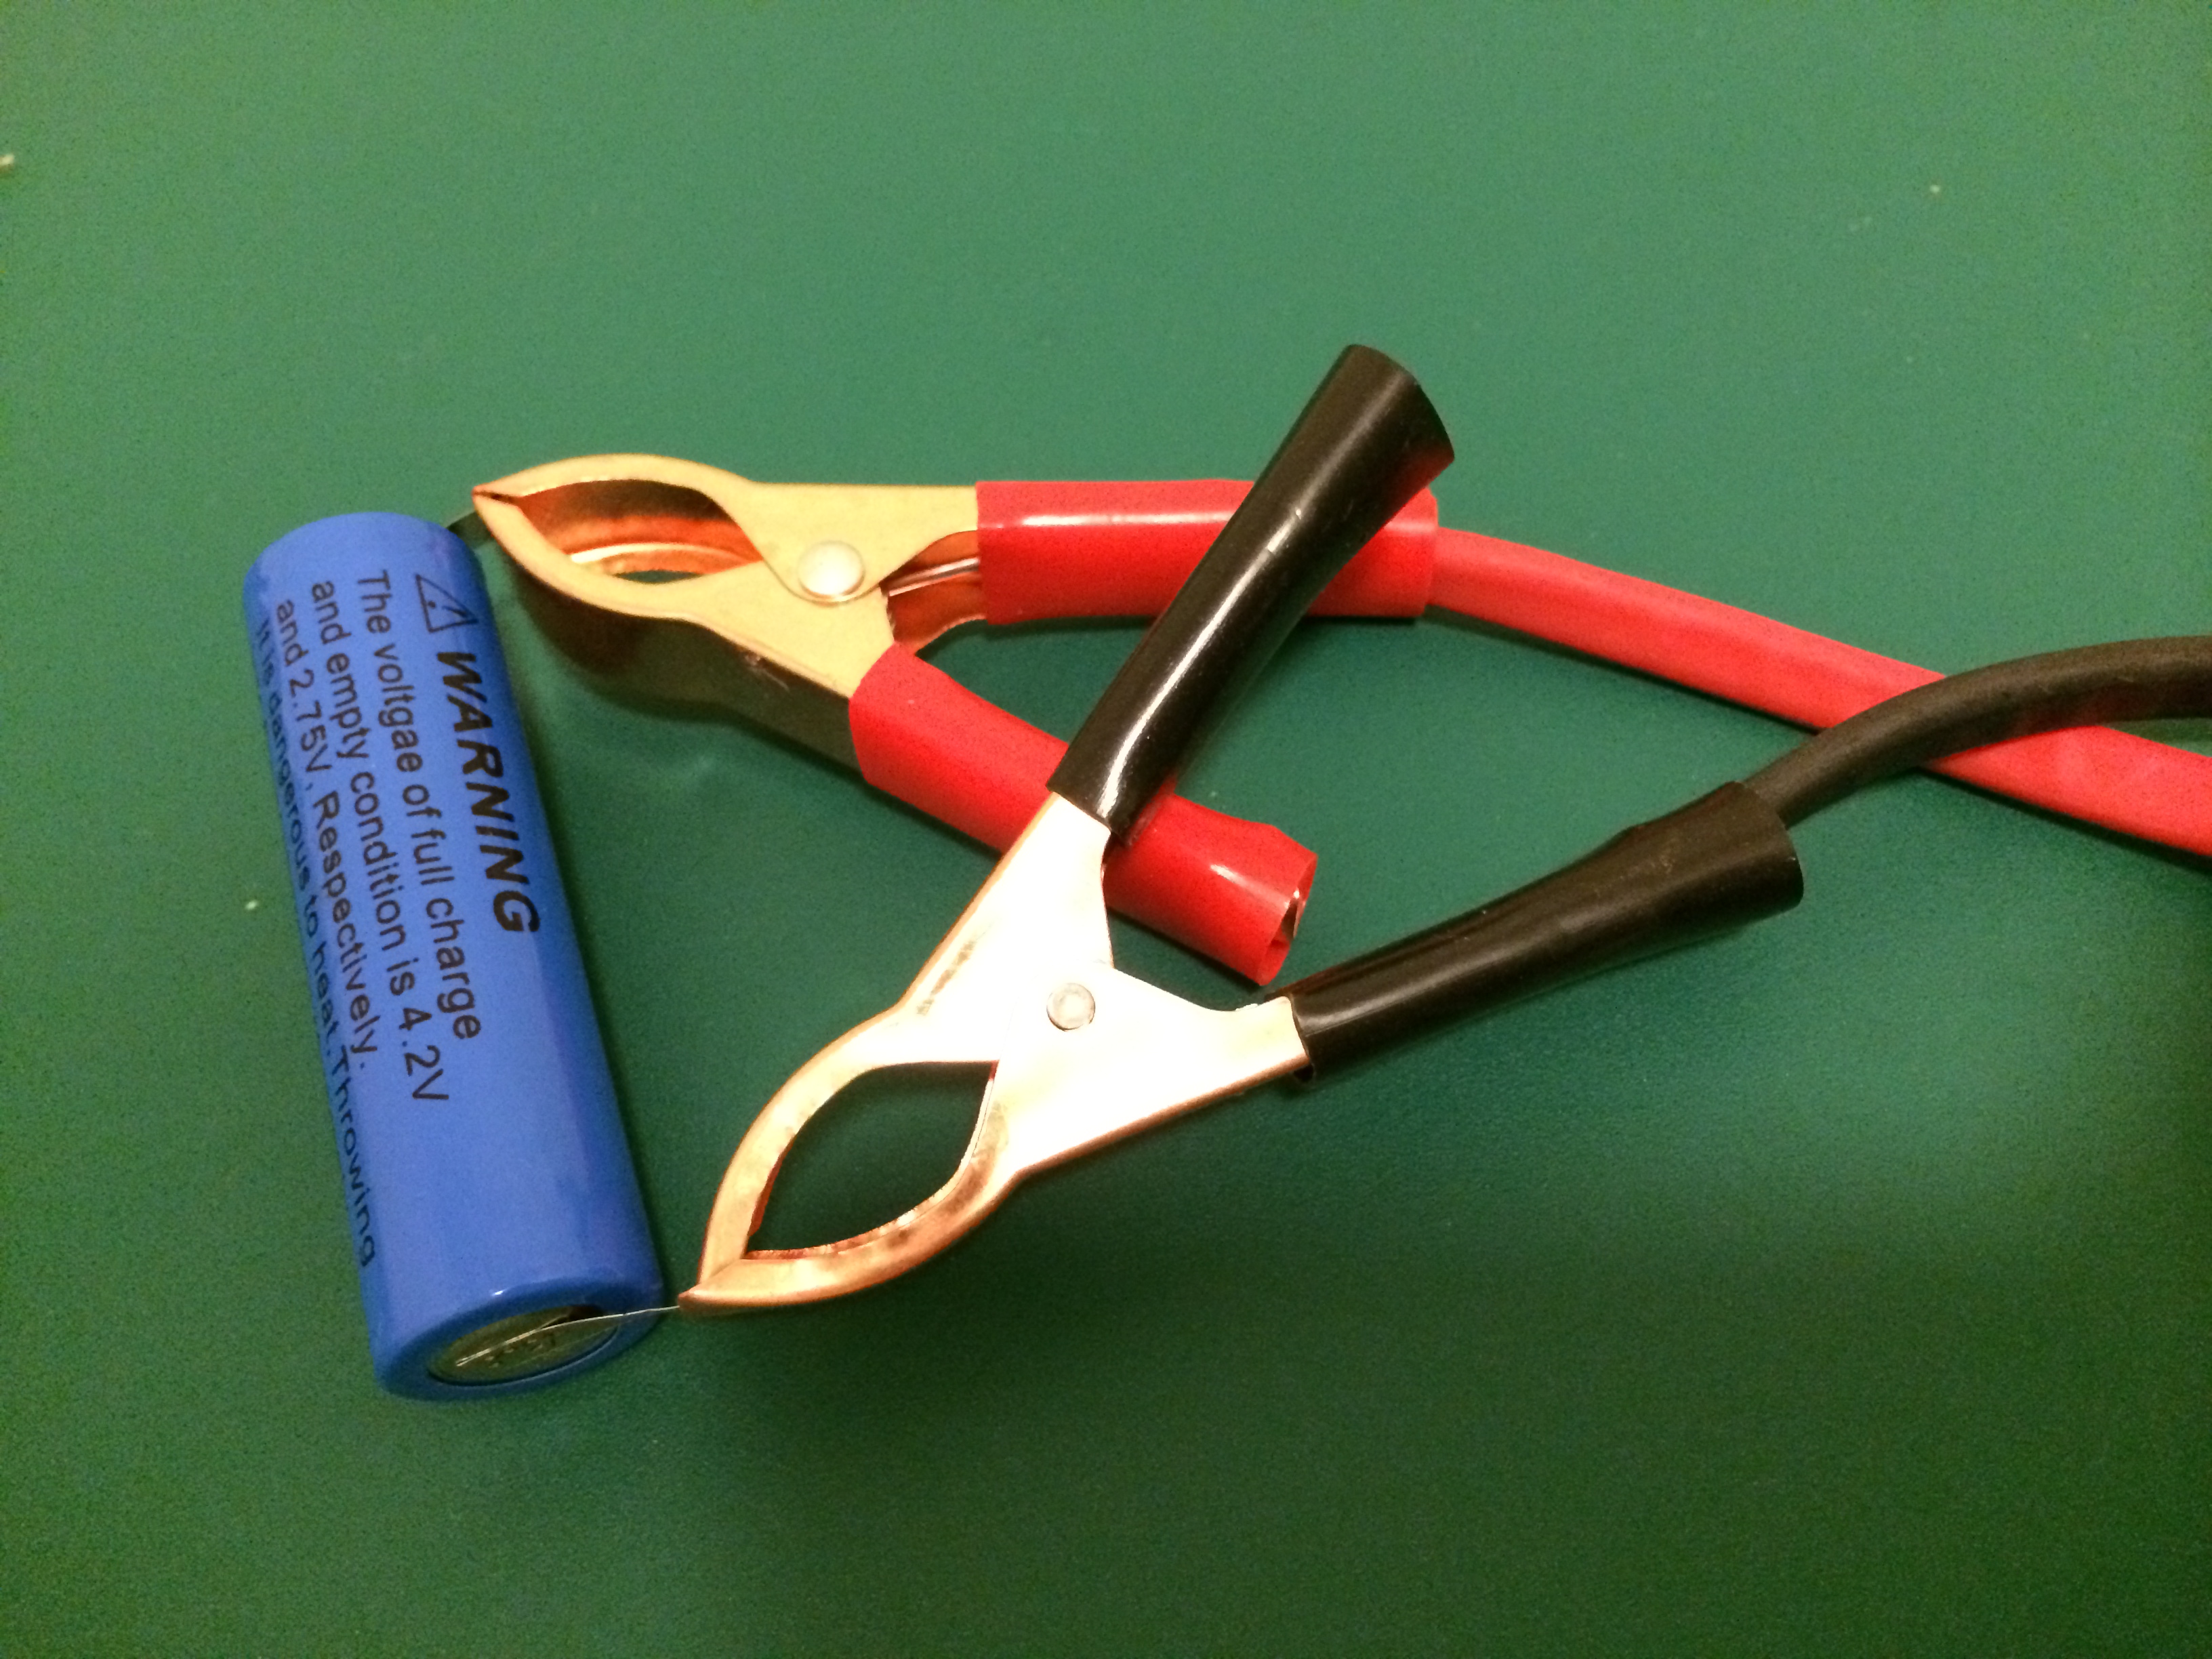
My approach was pretty simple – charge up all batteries through the main charger until some of the lights came on, unplug the pack from the charger (important), and then individually charge each cell with a single-cell charger using alligator clips. After a few cycles of doing this, the whole pack was fully charged and all 16 balance lights were lit. Awww yeah!

IMG_0245

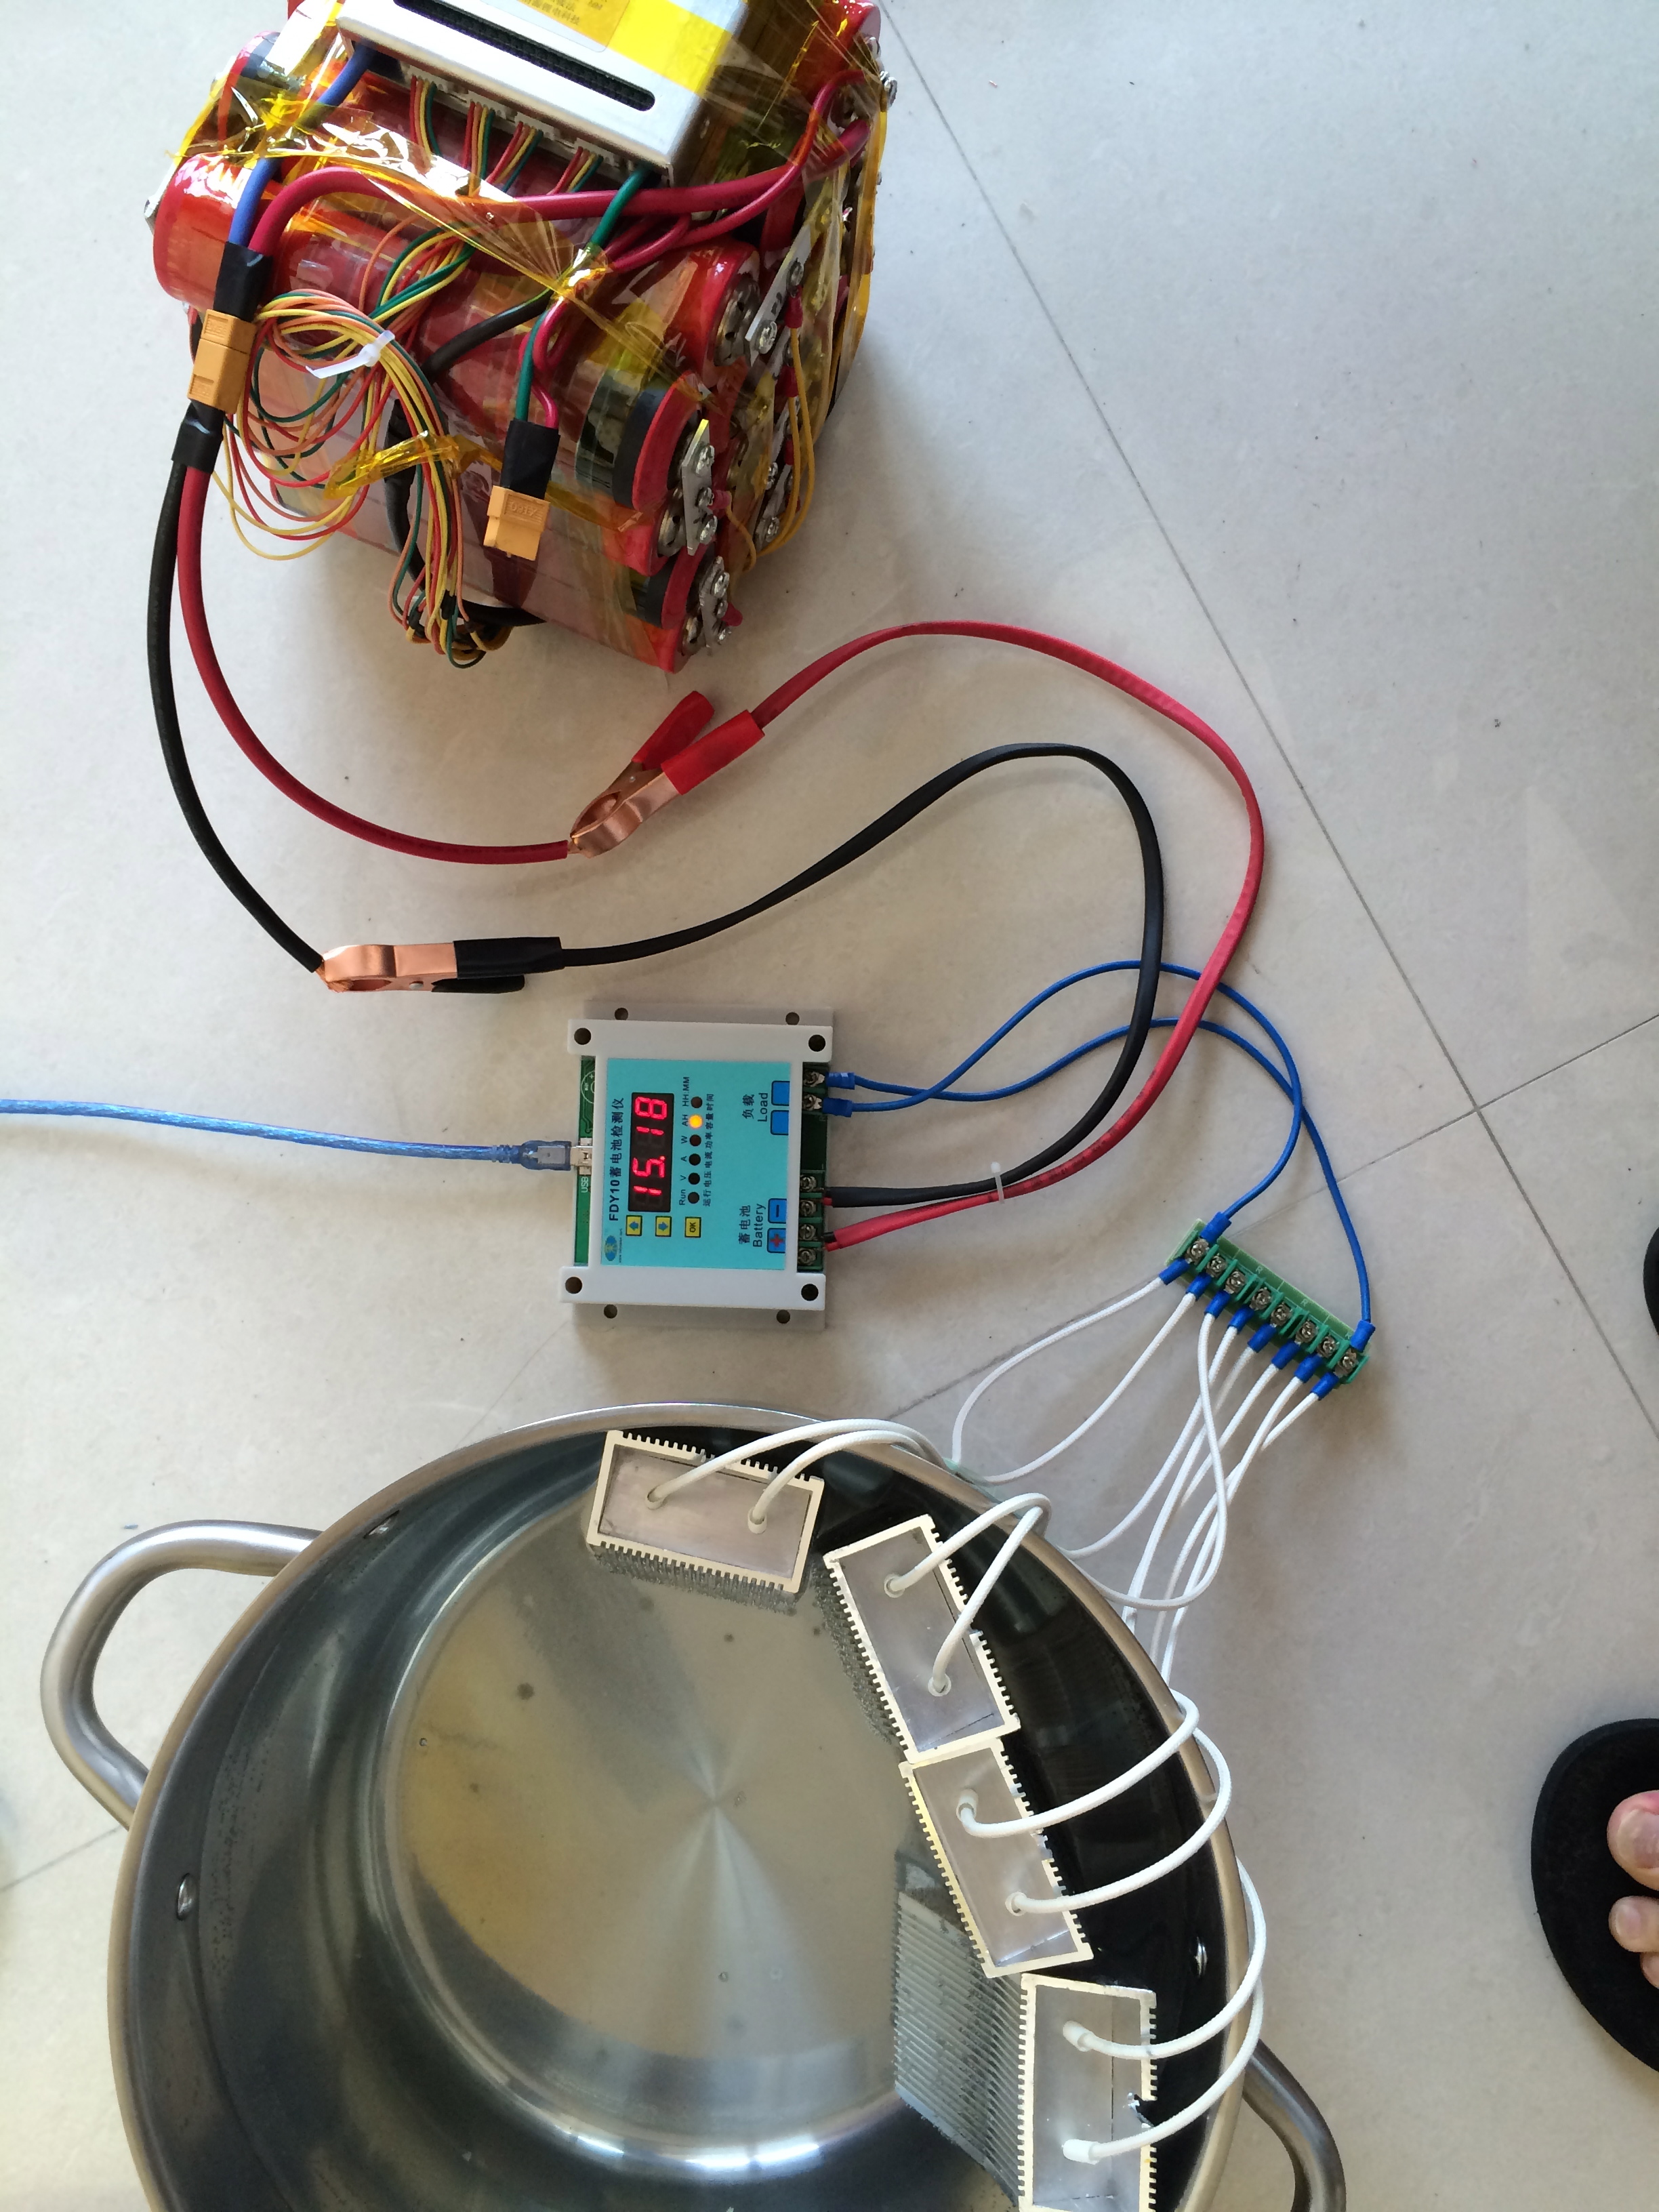
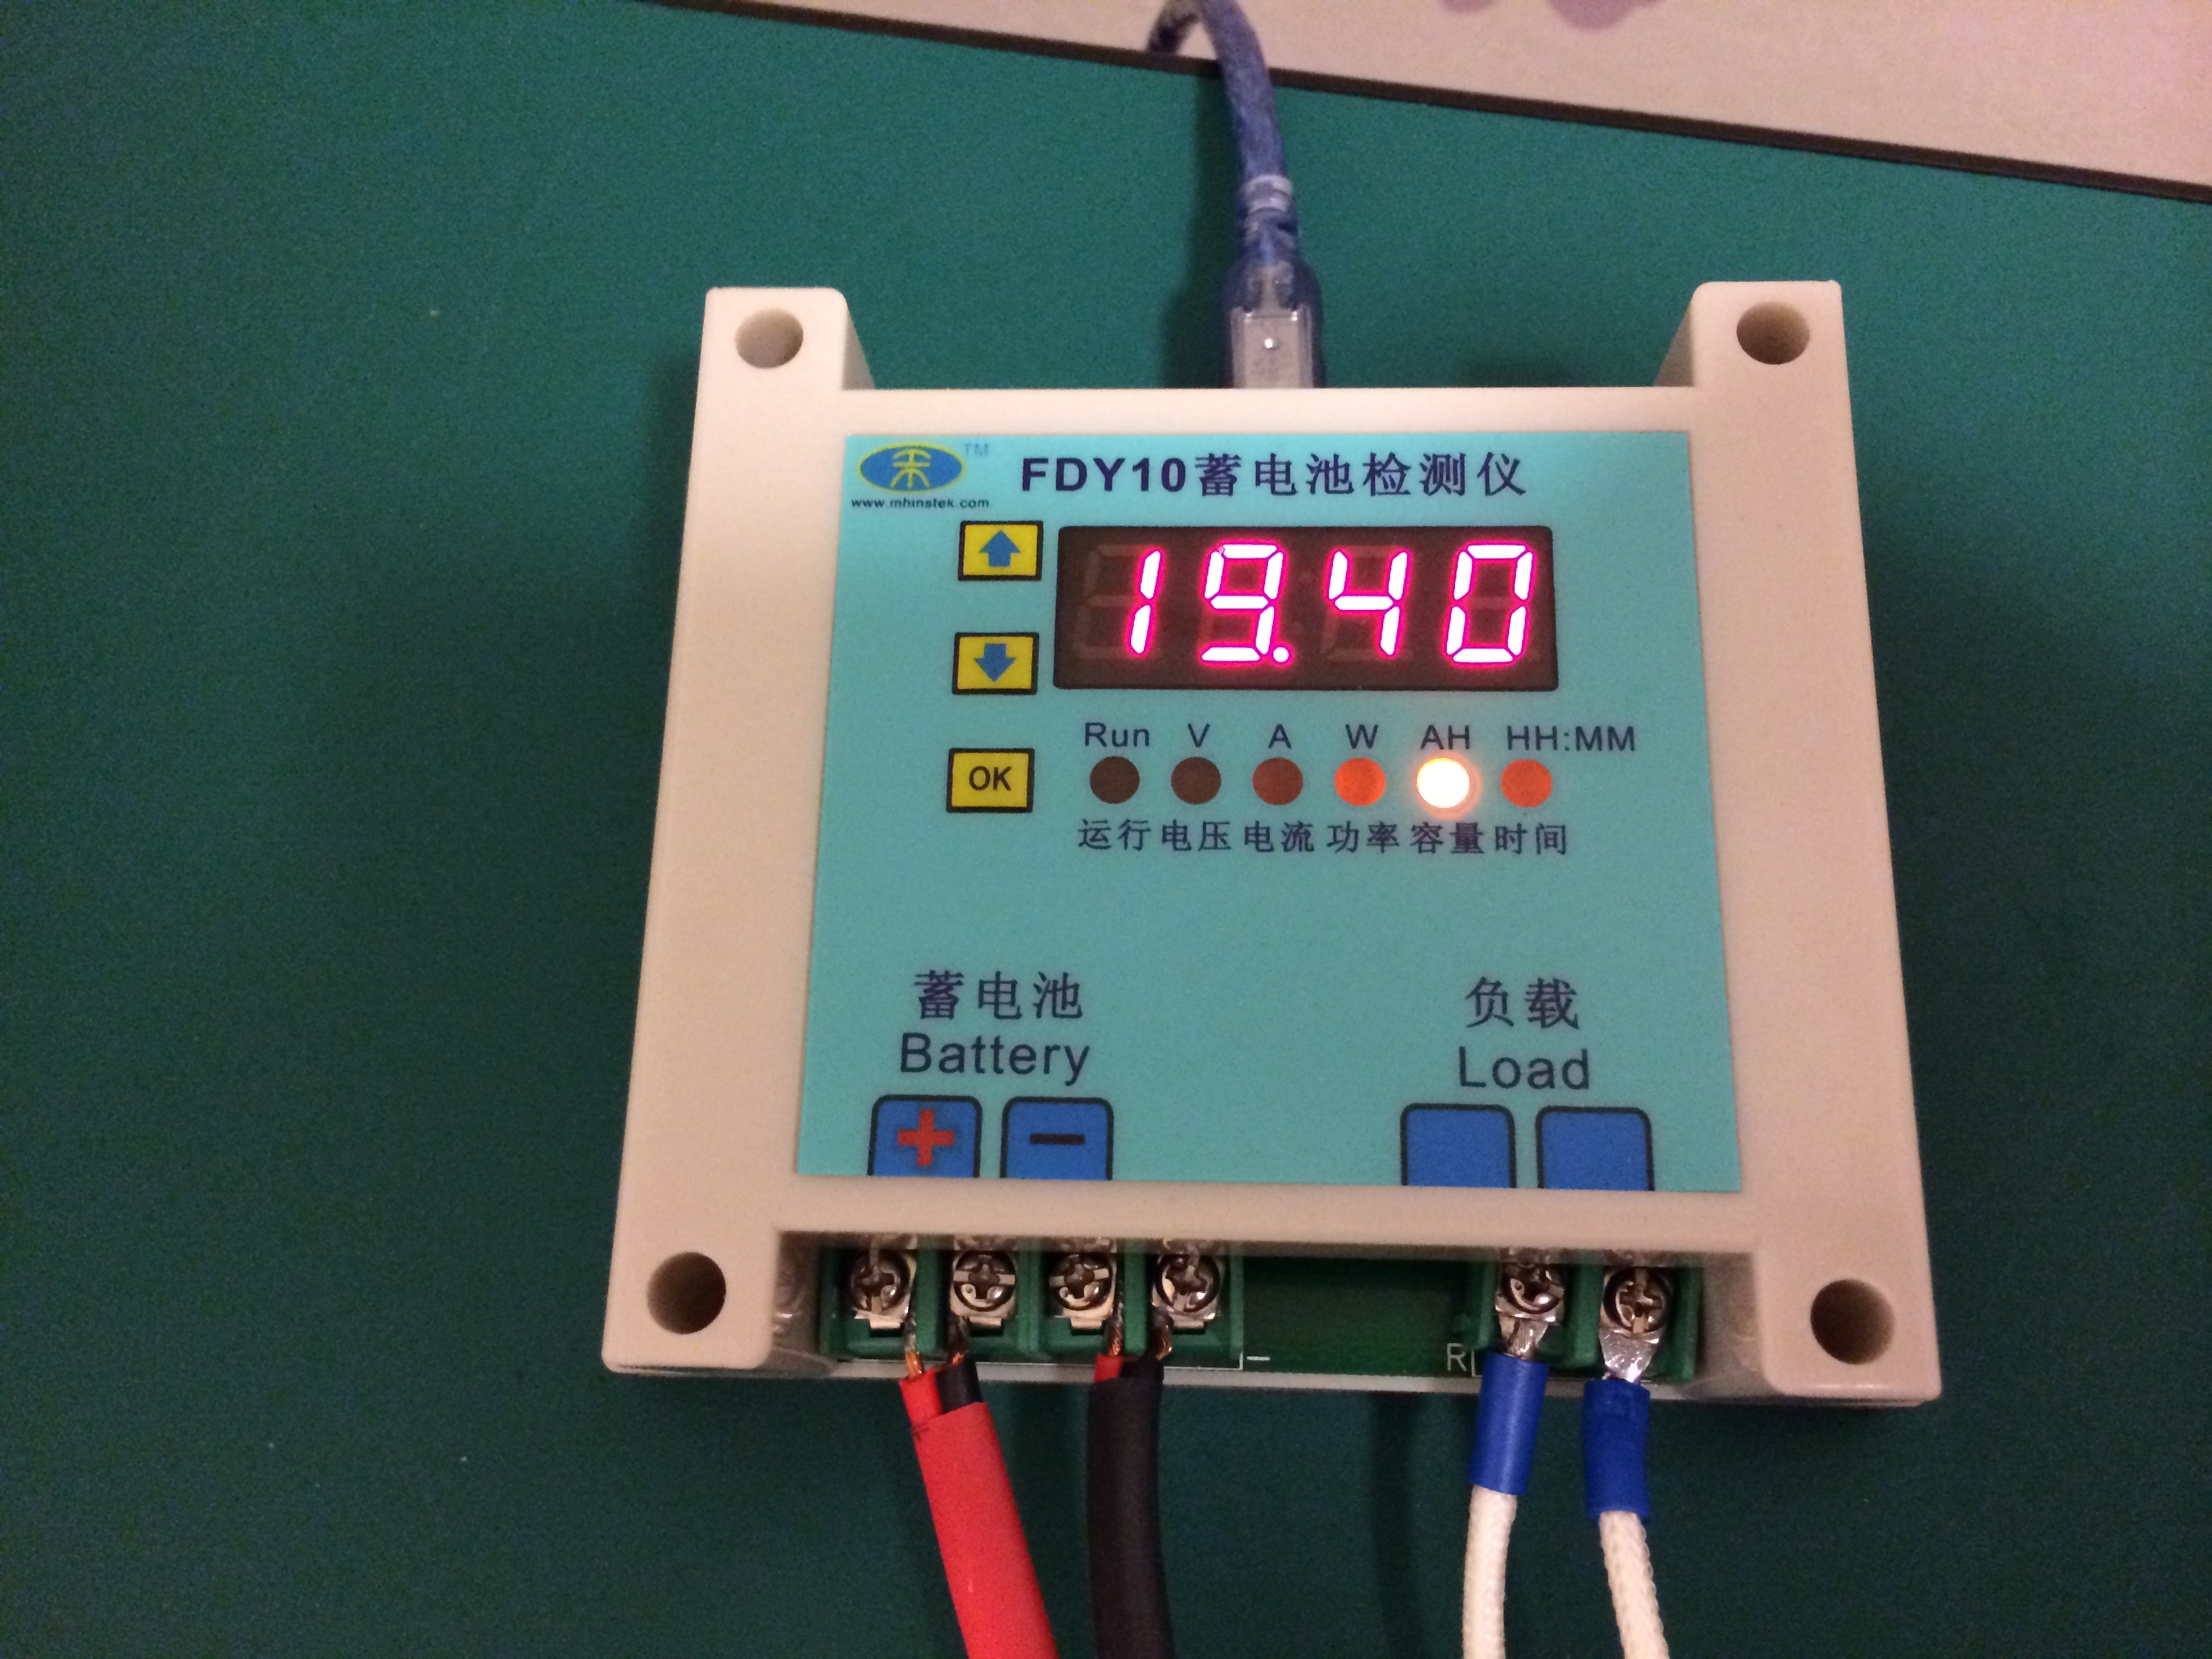
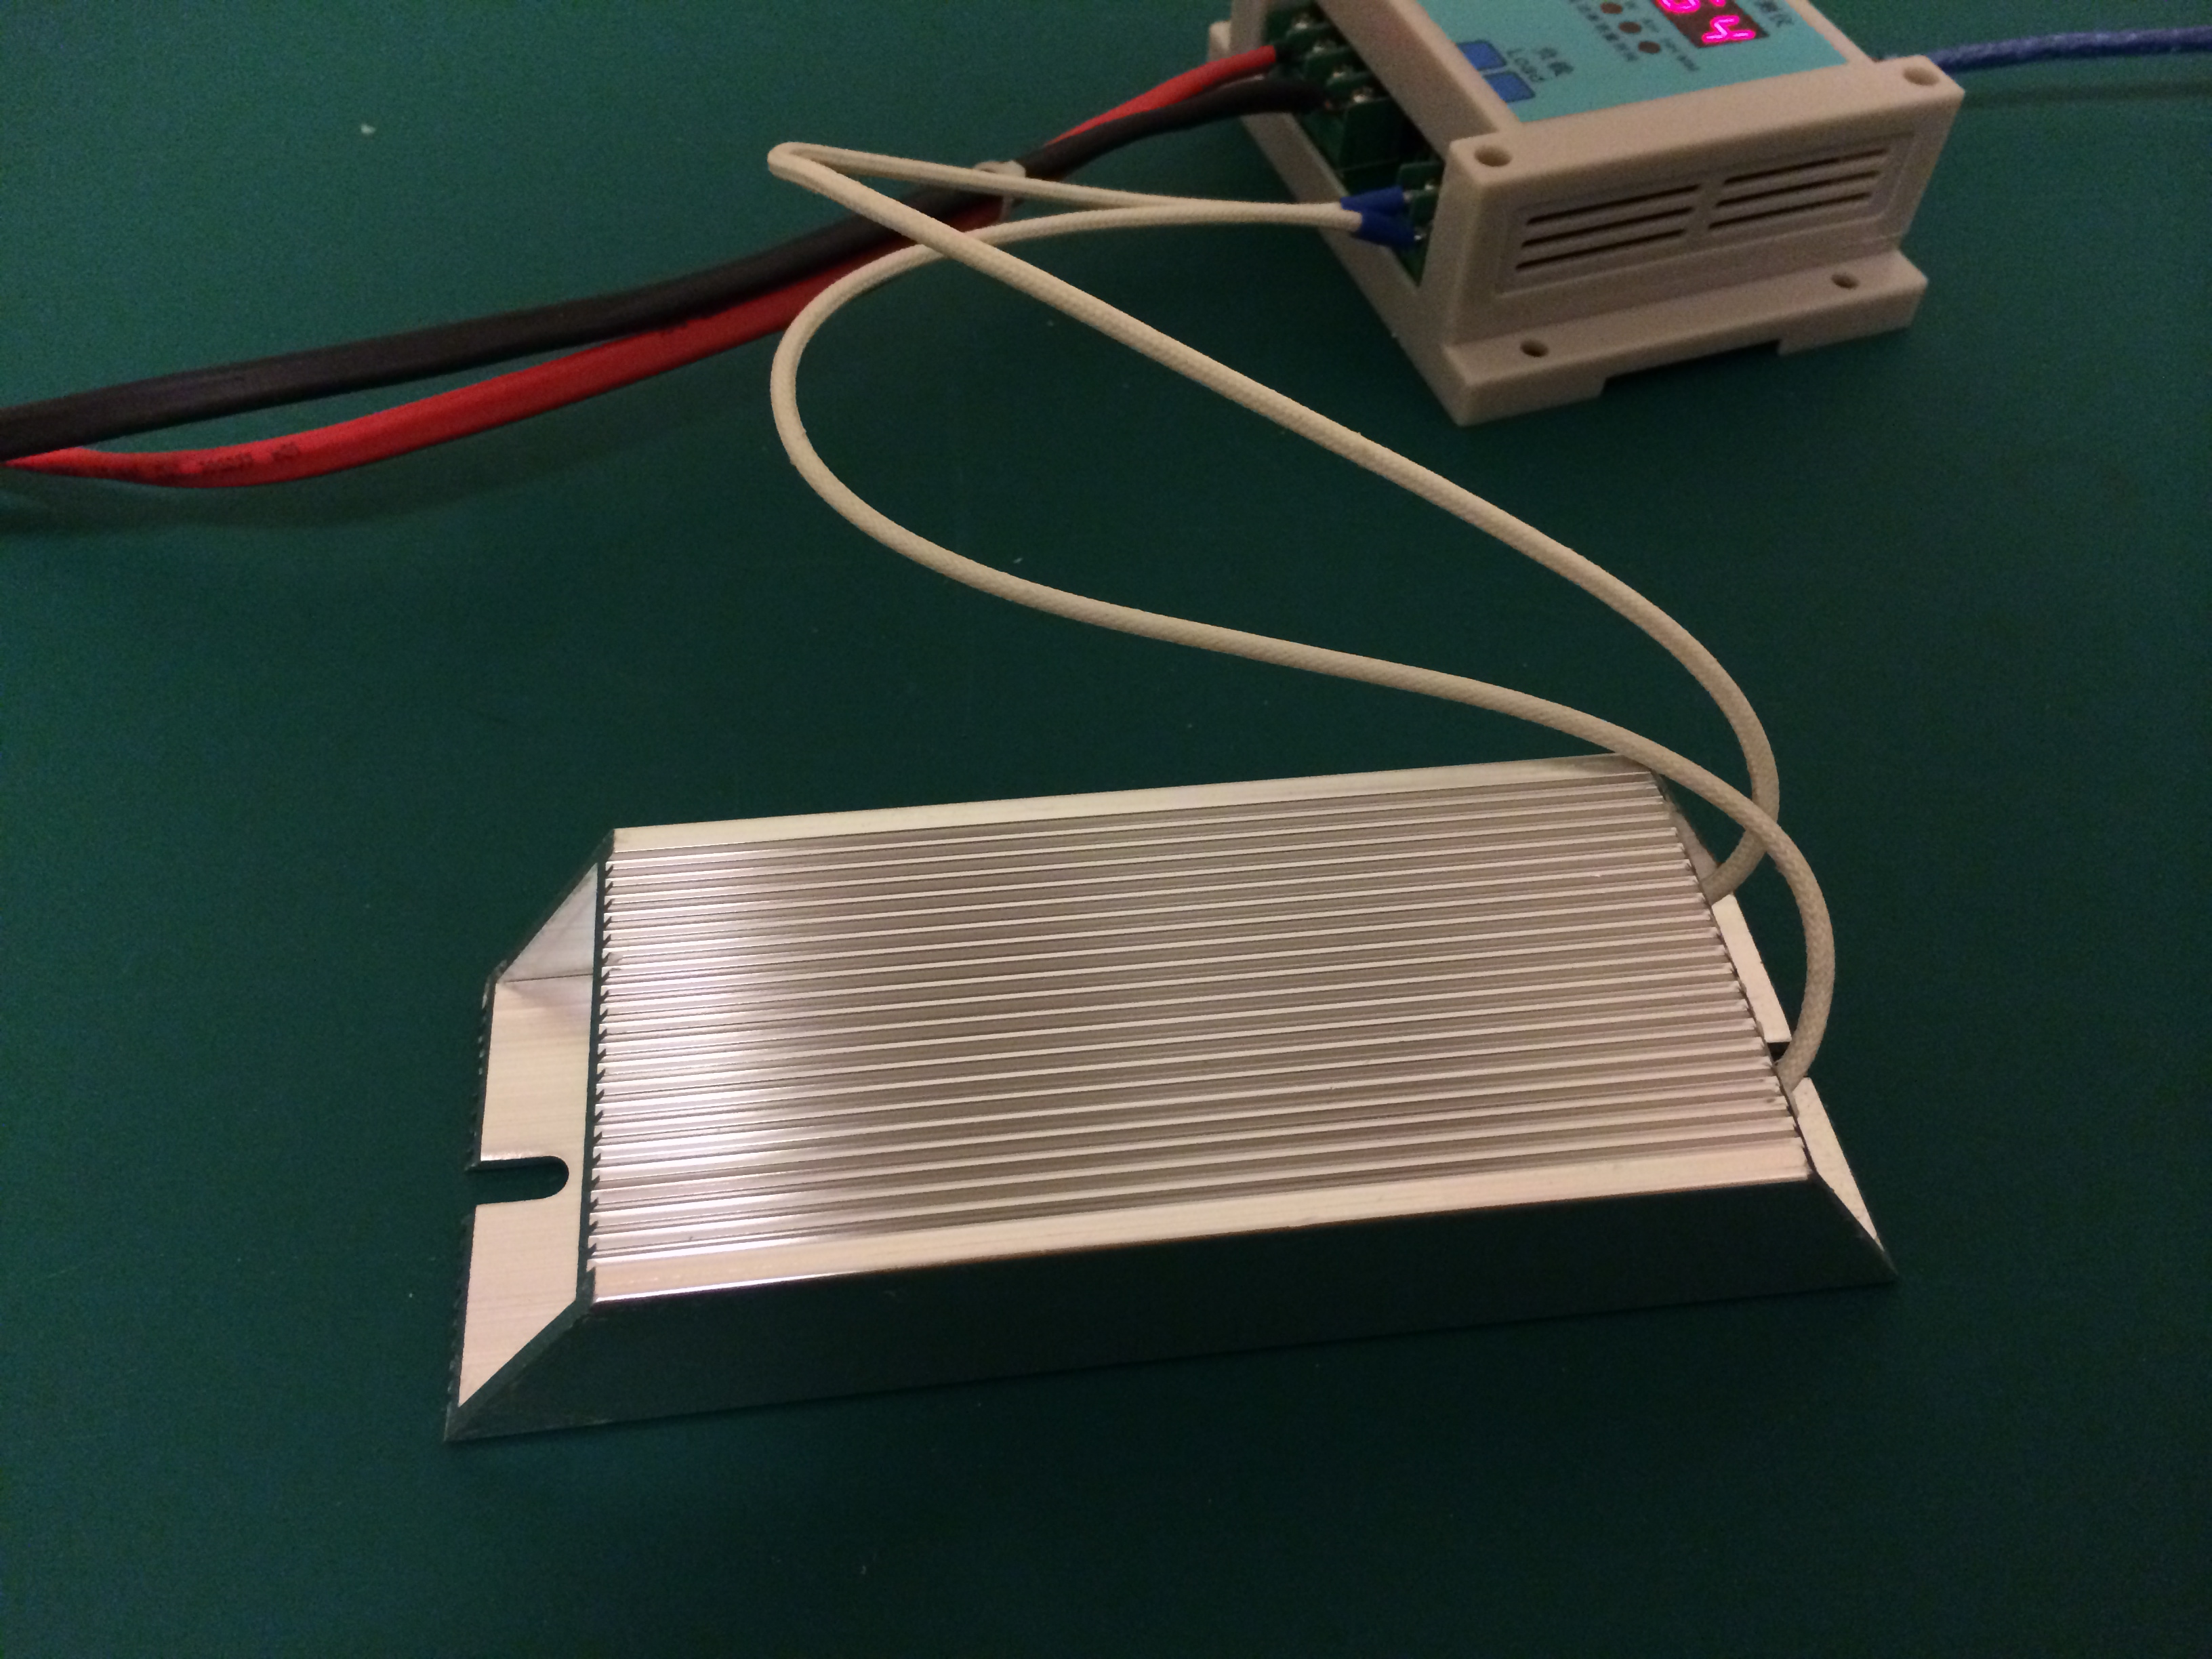
Next, I wanted to verify the capacity of the pack. I hooked it up to the battery capacity tester and set the amperage to 10A. After about 90 minutes the results were in: it tested out as 15.18Ah – slightly more than the advertised capacity of these batteries! I was quite pleased. You’ll note the power resistors were in a water bath – they were putting out a total of about 500 watts during testing and got quite hot – I even had to change to colder water about halfway through otherwise it might have started boiling. Will definitely need to get a better setup later as water + heaters isn’t exactly a brilliant idea.

IMG_0252

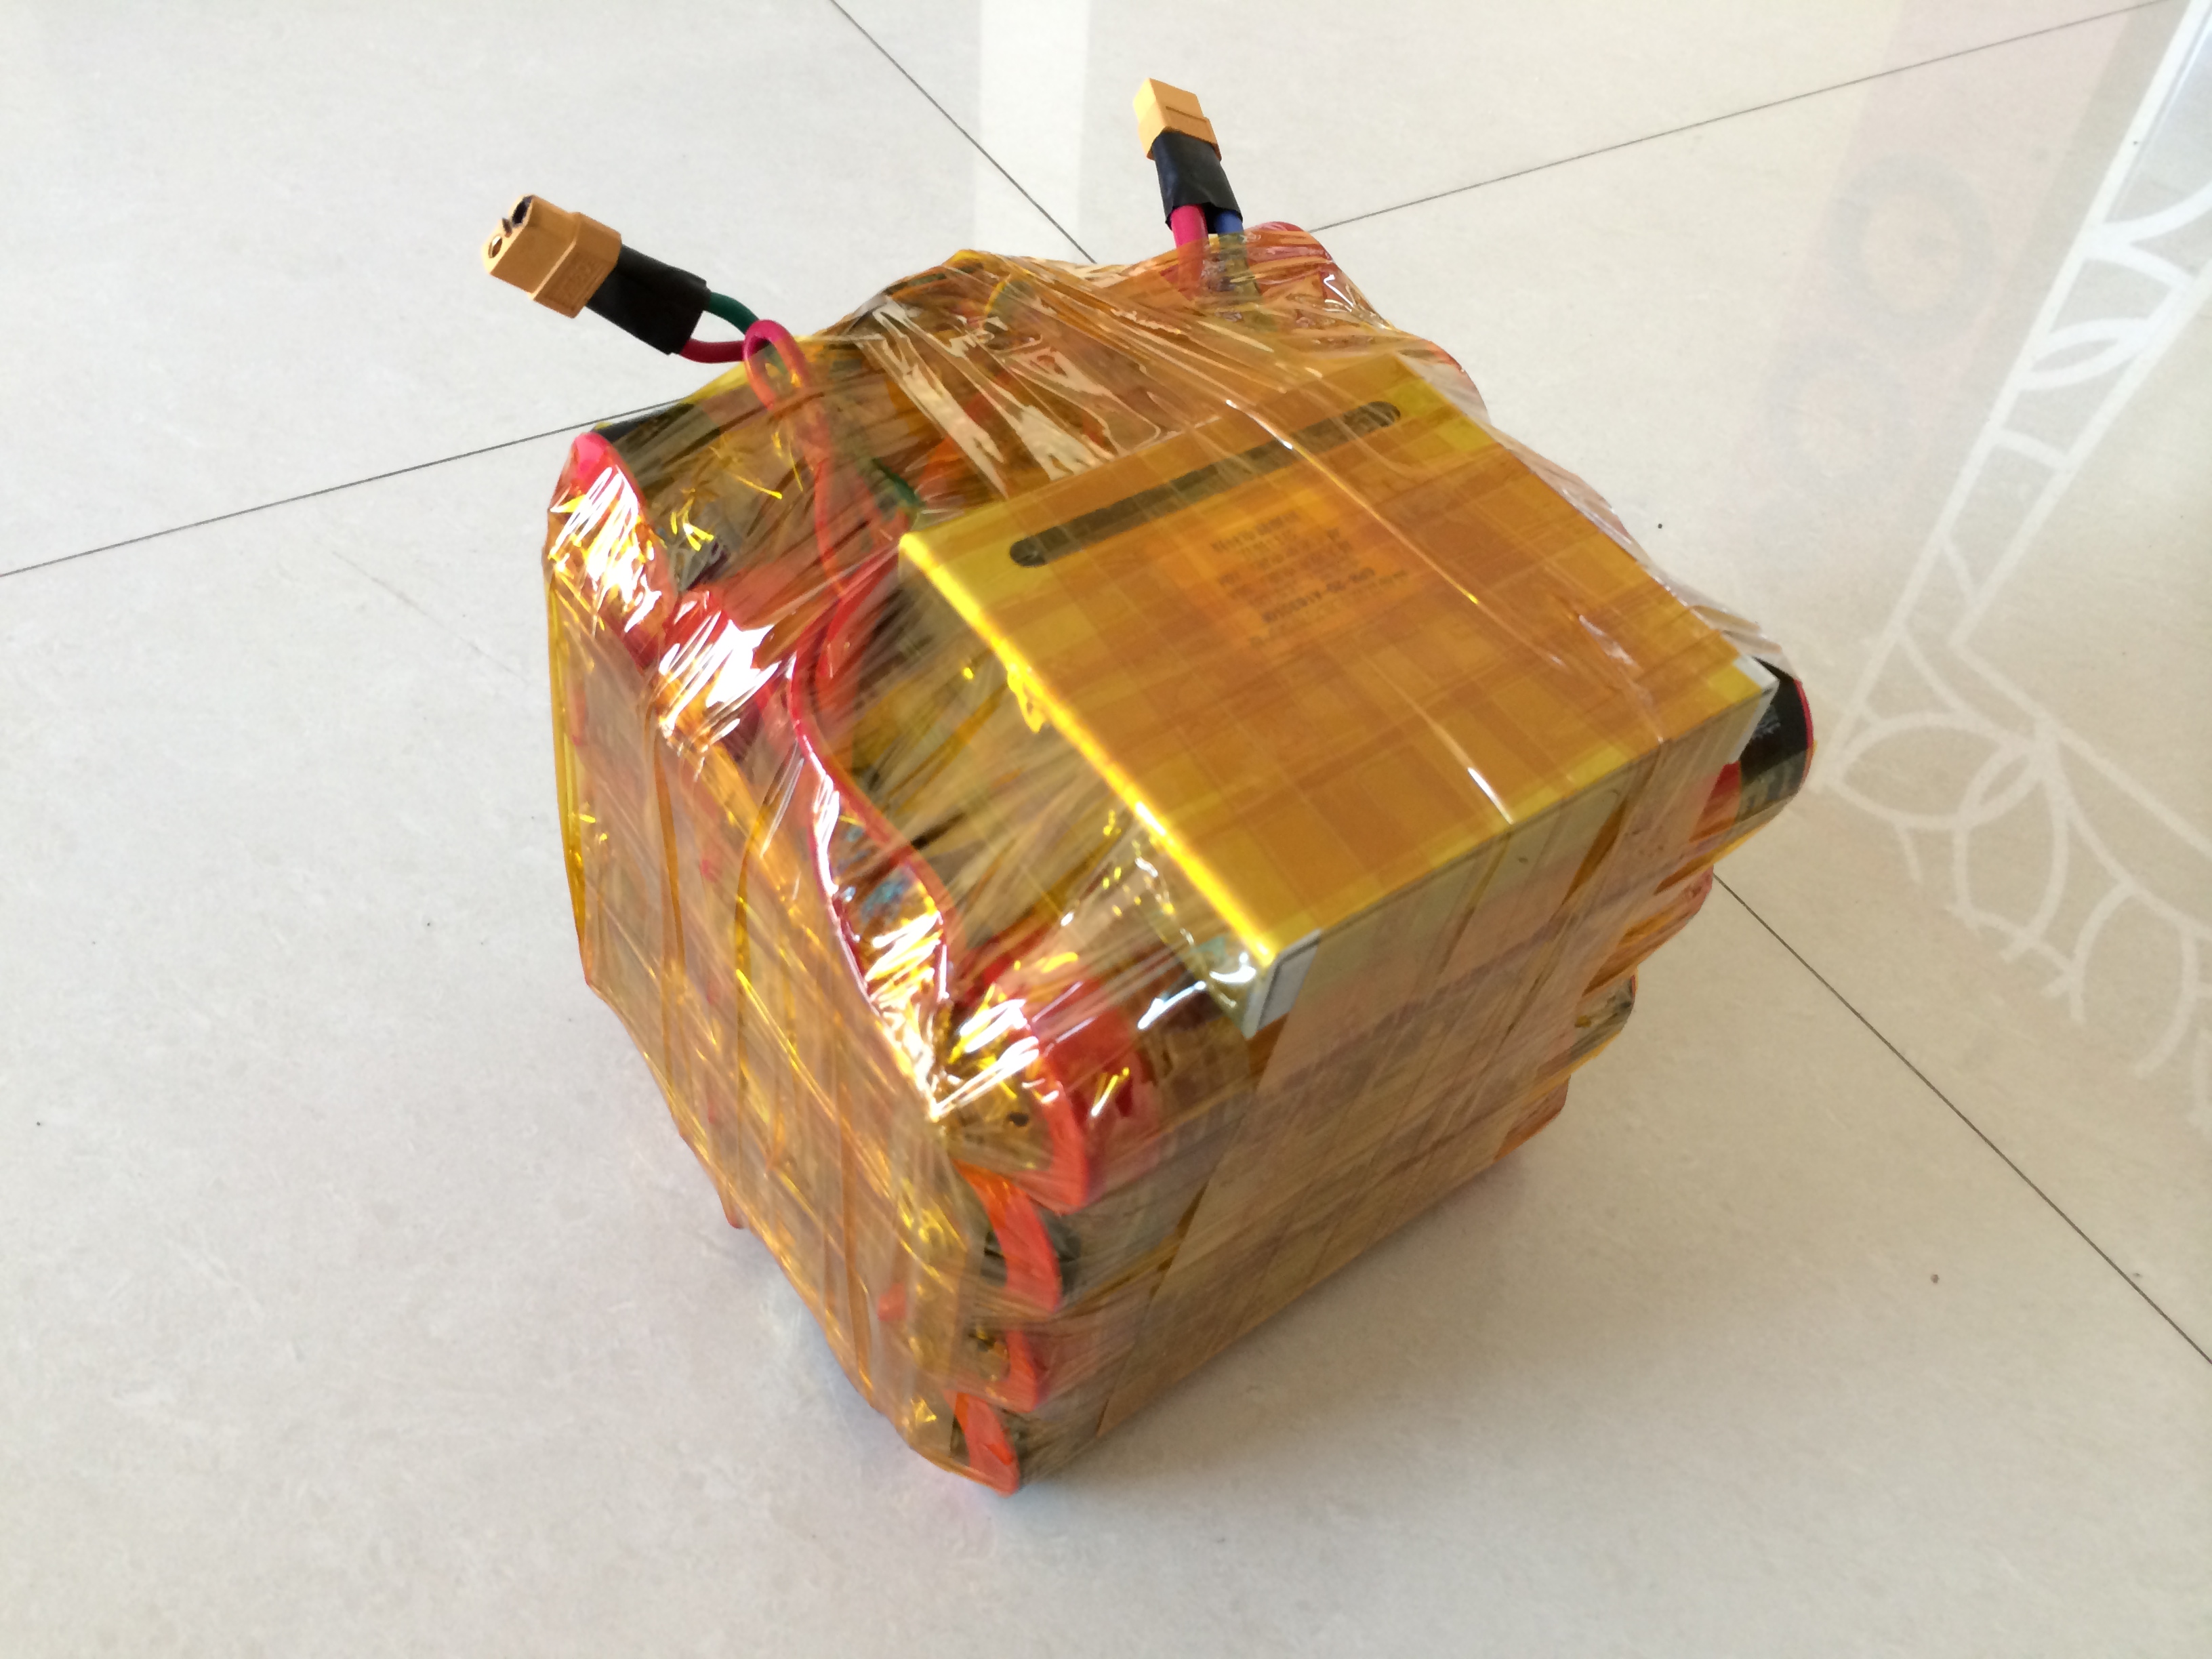
Once my pack was verified and good to go, I did the final layer of wrapping to prepare it for going into the bike. I was gluttonous and used an entire role of Kapton tape. Sometimes I just love living in Shenzhen where its about a buck a roll. I left air holes in case the batteries need to vent and left the cables out. Since the kapton is translucent, I was still able to see the balance indicators through the opening while protecting the electronics from dust and road particles.

IMG_0287

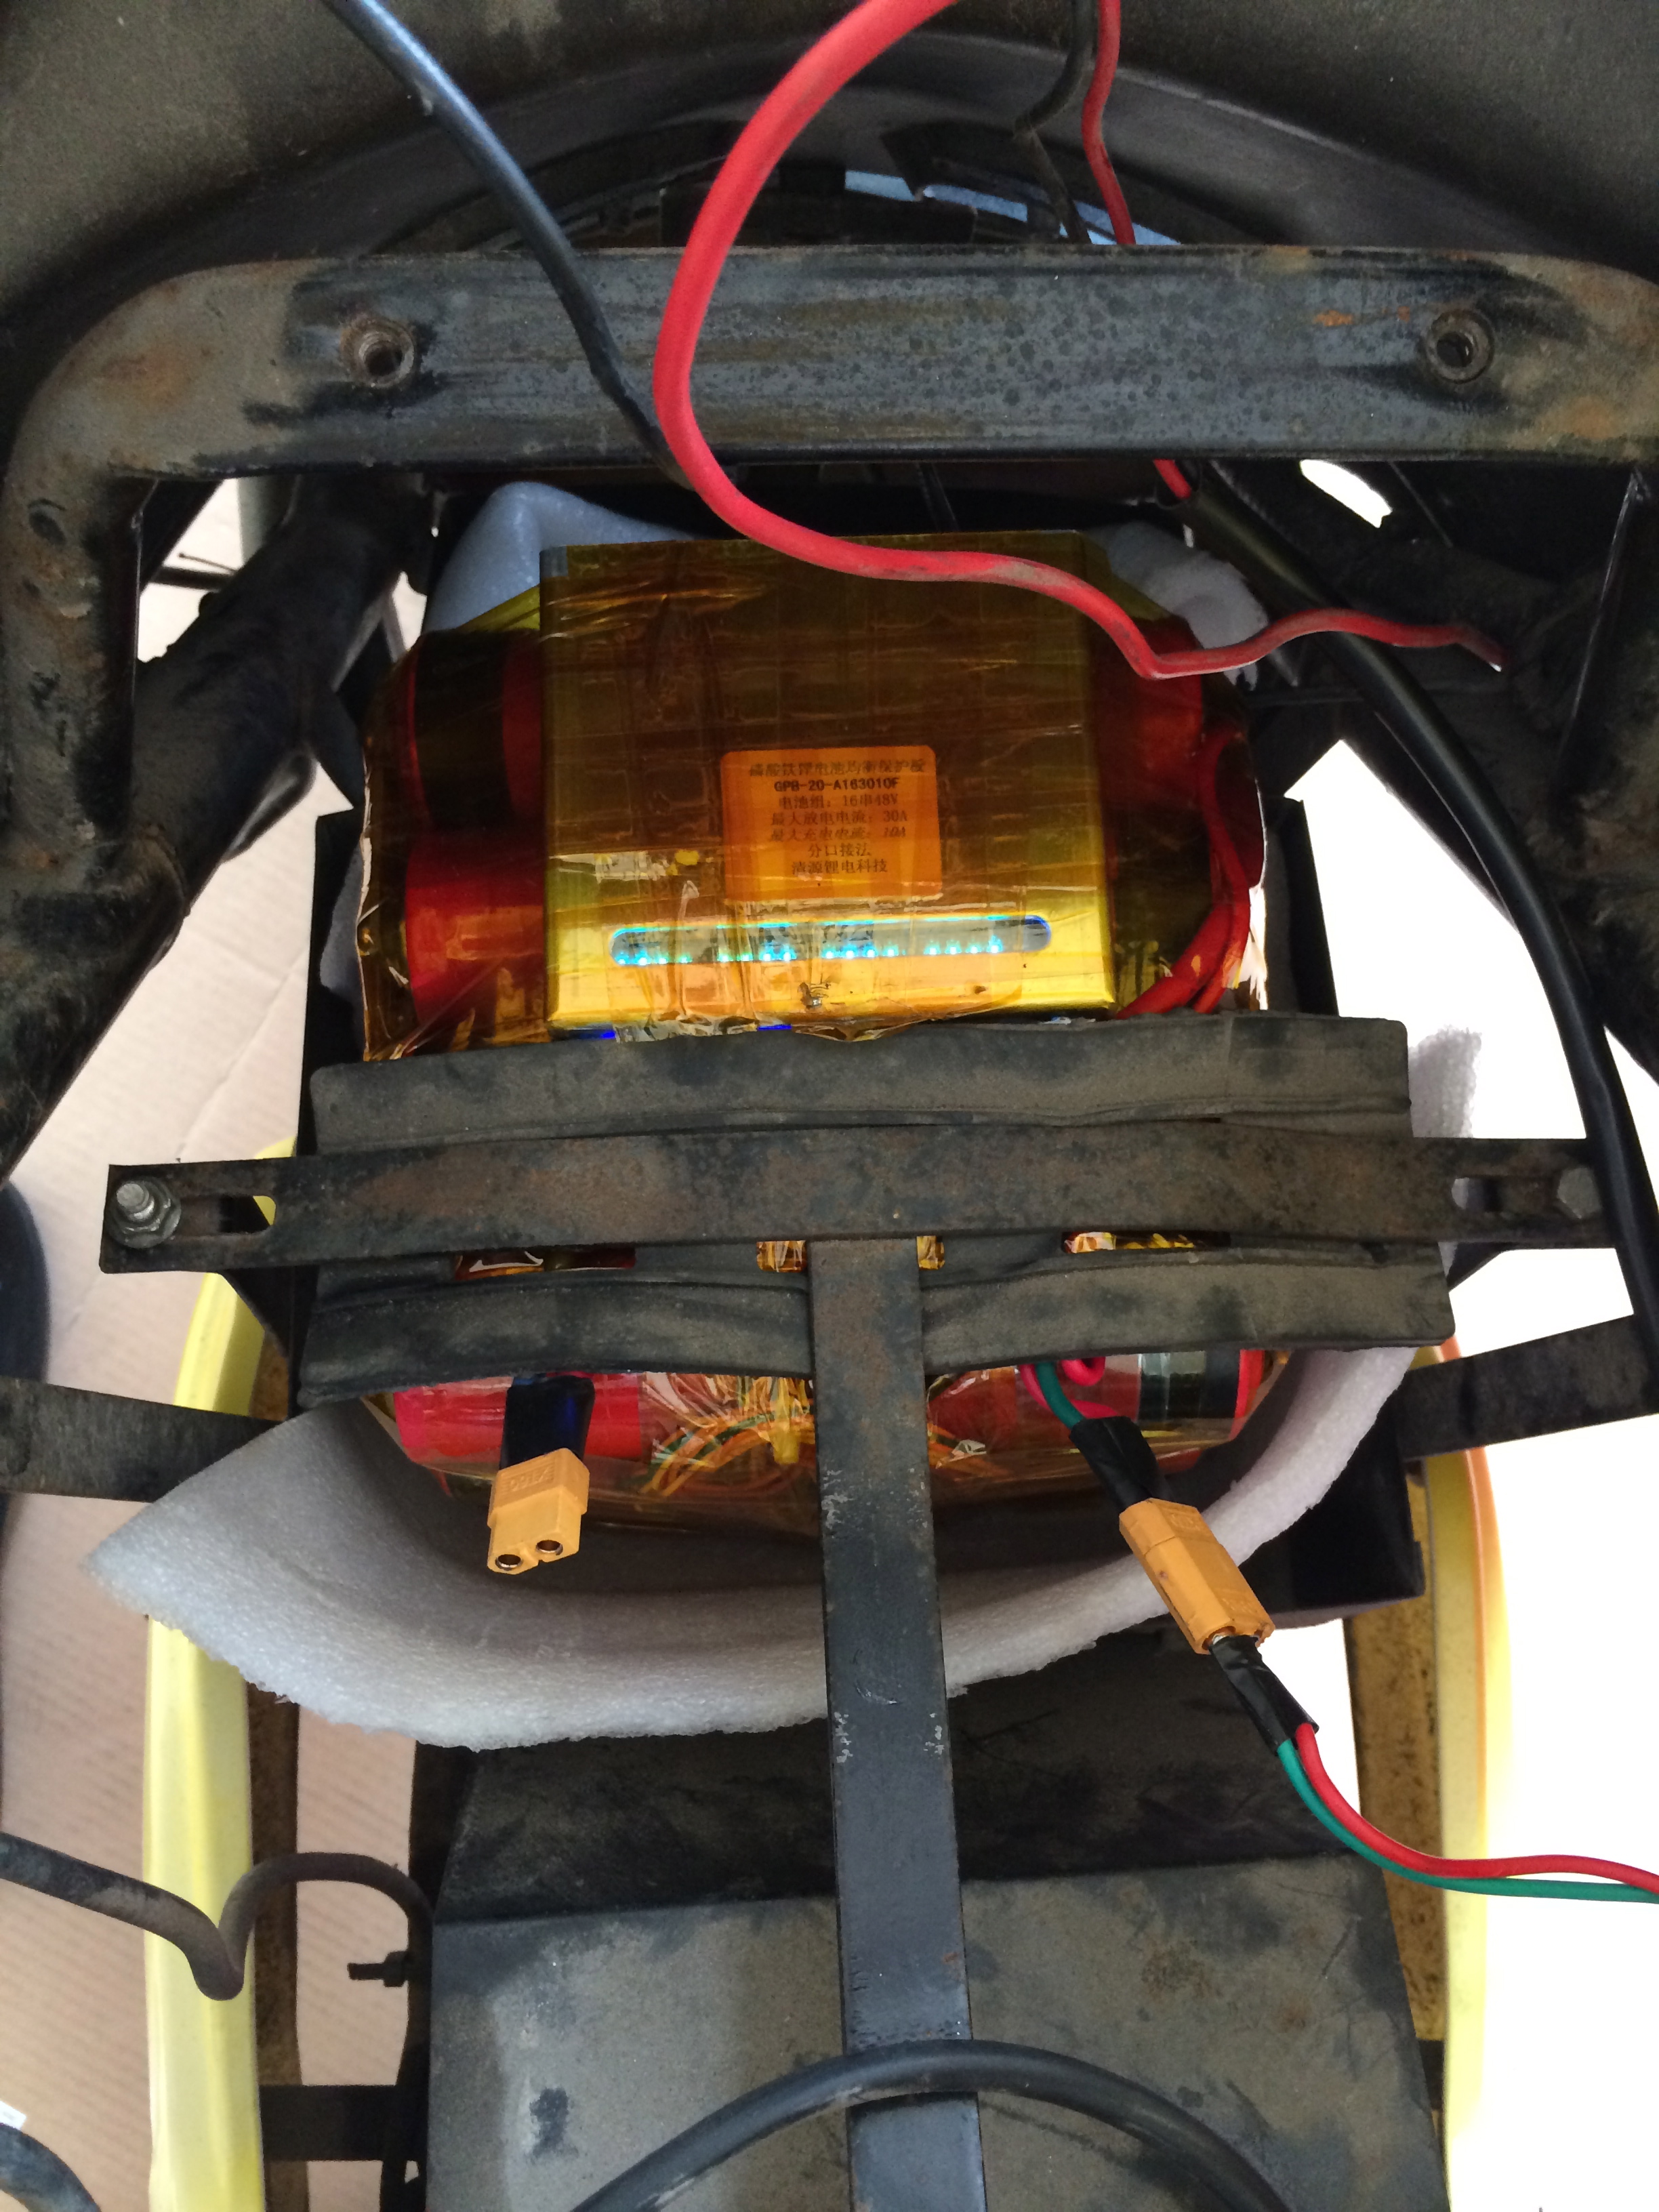
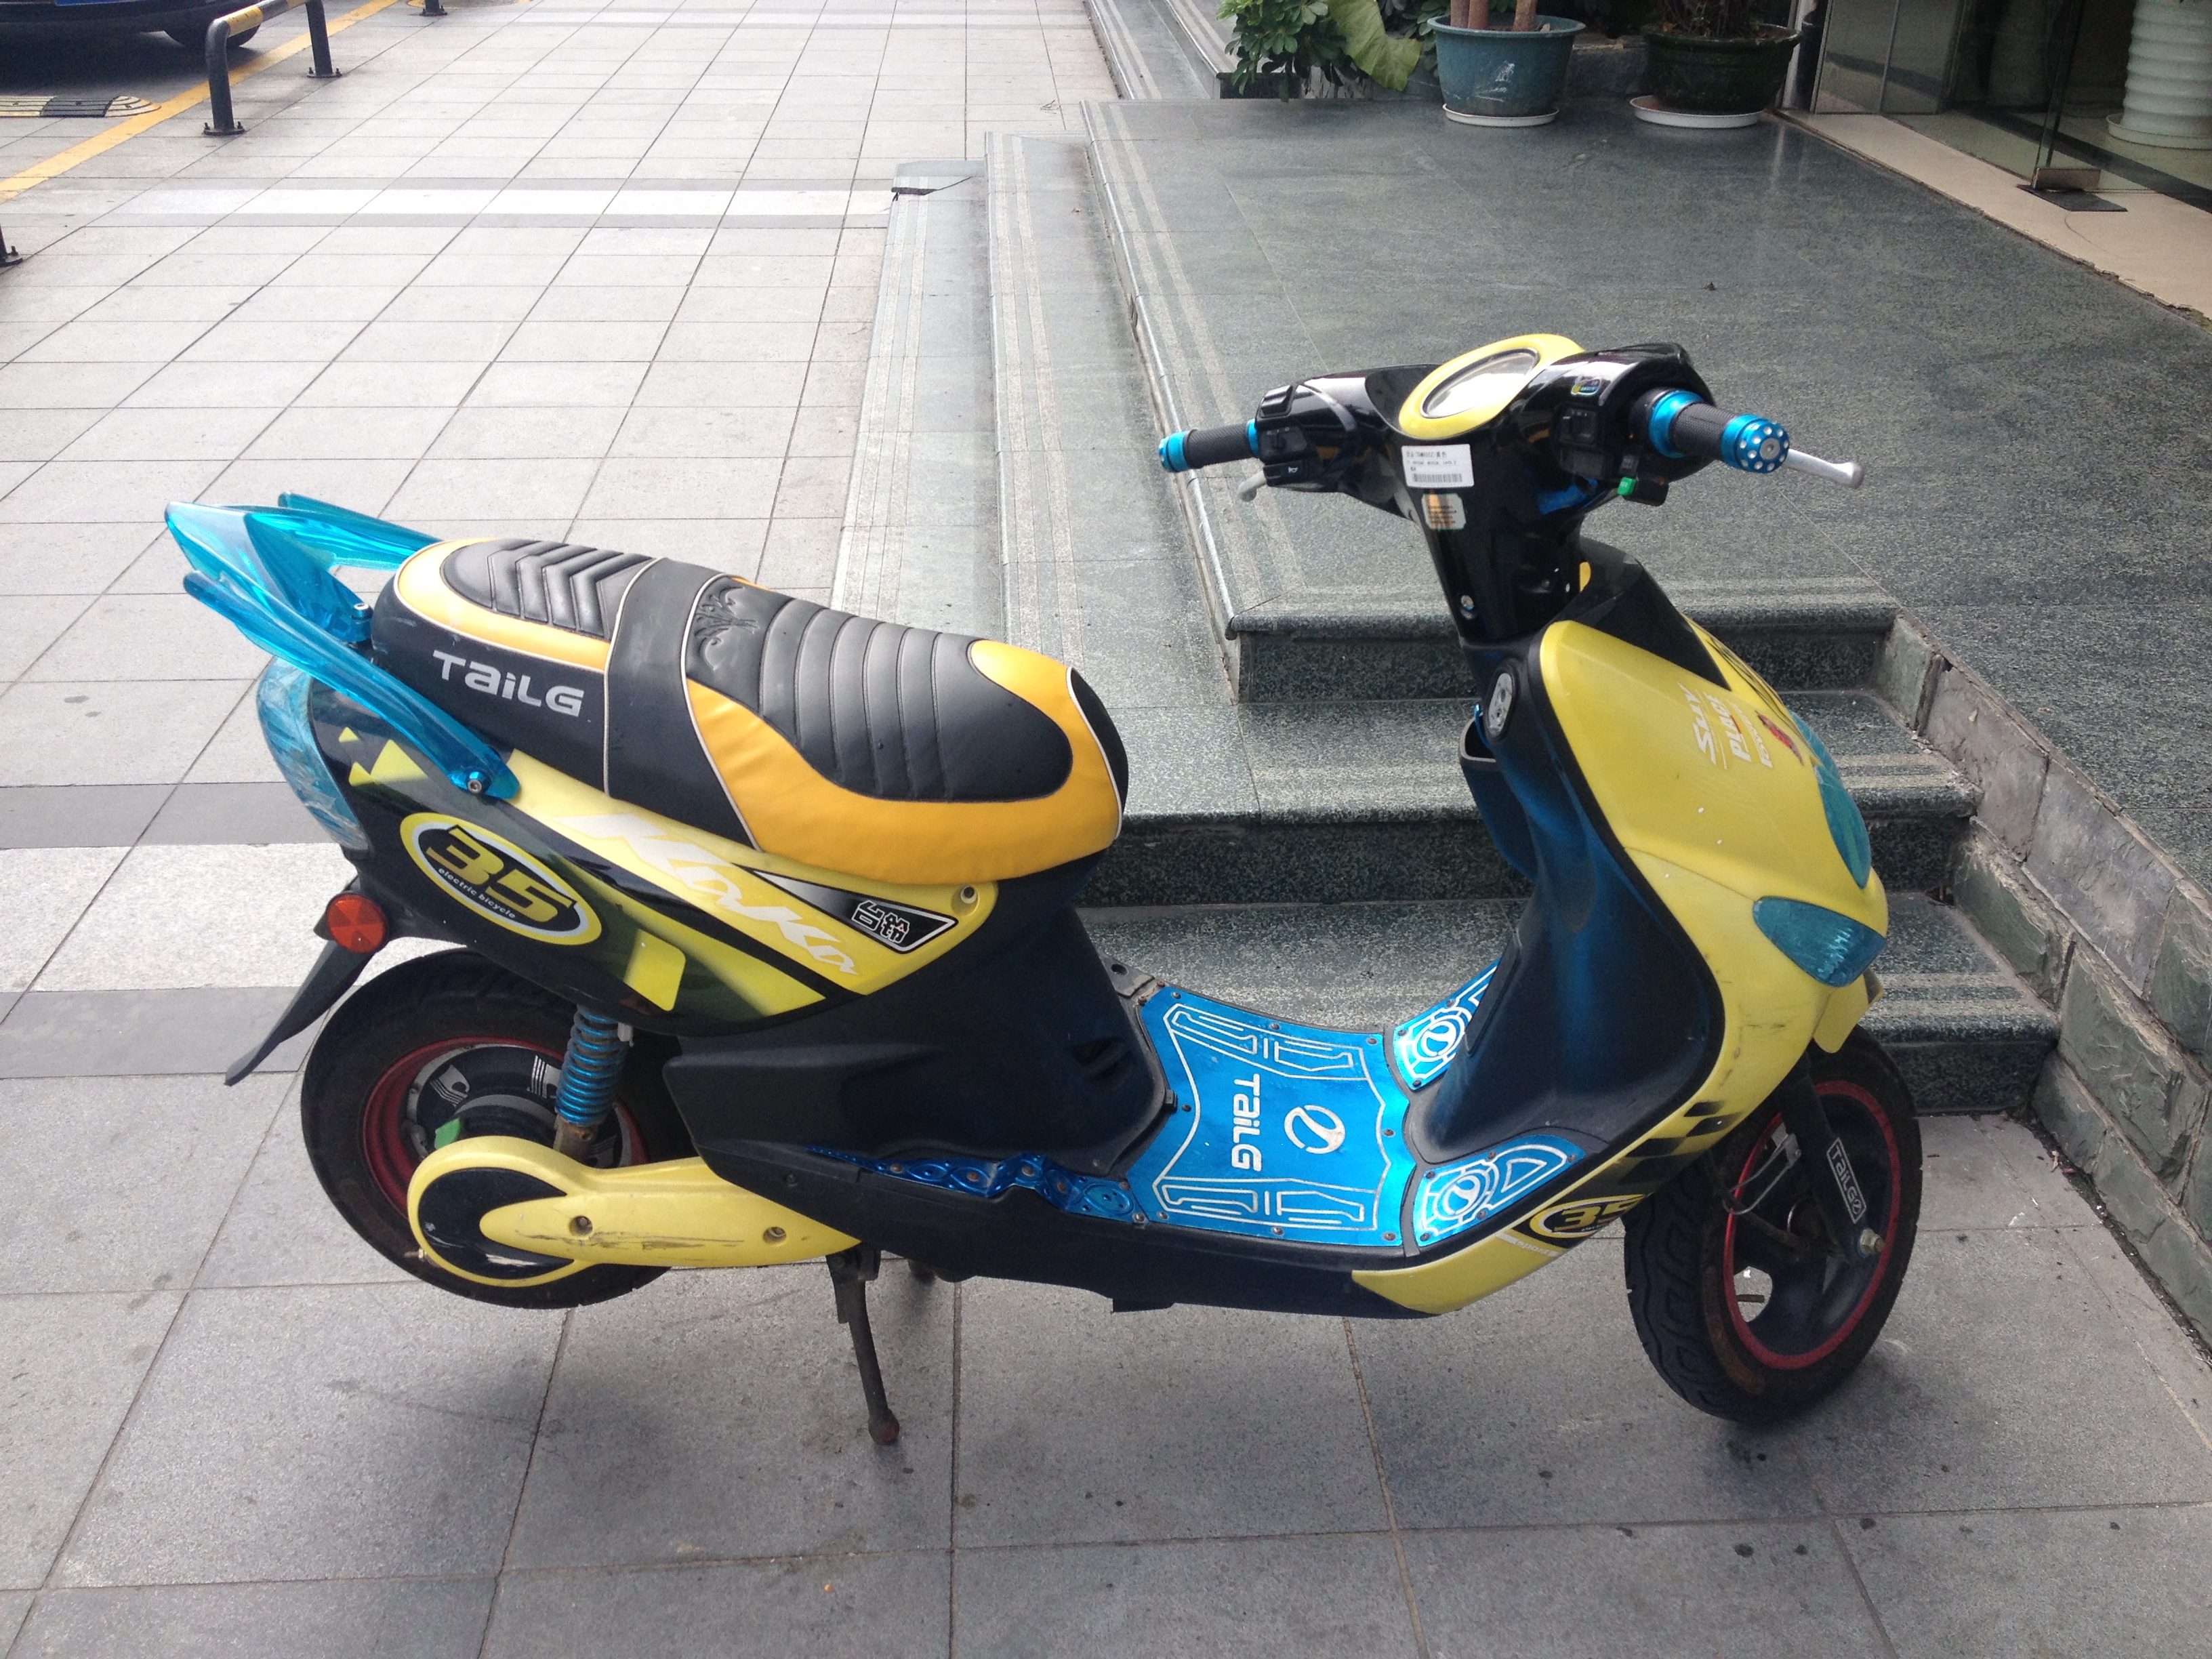
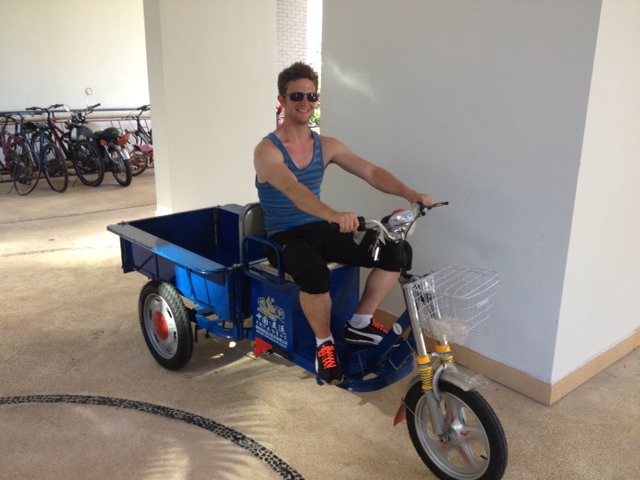
After that, I put the batteries in the bike and strapped it down using the old parts that held the SLA batteries in place. I took it out for a spin and while I don’t have hard data to back it up, it felt quicker than the old setup. I measured a top speed of 48kph and definitely like how it handles now. One major improvement is that the battery pack went from about 28kg in weight down to 8kg in weight. Dropping 20kg from the weight of the bike is a definite improvement and seems to make a difference.

IMG_0290

An awesome feature of the bike is that there is a little hatch from the cargo compartment to the battery compartment which means I can easily check the status of the battery after a charge – by looking to make sure all the LED balance lights are lit, I can know if all the cells are ready to go or not.

IMG_0254

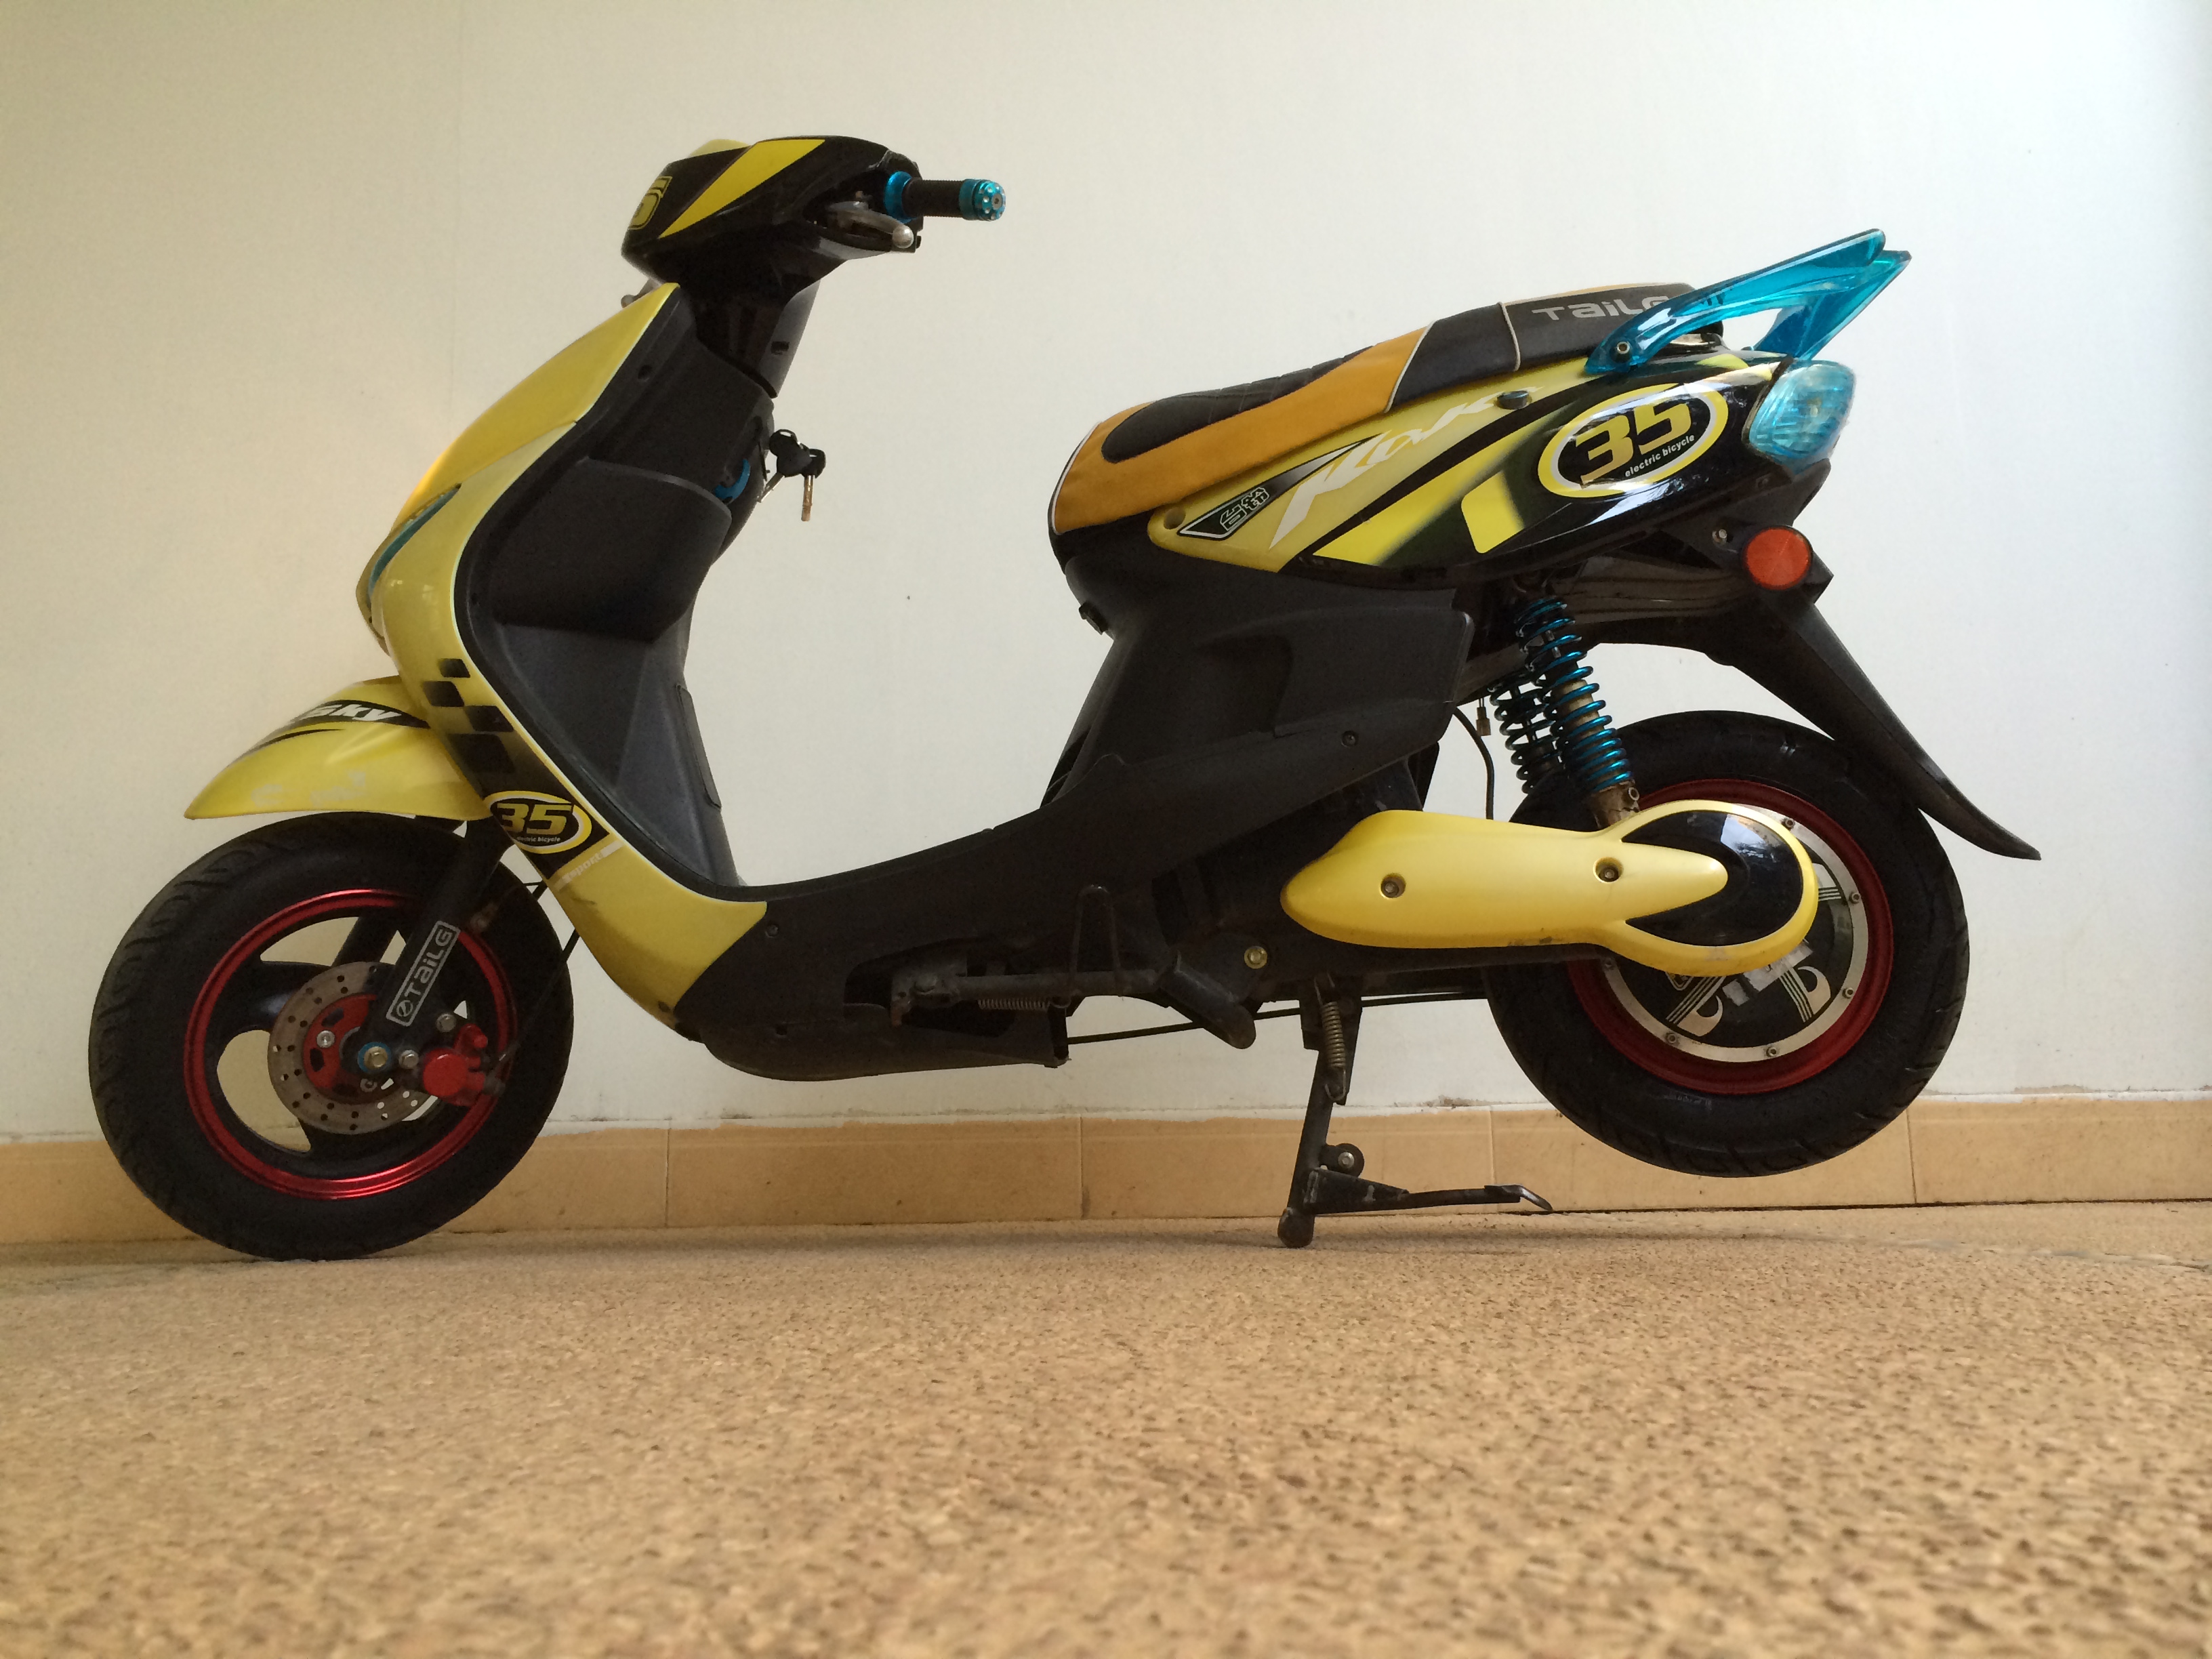
Here’s the finished bike. Of course no upgrade would be complete without washing it until it was sparkly clean and gorgeous again.

blog post

Electric Scooter Battery Upgrade – Pt. 2 – Battery Selection

After getting my tools ready in part 1, I was ready to start deciding on which battery to use. I scoured Taobao for many different batteries, including the infamous ‘Ultrafire’ batteries which claim a ridiculous 5500mAh capacity. I ordered a couple of each different kind of batteries from a bunch of different vendors.

IMG_0267

Testing the batteries was pretty straightforward – the testing unit can be configured with a minimum voltage cutoff that signifies that the battery is fully drained, as well as a programmable current so that the battery drains at precisely the rate you want. I tried to use a 0.5C discharge rate across the board for all the batteries. I made sure to fully charge each battery before testing and set the discharge voltage to 2.75v. During testing the meter can be cycled between voltage, amperage, wattage, and amp-hour, and duration displays and at the end will report the total amp-hours for this battery. It comes with 4 pieces of 200-watt 1 ohm resistors which are the load for the testing.

IMG_0097

The results were very interesting, and I’m really glad I got a tester to get quantitative data as some of them were complete bullshit – most notably the Ultrafire batteries (measured at ~1500mAh). Surprisingly, most of the batteries turned out to be legit.

IMG_0146

Here is a list of the batteries that actually tested true:

* Sanyo 18650 @ 2600mAh – Tested 2510 mAh
* Panasonic NCR18650A @ 3100mAh – Tested 3010 mAh
* Panasonic NCR18650B @ 3400mAh – Tested 3260 mAh
* A123 20Ah LiFePo4 Pouch – Tested 19.40 Ah
* Unknown (A123?) LiFePo4 40152 @ 15Ah – Tested 14.50 Ah
* Unknown (A123?) LiFePo 38120 @ 10Ah – 9.32 Ah
* Unbranded Lipo @ 36Ah – 35.37 Ah

IMG_0269

Of course all of those different batteries had different sizes, weights, densities, and prices. There were 2 main chemistries as well – the 3.2v LiFePo4 and the 3.6v Li-on. In order to really compare apples-to-apples I made a spreadsheet (which you can download here). On the spreadsheet I entered all the critical information – voltage, capacity, price, weight and dimensions. From that information I was able to calculate volume, watt-hours, cost-per-watt-hour, “Volumetric Energy Density” aka watt-hours per liter, and “Gravimetric Energy Density” aka watt-hours per kilogram.

Microsoft Excel-1

I also threw in an entry for the SLA battery that I was replacing. Not surprisingly it had low scores for energy density, but it was a decent contender for cost, which is probably why people use these sorts of batteries – cheap and extremely easy to use (no protection circuitry required usually – just wire and go!)

With this information in hand I was able to narrow down on what sort of battery pack to build. This was my first time around the block, so I wanted to make it very simple. Additionally, I wanted to make sure that I built a very safe battery pack as well. Lithium ion batteries have a tendency to catch on fire if you don’t treat them right and I absolutely do not want that to happen to me or my bike. For that reason I leaned towards the LiFePo4 chemistry, which is supposed to be a bit more abuse tolerant than the other chemistries which I really like. Another added benefit on top of all this is that the lifetime cycle count of LiFePo4 batteries is pretty high (~1500 charges before you get to 80% capacity). The downside is that they have a relatively low energy density for the volume and weight. I narrowed it down to the 20Ah pouch or the 15Ah cylinders. The real clincher for me was price – the 15Ah cylinders were about 60% the cost of the 20Ah pouch – the total cost for the batteries and protection circuit ended up being about $100. As this was a complete first stime, I wasn’t even sure it would end up working.

If cost is no concern, and you wanted the best energy density available – your choice is simple. Copy Tesla Motors and use the Panasonic NCR18650B cells which are 3.4Ah in a tiny 18650 package. You’ll need a spot welder and patience to assemble a few hundred of these cells into a pack, but you’ll end up with a huge amount of energy in a small package. The next project I’m going to attempt is a 100Ah bike, and this is the battery I’ll be looking to for that.

lifepo-charger

Last, but not least there are some other things that need to be used for building a Li-on battery pack. You need a charger and a protection board and ideally some way to balance the cells. I opted for a simple CV/CC charger and a protection board with built-in balancing. That means it is simple to connect up the charger (2 wires, one connector), and the protection board will handle all the overvoltage/undervoltage/overcurrent/balancing issues. Both of these cost about $20-$30 on Taobao.

IMG_0136

The protection board I chose has some nice features – a nicely heatsinked and protective aluminum case, separate connections for battery load and charging, as well as LED indicators for the balance charging. All in a nice little package with simple wiring instructions that even though they were in Chinese were very easy to understand.

IMG_0138

Check out the next step, building and installing the battery pack.

blog post

Electric Scooter Battery Upgrade – Pt. 1 – Preparation

I live in Shenzhen, and electric scooters/bikes are extremely popular here. Having been riding one myself for a couple years, I completely understand why – the weather is great for it 11 months out of the year, and you can drive anywhere. Literally. Sidewalks, highways, overpasses, underpasses, buildings – if it fits, you sits. Combined with a low cost of ownership ($300-$500 for a bike) and basically free charging its a no-brainer.

Sealed-Lead-Acid-Battery-RM12-1-3-

Unfortunately, most bikes run on sealed lead acid (SLA) batteries that are heavy, and lose capacity after a few hundred recharges. My bike is about 18 months old now, and is starting to show its age – I used to get 30km per charge, and now I’m lucky to get 15. I could replace the batteries with new lead ones, but if I’m gonna get under the hood I might as well upgrade it at the same time.

IMG_3105

I’ve been reading quite a bit about lithium based batteries on awesome sites like Endless Sphere, and have gathered enough information that I feel ready to give it a shot. For the first pack, I’m thinking to go the nice, safe route AKA LiFePo4. Safer than your standard lipo batteries, but a bit heaver. Considering I’m coming from the land of SLA batteries it will be a net weight reduction regardless.

IMG_0096

Of course living in Shenzhen and buying stuff off Taobao, you have to be on guard. Especially with stuff like batteries where its easy to make a claim. The first thing I did was source a battery tester. This will measure the actual capacity of the battery (measured in amp-hours (aH)).

IMG_0099

The tester is pretty simple – two clips to hook up a battery and two terminals to hook up a big fat power resistor. This one can handle discharges as small as 0.1A @ 2v and as large as 20A @ 60v which means I can test both individual cells as well as entire battery packs. Awww yeah.

IMG_0098

I’ve started to order a bunch of different batteries and will be testing their capacity one by one. Once I find a reliable supplier then I will design the battery pack, install it, and hopefully my bike will be back to new (and hopefully even have a bit bigger range!) Will try to post an update with the next step.

IMG_0102

Continue on to read Part 2 – Battery Selection.

blog post

Automated Digital Manufacturing w/ BotQueue

One of our main users of BotQueue, 3Distributed, send in this cool blog post describing their setup. Hugh’s company makes and sells RepRap kits, which includes many 3D printed parts. In order to keep up with demand, they have a fleet of machines to print out the parts they sell. This fleet is now at 5 bots, and they use BotQueue to keep it running. Since BotQueue has an API that allows you to add jobs, they integrated their online store with their BotQueue account so that it automatically creates new print jobs when someone places an order for a RepRap machine. Completely automated, just-in-time digital manufacturing on the cheap. Awesome!

Check out the video:

blog post

BotQueue 0.4 – Easy Online Config

This latest release of BotQueue brings a lot of nice features under the hood that will make it much easier to get bots up and running. The biggest change is that all bot configuration now happens via the web interface. No more editing of config.json. You can now edit your bot config via the web, and the client will detect the changes and pull in the new config. It will be changed automatically, so no need to restart bumblebee or anything. Just make your changes on the web and thats it.

Edit Bot - TestBot - DevQueue

Since the configs get pulled from the internet, you need to assign each bot to a particular client. In the apps area, it lists all the client tokens you have and you can now rename them to reflect what computer it corresponds to. If you don’t know what computer is which, you may want to revoke all the tokens and start over, especially since the new client configuration process is so much easier.

BotQueue.com_ Internets + Digital Fabrication = Win

BotQueue now supports headless clients much better. The standard authorization process of following a link still exists, but BotQueue will now detect any token requests that originate from the same IP as your browser and allow you to accept or deny them. For most people on a home router with NAT, this means any device on your home network will have the same global IP. For user experience, this means you simply run bumblebee and then visit the website to approve it and then do all the config via the web interface. Easy and simple.

Last, but not least, BotQueue now includes a device scanning feature. This is critical for the online config process and makes setup extremely easy. The Bumblebee client will scan once on startup, and will scan every time the hardware changes (such as adding or removing a webcam). It will upload this data to the website and allow you to configure your machine by simply selecting the serial port from a dropdown and clicking on the image of your desired webcam. Can’t get much easier than that.

Here’s a full list of the changes direct from the changelog. Enjoy!

v0.4 – Online Config – July 4th, 2013

* WEB – record local and remote IP when getting bot updates
* WEB – show IP addresses on bot view page
* WEB – added 30 day list to leaderboards
* WEB – bulk create multi-job prints from an uploaded .zip file
* WEB – add support for .zip files to file view page
* WEB – add support for showing parent files to job page
* WEB – pull in all files from thingiverse.com/thing:#### style urls
* WEB – add ‘bump’ feature to move a job to the top of the queue
* WEB – record client name and version when updating bot status.
* WEB – show all apps requesting access from your current IP.
* WEB – if you’re on the same IP, high likelihood its your bot
* WEB – remote address is pretty tough to fake too.
* WEB – add name info to app registration
* WEB – Remove access token for a certain app.
* WEB – Implement getmybots api call
* WEB – Implement botscanresults api call
* WEB – Allow user to manually add new machines & configure them (serial port, speed, etc)
* WEB – ability to assign each bot to an app.
* WEB – online editing of bot configs.
* WEB – add contrast and brightness configuration settings to driver config
* WEB – prevent editing of driver unless bot is offline, idle, error, or qa
* WEB – fixed error with field size for storing temperature logs.
* WEB – allow renaming of jobs
* WEB – fix register bot section.
* WEB – app token should list bots
* WEB – bot view page should show app token
* WEB – better flow for app approval -> bot registration
* WEB – if no device scan is detected on the driver page, show an error/warning message.
* WEB – update help docs with new configuration setup.
* BUMBLEBEE – report local IP address
* BUMBLEBEE – headless app authentication support – based on IP
* BUMBLEBEE – new machine discovery
* BUMBLEBEE – send list of serial ports and webcams to site for bot configuration.
* BUMBLEBEE – pull list of bots + config from web directly
* BUMBLEBEE – add contrast and brightness configuration settings to webcam
* BUMBLEBEE – update worker thread when config changes.
* BUMBLEBEE – stop worker thread when bot is removed from our list.
* BUMBLEBEE – don’t show bot list until we’ve scanned devices.
* BUMBLEBEE – linux webcam detection.
* BUMBLEBEE – add name parameter to create job api calls
* BUMBLEBEE/WEB – per-driver can slice configuration via website

If you’ve made it this far, its only fair to let you know whats next. The big features planned for v0.5 are cloud-based slicing, and timelapse generation for prints. Both of those features should be really sweet. Of course you could always read our ROADMAP to see whats coming up.

blog post

Project Scan Trike

photo (62)

I’m in love with electric bikes. They’re cheap, quick, cost nothing to run, and get me everywhere I need to go in the city. In Shenzhen I can drive it year-round and an electric bike is truly king of the road here – I can drive literally anywhere I want: from sidewalks to highways. Lately a few things have conspired to take my passion to the next level.

photo (63)

First, I got a 3D scanner and software combo that works really well. The Primesense Carmine 1.09 combined with Skanect makes beautiful, watertight meshes and is ridiculously easy to use. Whatever magic smart beans they’re eating, its working. Mad props to the people at both those companies.

deltabot

Second, my buddy Nick is building awesome delta bots that are gorgeous to watch as well as produce amazing prints. I was bringing a 3D printer back to the office one day when I basically got mobbed by inquisitive people on the streets asking what it was. Turns out I can actually decently describe a 3D printer in Mandarin. Who knew?

Third, I saw a bunch of people at MakerFaire carrying around 3D printers and printing on the go. This is awesome and it looked really fun. I wanted in.

trike-packages

These experiences, combined with my desire to practice more Mandarin in a fun way came together into a project I’m calling Scan Trike. The basic idea is to take an electric trike + 3D printers + 3D scanners and turn it into a mobile scanning/printing experience. This fits perfectly with the trike culture – these things are basically half pickup truck half mobile storefront. If you’ve ever been to China you’ve seen these trikes everywhere – from ladies selling fruit out of the back of a trike to a dude with a mountain of cardboard impossibly perched on top. They’re ubiquitous and multipurpose and just generally awesome.

Once we get this whole shebang put together, we’ll head out to a public area and start scanning people. Hopefully we’ll be able to crank out 3D prints of their heads right then and there, otherwise we’ll use BotQueue to queue up bigger prints that we can mail or hand deliver later.

photo (64)

I started work on the schematics for the trike – it obviously needs to support some 3D printers, but it also needs some pizazz in the form of leds, dubstep, and possibly lasers. It should be pretty easy to hook all of this up – the trike has a huge compartment for holding the batteries and all this other stuff, and I’ve added LEDs + a sound system to my other bike already.

I’ll try to post pics and videos of the build process and eventual running of the show if anyone is interested.

blog post

Compiling Slic3r on Raspberry Pi

The Raspberry Pi makes a great little controller for BotQueue, but it until I add cloud based slicing, the gcode generation needs to happen on the Pi itself. Since the Raspberry is on the ARM architecture, there is not precompiled version available to use. The good news is that its pretty easy to install from source.

The first step is to install the prerequisite software using apt-get:

sudo apt-get install git-core build-essential libgtk2.0-dev libwxgtk2.8-dev libwx-perl libmodule-build-perl libnet-dbus-perl cpanminus libextutils-cbuilder-perl gcc-4.7 g++-4.7 libwx-perl libperl-dev

The next step is to compile and install all the Perl dependencies. Be warned, that this next step will take literally HOURS. My advice is to install screen first and then do it within a screen session in case your login gets interrupted:

sudo apt-get install screen
screen -dR botqueue

Now, install those dependencies:

sudo cpanm AAR/Boost-Geometry-Utils-0.06.tar.gz Math::Clipper Math::ConvexHull Math::ConvexHull::MonotoneChain Math::Geometry::Voronoi Math::PlanePath Moo IO::Scalar Class::XSAccessor Growl::GNTP XML::SAX::ExpatXS PAR::Packer

To compile all of the dependencies for Slic3r, you need the GUI running. If you keep that turned off on your Pi, you need to install the virtual framebuffer to give it a ‘fake’ X server to run on:

sudo apt-get install -qy xvfb
sudo Xvfb :1 &
sudo env DISPLAY=:1 cpanm Wx
sudo killall Xvfb

Now that all the prerequisites are installed, you can install Slic3r itself:

git clone https://github.com/alexrj/Slic3r.git
cd Slic3r
git checkout 0.9.9
sudo perl Build.PL
sudo ./Build install

Once you’ve installed it, you can run it from the commandline with ./slic3r.pl. Of course I sort of lied earlier… there are no officially available Raspi versions of slic3r available, but we do bundle one together with BotQueue itself. This binary can be created with the following command:

pp slic3r.pl -c -o slic3r -M Method::Generate::BuildAll

I hope this helps anyone out there who is trying to get Slic3r installed on their Raspberry Pi!

blog post

First to File? Nah, First to Blog!

As much as I dislike patents and the culture of intellectual property, the cold hard fact is that patents are real and they are here to stay. Now, there are a few ways to handle this – one is to completely ignore them and do what you want anyway. Another way is to use the system to defeat itself. Now, the patent system has the concept of prior art built into it. I’m not a lawyer but my understanding is that the minimum requirement for creating prior art is to publicly publish it. There is probably more beyond that to make it more visible, and if anyone has suggestions on an easy way of accomplishing that, please let me know!

Like most people out there, I sometimes have more ideas than time to implement them. So instead of keeping those ideas locked in a notebook somewhere unaccessible and not serving a purpose, I’m going to release them into the world as public domain in the hope that they might inspire, or at a very minimum keep an idea from being patented. I’m not claiming that these ideas are good, or that they are even new. Heck, some of them might even be patented already. They are just ideas in my head that it’s about damn time I put down on (digital) paper. Feel free to discuss, critique, or offer suggestions that expand on these ideas in the comments.

You can do whatever you like with these ideas, except for attempting to patent them yourself. It is my sincere hope that by releasing these ideas, more awesomeness and excellence will be brought into being. Furthermore, I hope that I might inspire others to similarly share their ideas to build a body of ‘protected’ ideas that are protected not by ownership, but by virtue of specifically being released into the public domain for use by anyone. The internet has shown us that the cost of sharing ideas is close to zero, whereas the benefits of collaboration are immense and very tangible. Why hoard your ideas like a jealous miser when it is impossible for a single human, or even a single corporation to act on every interesting idea that it generates?

Idea 1: 3 Point Planar Bed Leveling for 3D Printer or Other Digital Fabrication Device.

One of the biggest problems with 3D printing is keeping the build surface plane aligned with respect to the XY axes plane. Most printers implement this with a bed on adjustable springs. My idea is to add 3 buttons to the edges of the build platform. After the printer has homed to a known position, it moves to trigger each button with the extruder nozzle. The z-height of each triggered button is recorded, and the plane of the build surface can be calculated. During printing, the Z axis position is automatically adjusted to compensate for the build surface. Since most build surfaces use a PCB based heater, it should be trivial to add buttons in the appropriate places.

Idea 2: Adaptive Digital Fabrication with Camera Feedback

3D printing, CNC, lasercutting, and many other digital fabrication techniques are based on a 2D or 3D file format. Most machines simply follow the instructions and produce an object based on a static toolpath. It is possible to add a camera for visual feedback of the process and adapt the parameters of the 3D print dynamically. For example, one could detect if a print is failed, or measure if the initial height of a layer is too high or too low. One could even measure in realtime the extrusion width of a current layer and compensate by increasing or decreasing the amount of plastic extruded. With subtractive processes, one could even scan the base material and automatically determine where to cut the next parts from, freeing the user from panelizing / combining multiple jobs into a single sheet.

Idea 3: Combined CNC + 3D Printing for High Precision Layers

Extrusion based 3D printing is an excellent technology for its ability to create arbitrary geometric shapes of a high complexity. Unfortunately its resolution is not the best, and there are frequently defects on the outside of parts from layer misalignment, warping of the plastic, or other problems. CNC machining on the other hand is a very precise method of fabrication but the type of geometry that can be produced is much more limited. It is possible to combine them into a hybrid process where each layer is extruded, and then a very fine CNC end mill is run along the outside of the layer to trim the material to the exact dimensions desired. This might result in a nicer surface finish, as well as giving higher precision to the part.

Idea 4: Encoder Wheel on Filament Input to Detect Jamming or Stripping

Jamming and stripping of filament is probably the most common failure mode for a 3D printer. Adding an encoder wheel to the filament input will allow the software to check the expected movement of the filament to the actual movement of the filament. If they do not match, then there is likely an error and the machine can pause or go into an error mode. Furthermore, the machine can easily keep track of the amount of filament consumed and pause the job when the end of the filament spool has been reached.

Idea 5: Ultrasonic Welding of Microfilaments

Ultrasonic welding is a technology widely used in the manufacturing industry to weld plastic (and sometimes metals) together. It might be possible to adapt this technology to weld microfilaments together. If so, a printer could be designed that uses a miniaturized ultrasonic welder and a microfilament dispenser to build a 3D printer. Such a printer would have resolution based on the microfilament diameter. If welding of a metal like aluminum wire is possible, layer heights of less than 100 microns might be possible. Furthermore, a metallic microfilament combined with a plastic/non-conductive filament and a pick and place machine could be used to print housings, place parts, and directly wire electronics in the same job.

Idea 6: Pick and Place with Built-In Heated Build Platform

A pick and place machine with an integrated heated bed would allow a PCB to have components placed and then reflowed in a single operation. Such a system would not be good for high volume manufacturing, but could potentially be nice for low-volume prototyping operation.

Idea 7: Flexible Manufacturing Cell with Robot Arm + 3D Printer, CNC, Laser Cutter, Pick and Place Machine or other Digital Fabrication Devices

Digital fabrication machines are great, but it takes human intervention to clear finished jobs, assemble the parts together, and load new material. For 100% automation, a robot arm could be added to handle these tasks. It would require some sort of vision system and communication between each of the devices. The advantage would be having a higher level of automation that could allow higher level parts or even assemblies to be produced without human intervention. This is basically a prerequisite for high level fully automated manufacturing, and it seems obvious that combining purpose built equipment such as 3D printers or pick and place machines with a generic piece of hardware like a robot arm can allow products to be automatically produced using parts from each different machine.

Idea 8: CNC or Laser Cutter with Automated Sheet Loading

A very common method of production with a CNC machine or laser cutter is to cut flat sheets of material such as Acrylic, ABS, or POM. Adding an automated sheet feeder to the machine could allow a machine to operate nearly continuously by ejecting a finished sheet and then immediately loading the next sheet for processing. Software would likely be required to add tabs to hold the cut pieces in place during the unloading process that would be removed by the operator afterwards to break the piece out of the sheet.

Idea 9: EDM Cutting of Nozzles into Special Shapes

This idea is credited to Nicholas Starno. Using Electro Discharge Milling, it might be possible to create nozzles for a 3D printer with custom shapes such as a square. The benefit of a square nozzle would be that the extruded filament would have a square profile. When stacked up layer on layer, square filament would have a smoother surface than a stackup of rounded filament. Nozzles made via EDM milling might also have a better surface finish, as well as giving a much greater freedom in design choices for the geometry of the nozzle body itself.

Idea 10: Flippers to Eject Parts From a 3D Printer

The majority of 3D printers are incapable of continuous operation because they do not have a way to eject the part after a build has been completed. One potential option is to add one or more arms attached to a motor that would eject the part from the machine after it has been completed. Modern build platform surfaces such as polyimide, glass, and carbon fiber allow a print to stick to the platform when it is hot, but after it is cooled down the part can be detached very easily. The mechanical requirements for a system like this could be very low. It is likely that a simple DC servo gearmotor such as those used in RC cars or small robots would be a suitable, cheap, and simple to implement method to achieve this.

blog post

BotQueue v0.3 = Webcams, Pausing, and More!

DevQueue - Internets + Digital Fabrication = Win-2

Update: there were a couple bugs with the client. I’ve released a new version you can download here.

Coming quickly on the heels of the last release, the latest v0.3 release of BotQueue adds some really exciting new features that make it much nicer to use. I hope you enjoy this new version as much as I do. Be careful though, the new webcam feature is addictive – you can watch your machine from anywhere you have an internet connection and a display.

If you want to take advantages of the new BotQueue, you’ll need to upgrade the BotQueue client, bumblebee. See instructions at the end of the article for how to do that.

Webcam Support

This is the biggest new feature for BotQueue, and the one that I’m most excited about. The BotQueue client, Bumblebee, can now grab webcam images and upload them to the BotQueue site. This allows you to be able to see whats happening on your bot through the BotQueue.com website. That’s right, you can see how your bot is printing from any device (computer, phone, tablet, etc) from anywhere in the world.

I’ve also modified the dashboard and various pages throughout the website to support showing the webcams. The default dashboard view is now large thumbnail images, although you can switch to medium, small, and the old list-style view of your bots. BotQueue will also save the final image of each job so you can have a historical view of how each print turned out. In the future, we’ll even be able to automatically create timelapse videos of each job.

In order to add webcam support, please see the help page with information on how to configure bumblebee to start capturing and uploading webcam images.

DevQueue - Internets + Digital Fabrication = Win-4

Job Pausing

It happens fairly rarely, but sometimes you need to pause a job mid-print to do something. Maybe a nut fell into your print, or maybe you need to reach your hand in to clear out some debris. Well now you can pause and unpause a job from the BotQueue.com website. Due to the magic of the internet, the request will filter down to your bot whether you are in the same room or on the other side of the planet. Due to the way this is currently done (polling HTTP requests) the lag is pretty bad (~30 seconds). Future versions of BotQueue will be implementing Websockets and should be MUCH faster.

DevQueue - Internets + Digital Fabrication = Win-1

Bot and User Leaderboard

I’m a huge fan of stats, and once you have stats you can start doing what every primate has done ever – compare him/herself to others! Well, the BotQueue stats page now has a leaderboard for both bots and users. How does your bot stack up? Are you logging the most hour and producing tons of stuff with your machines? Head on over to the stats page and see how you stack up!

Overall BotQueue.com Stats - DevQueue-1

Job Commenting

This is a pretty straightforward feature that allows you to make a comment on any job. Use it for making notes on output quality, or just helping you keep track of what is what. If you add a comment, the job detail page will show a badge next to the comments tab to let you know that there are comments when looking at the job.

View Job - material-180x190x8.gcode - DevQueue-1

Upgrading Bumblebee

Since BotQueue v0.3 adds webcam support, and this requires some new software to make it all happen. For Linux, we’ll need to install fswebcam. If you’re on OSX, you don’t need to do anything – the webcam support is bundled in the new version of bumblebee directly.

You’ll also need the new version of bumblebee which can be downloaded here. Simply unzip the folder and run the bumblebee program like normal. You will need to copy your config.json file over and modify it with your webcam information as described in the help area.

If you’re on Raspberry Pi, your bumblebee software has been downloaded using git. For you, upgrading is really easy. Open a terminal to your Pi and enter these commands to upgrade, modify your config file, and then reboot:

sudo apt-get install fswebcam
cd ~/BotQueue
git pull
git checkout 0.3
nano bumblebee/config.json
sudo reboot

Changelog

* WEB – add ability to make comments on individual jobs
* WEB – fixed a major security flaw that allowed people to see your jobs
* WEB – add organization to job view page – tabs?
* WEB – add canceled status to jobs & remove all calls to delete()
* WEB – Allow pausing / resuming through website
* WEB – create job time logging table to better track time spent in jobs (and be able to handle errors, dropped jobs, and canceled jobs)
* WEB – create script to populate job_clock with times from existing jobs.
* WEB – create job_clock entry on start of job.
* WEB – close job clock entry on job drop
* WEB – close job clock entry on job finish
* WEB – update main stats page to reflect job_clock times
* WEB – update bot stats page to reflect job_clock times
* WEB – update queue stats page to reflect job_clock times
* WEB – added leaderboard to stats page.
* WEB – update time displays to include more digits (eg: 1.2 hours vs 1 hour)
* WEB – add source info for jobs added by url.
* WEB – added webcam display to dashboard, bot, and job.
* WEB – modify dashboard ajax to preload images and then fade-in new content
* WEB – add ajax selector for 4 different views: details, big thumbs, med thumbs, small thumbs
* WEB – add ajax checkbox for turning on/off auto-update.
* WEB – add ajax call to save dashboard style stuff
* WEB – fix top navigation to show what page/area you are at
* WEB – update help instructions to add webcam config info
* WEB – get real default image for bots w/o webcam

* BUMBLEBEE – allow pausing and unpausing based on api status change.
* BUMBLEBEE – added webcam uploading during idle and printing periods
* BUMBLEBEE – fix race condition when workerbee is changing the status of the bot
* BUMBLEBEE – add watermark to each image
* BUMBLEBEE – resize each image to 640×480
* BUMBLEBEE – save each image at 60% quality (jpeg)
* BUMBLEBEE – compile slic3r and update install script

blog post

BotQueue Update – Raspberry Pi + Temperature + Dashboard

I’ve been logging quite a few hours lately with BotQueue, and as a result of that I’ve been tweaking and modifying lots of things. I’ve hit a few major goals, so its time for a new release! The new features and reliability stuff make this release extremely usable, and it shows – I’ve logged about 100 hours in the last 2 weeks and plan on adding 2 more printers to my queue to really get some printing capacity going. On a related note, over 1000 hours of printing and CNC cutting have been logged through BotQueue.com.

More Robust Bumblebee

I’ve done a ton of work to Bumblebee, the client that runs your 3D printer. I live in China, so internet can be spotty at times haha. As a result, I’ve encountered just about every error imaginable – and made Bumblebee tolerant of it. The result is that it is MUCH more reliable. You can either run from github or download the v0.2 release. No new configuration required – just download the new files, copy over your config.json and run the new Bumblebee. Voila, upgraded!

Cancel Jobs From the Web

This was a huge gap in functionality for BotQueue that has been closed. You can now cancel a job from the website and it will notify Bumblebee which will then stop the job. You can take the bot offline, or just clear the printer of a failed job and it will start it again. I’ll be adding pause/play functionality soon as well for even more interactive control of a Bot.

Drop Job - DaYin - butterfly.stl __ BotQueue.com

New Dashboard

The dashboard has been overhauled with an eye towards the common tasks you encounter when using Botqueue on a daily basis. You can create new jobs/bots/queues, see all the critical information on running jobs (like temperature) as well as upcoming and finished jobs. You can re-arrange upcoming jobs, and you can re-run old jobs. Life is good.

BotQueue.com

Temperature Logging

This is a feature I’ve been wanting for a while now. Using the awesome Flot library and by pulling the temperature data from the machine we can now log and display temperature data for all jobs going forward. Super helpful if you want to see how a machine is doing, or a job fails mysteriously and you want to see if the temperature was the culprit. It will also now show the temperature data on the dashboard which is very helpful during warmup when the percentage sticks at 0.01% for the first 10 minutes – you can now see the bot heating up from the web.

View Job - butterfly.stl __ BotQueue.com

Slic3r 0.9.9

In a fortuitous timing coincidence, the new Slic3r has been released. This new version adds some cool features, and if you use BotQueue you can easily upgrade. Just remember to re-export your config from the new Slic3r in order to pick up any new settings in the new version. You’ll need to select the new slice engine and slice config in BotQueue.com as well.

Slic3r - About-1

Raspberry Pi Support

I was a bit skeptical at first, but at the prodding of Jnesselr I took the plunge and got a Raspberry Pi. Holy crap, this thing is AWESOME as a machine controller. It’s pretty easy to setup, and once you have it running, it is amazing. I have put one of these babys on each of my machines and it is so awesome to just have Botqueue built in with no computers or extra stuff. Each machine just has a ethernet cable and a power cable. WiFi works, but I couldn’t find a decent dongle so I’m sticking with wired for now. Slicing is a bit slow, but there are plans to address that in the future. The Pi is a great platform, so expect lots more support for it in BotQueue in the future.

RaspberryPi

More to come

We’ve got a big, long list of awesome stuff to add to BotQueue. In particular, I’m really excited about webcam support, web-based configuration of bots, and an on-deck system to anticipate and pre-slice models to make the whole BotQueue slicing system more seamless and faster. As always, please submit bug reports to the Github issue tracker and remember to Keep it Locked!